- dbt Write-Back is currently only available for dbt projects hosted in GitHub and GitLab.
- You need to be at least a
project Developerto use dbt Write-Back.
Write back Metrics from Custom Metrics
You can build Custom Metrics in Lightdash and write these back to your dbt project so they are promoted to permanent Metrics in your YAML. We recommend using dbt write-back for custom metrics that you’re creating frequently so they become Metrics that are reusable, governed and available for everyone else to build from.What’s the difference between a Metric and a Custom Metric?Metrics written to your dbt project (or YAML Metrics) are reusable by everyone in your project and will show up in the list of available metrics for a Table. Custom Metrics are only saved in the chart they’re used in and will not be available if you or others open the same Table to build a new chart.
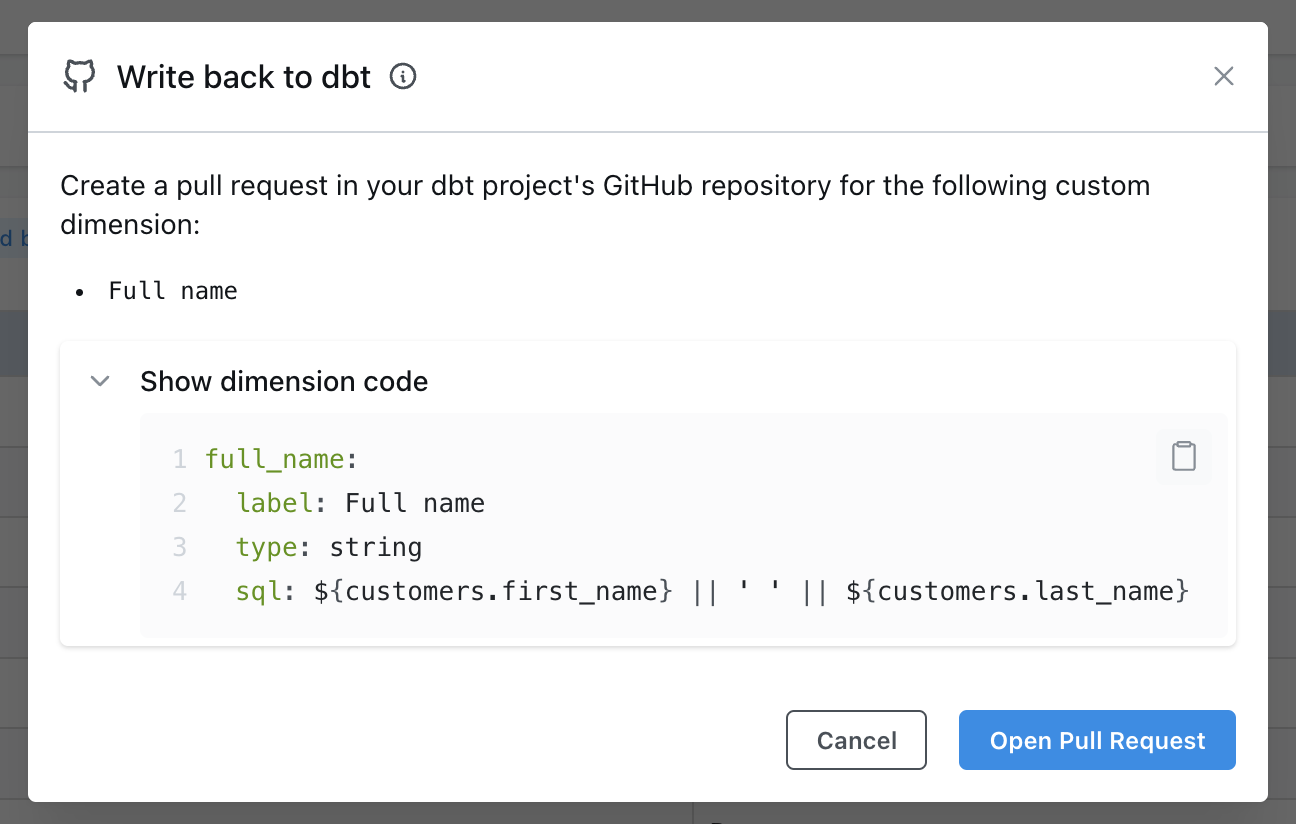
Write back to dbt.
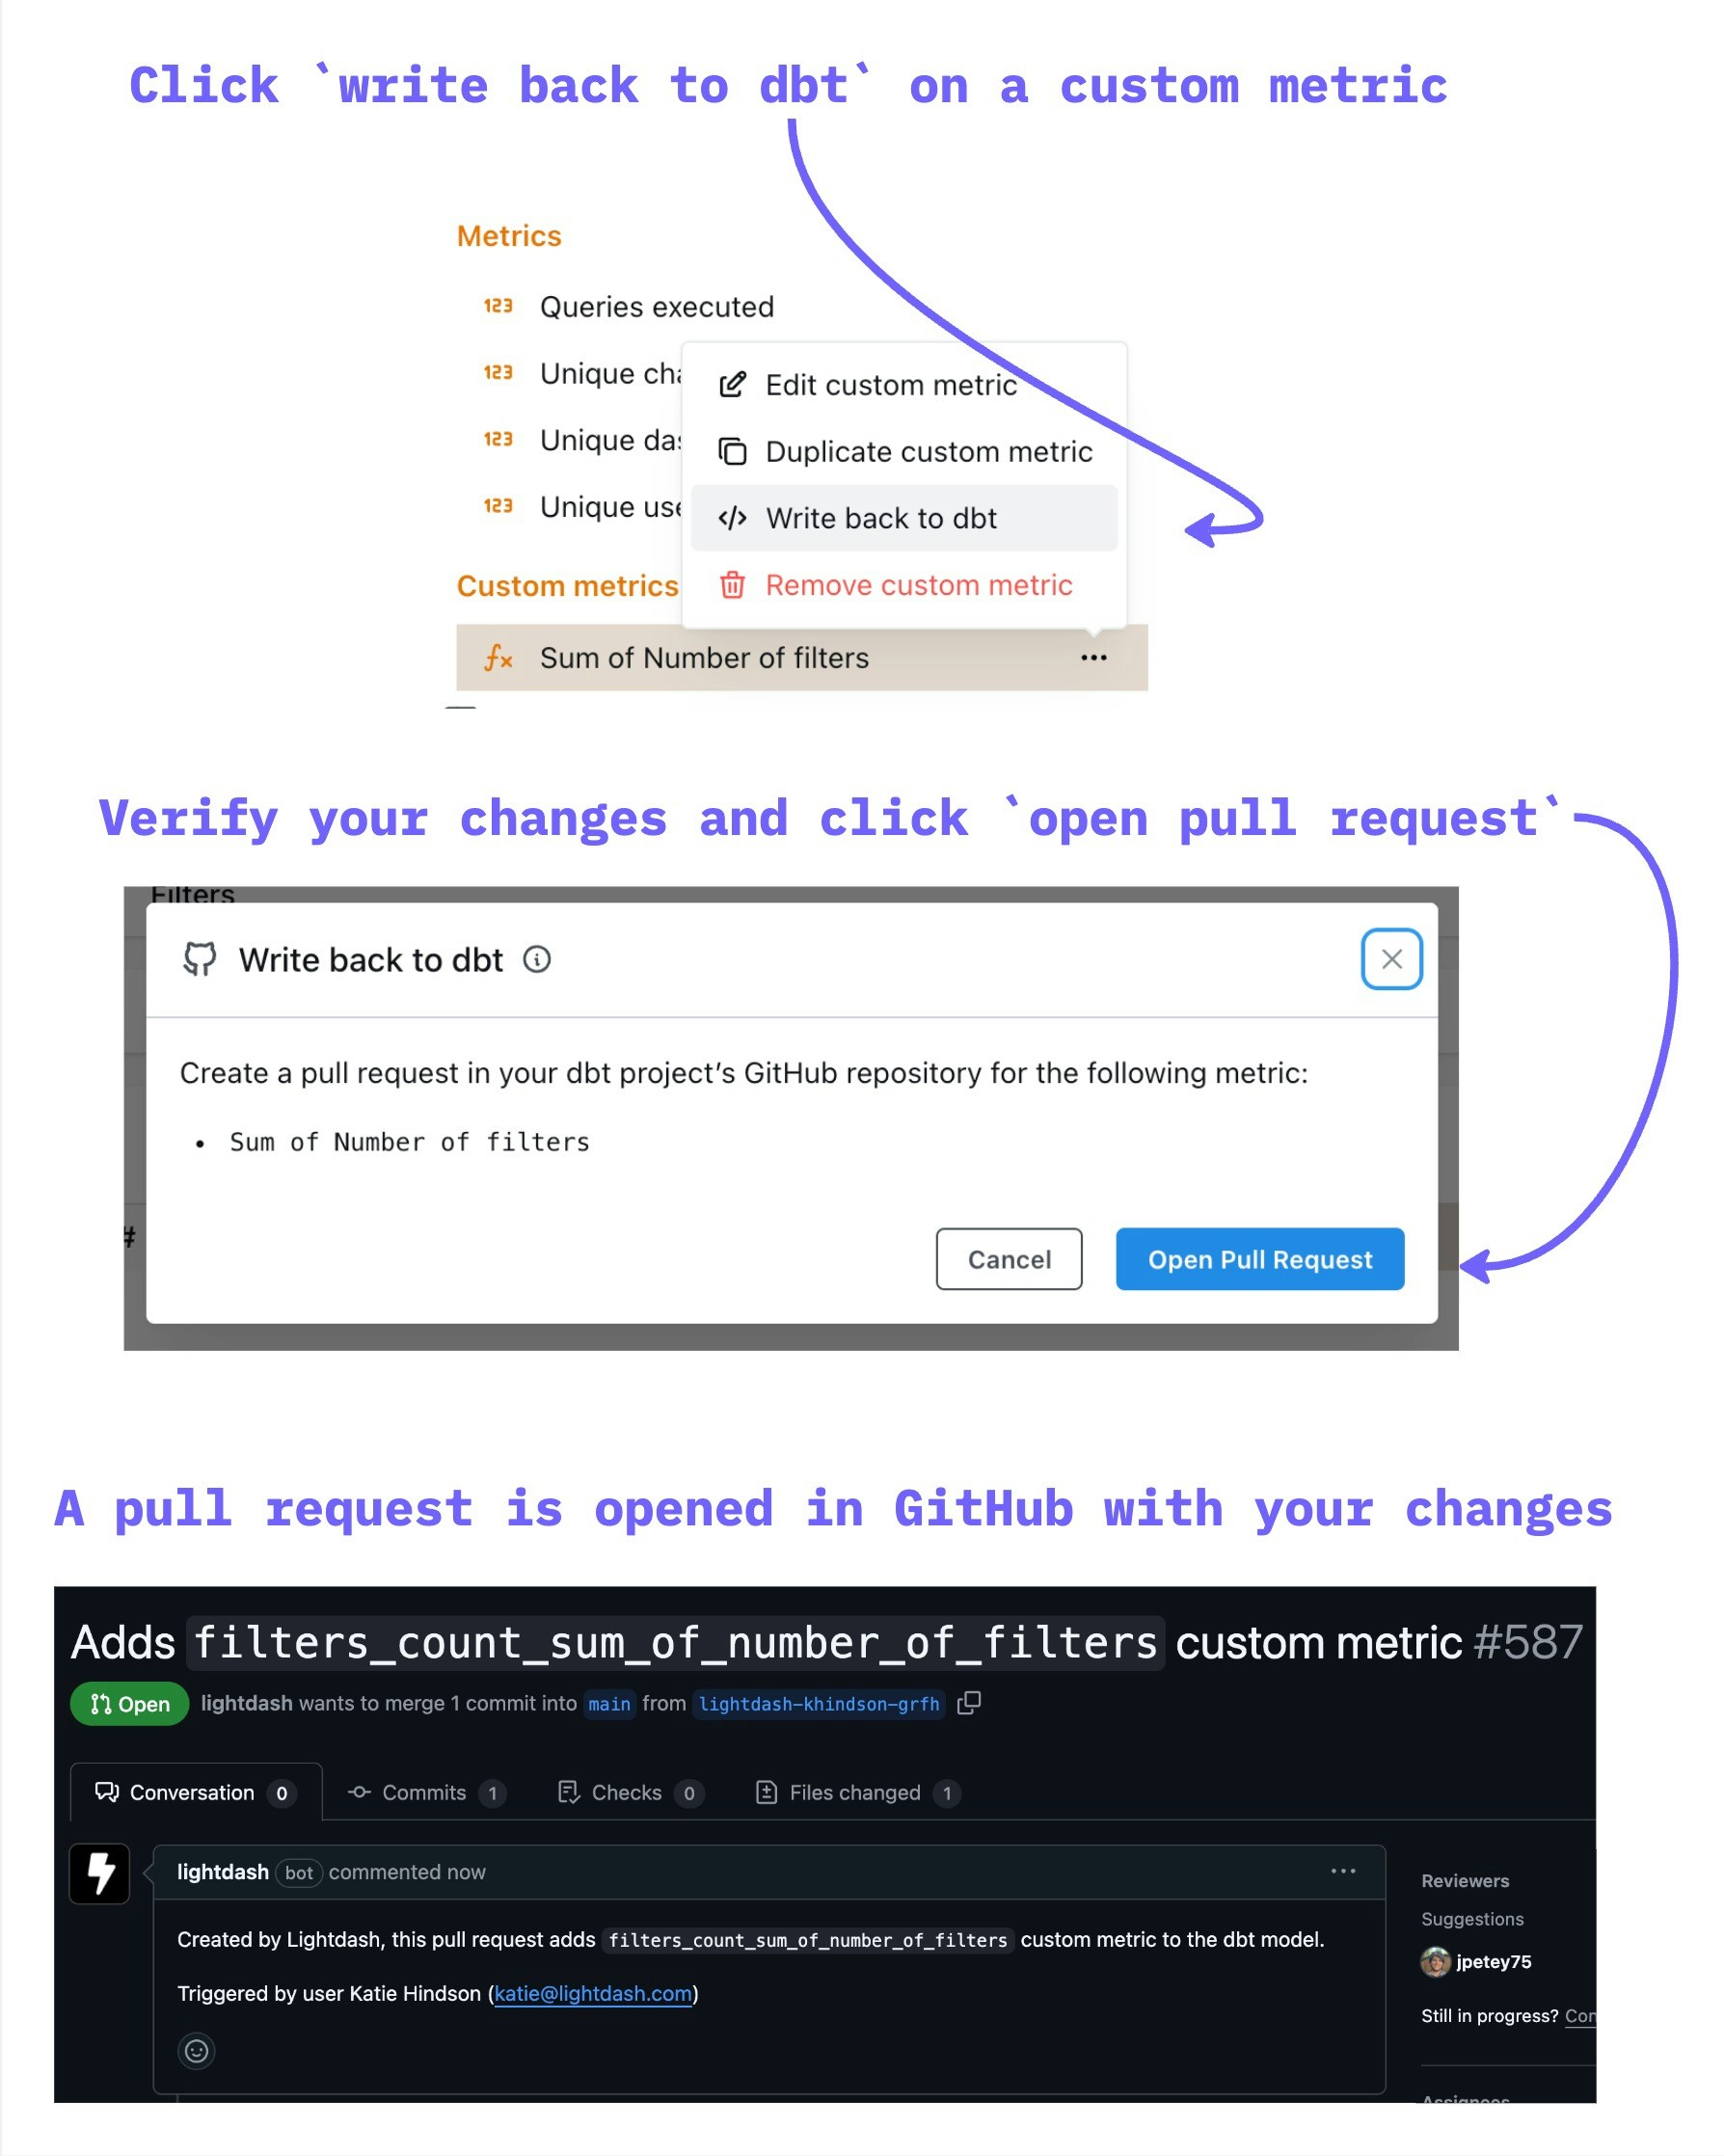
Write-back requires a base dimension column.
Write back to dbt is only available for custom metrics that were built from a dimension (the YAML write-back attaches the metric to that dimension in the dbt model). Custom metrics that were cloned from an existing metric do not have a base dimension, so the option is hidden from both the individual metric menu and the bulk Write back to dbt action in the sidebar’s Custom metrics section.Refresh dbt in Lightdash (or, if you’re using GitHub actions, your project will automatically refresh once your changes are merged) and your Custom Metric will be replaced by your new YAML Metric automatically.
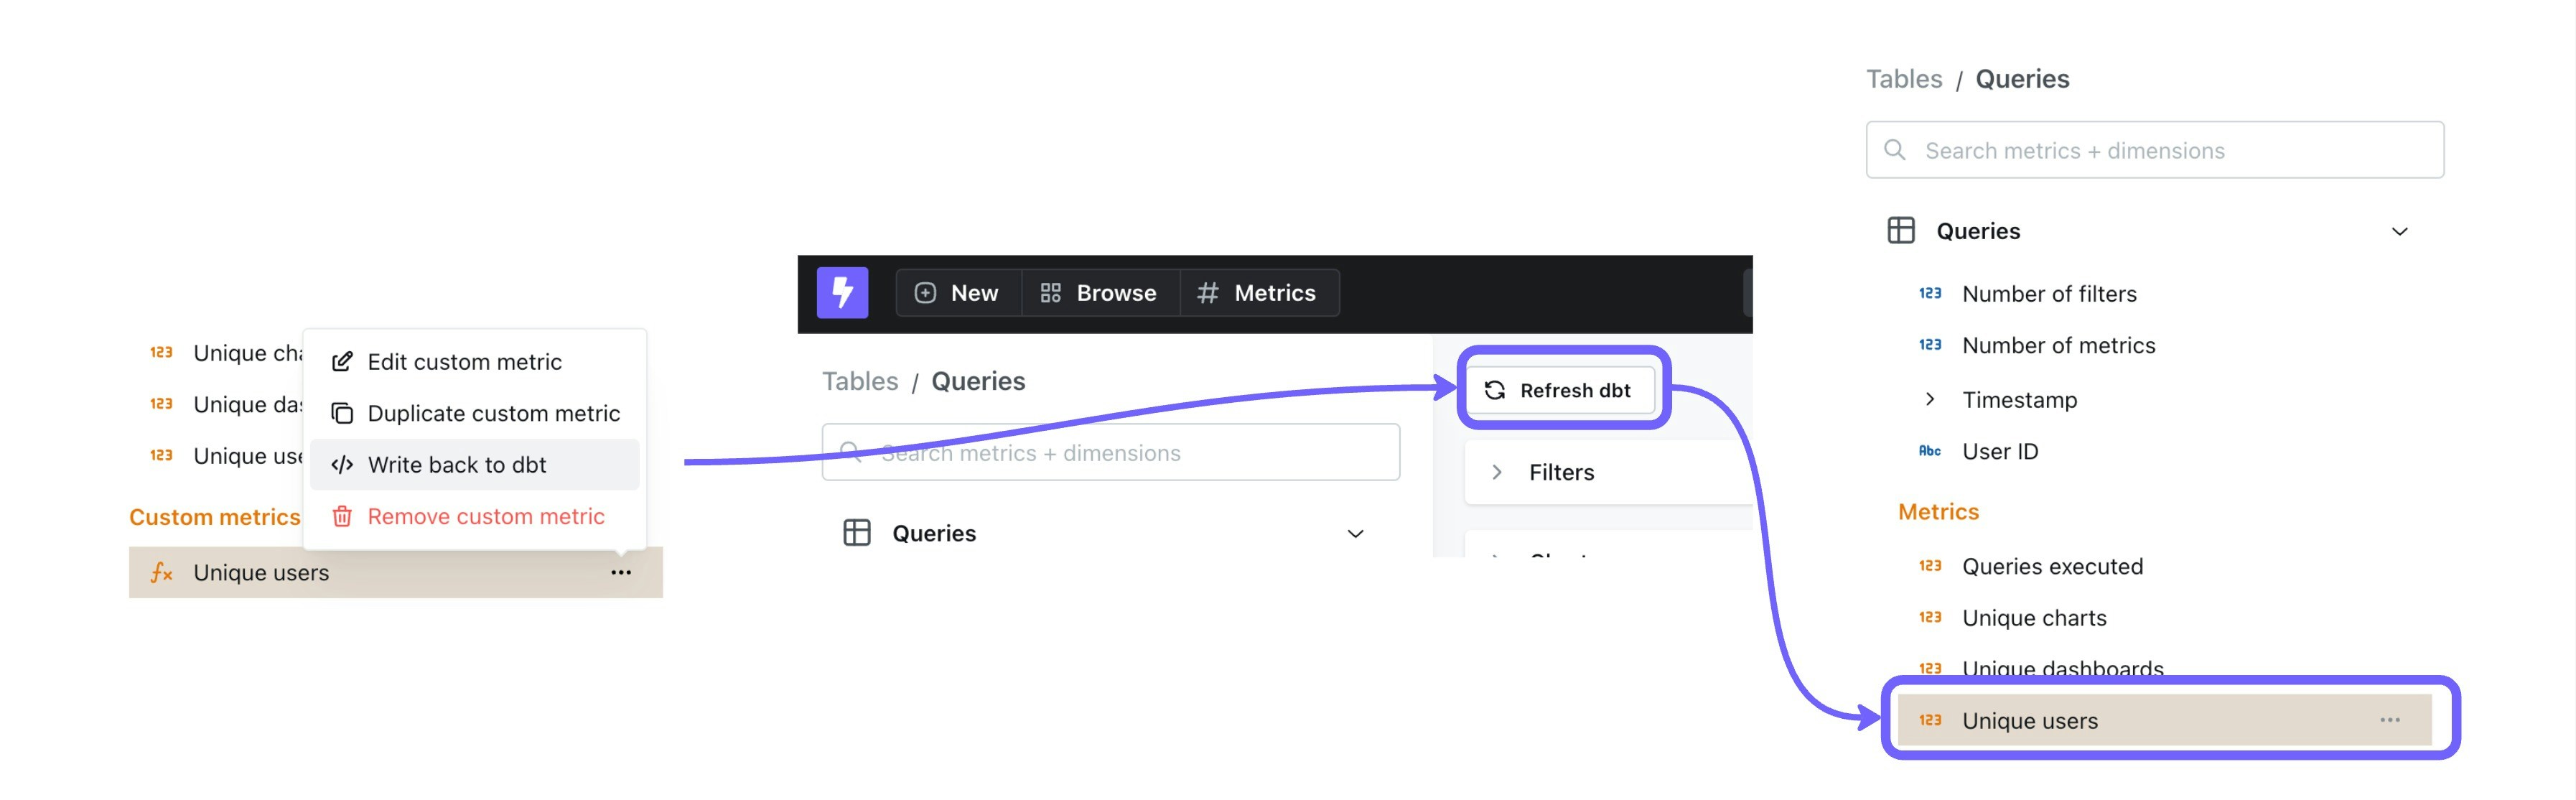
Any Custom Metric that matches the definition of your new YAML Metric will automatically be replaced by your YAML Metric. This means if someone created the same Custom Metric, with the same formatting, filtering, etc. in another Saved Chart, it will also be replaced automatically with your new YAML Metric.
Write back Dimensions from Custom Dimensions
You can build Custom Dimensions in Lightdash and write these back to your dbt project. We recommend using dbt write-back for Custom Dimensions that you’re creating frequently so they become Dimensions that are reusable, governed and available for everyone else to build from.What’s the difference between a dimension and a custom dimension?Dimensions written to your dbt project (or YAML Dimensions) are reusable by everyone in your project and will show up in the list of available Dimensions for a Table. Custom Dimensions are only saved in the chart they’re used in and will not be available if you or others open the same Table to build a new chart.
Write back to dbt.
-
Click
Write back to dbt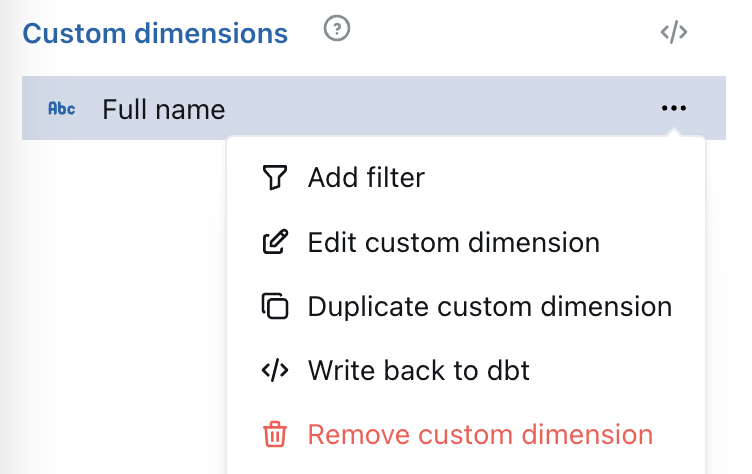
-
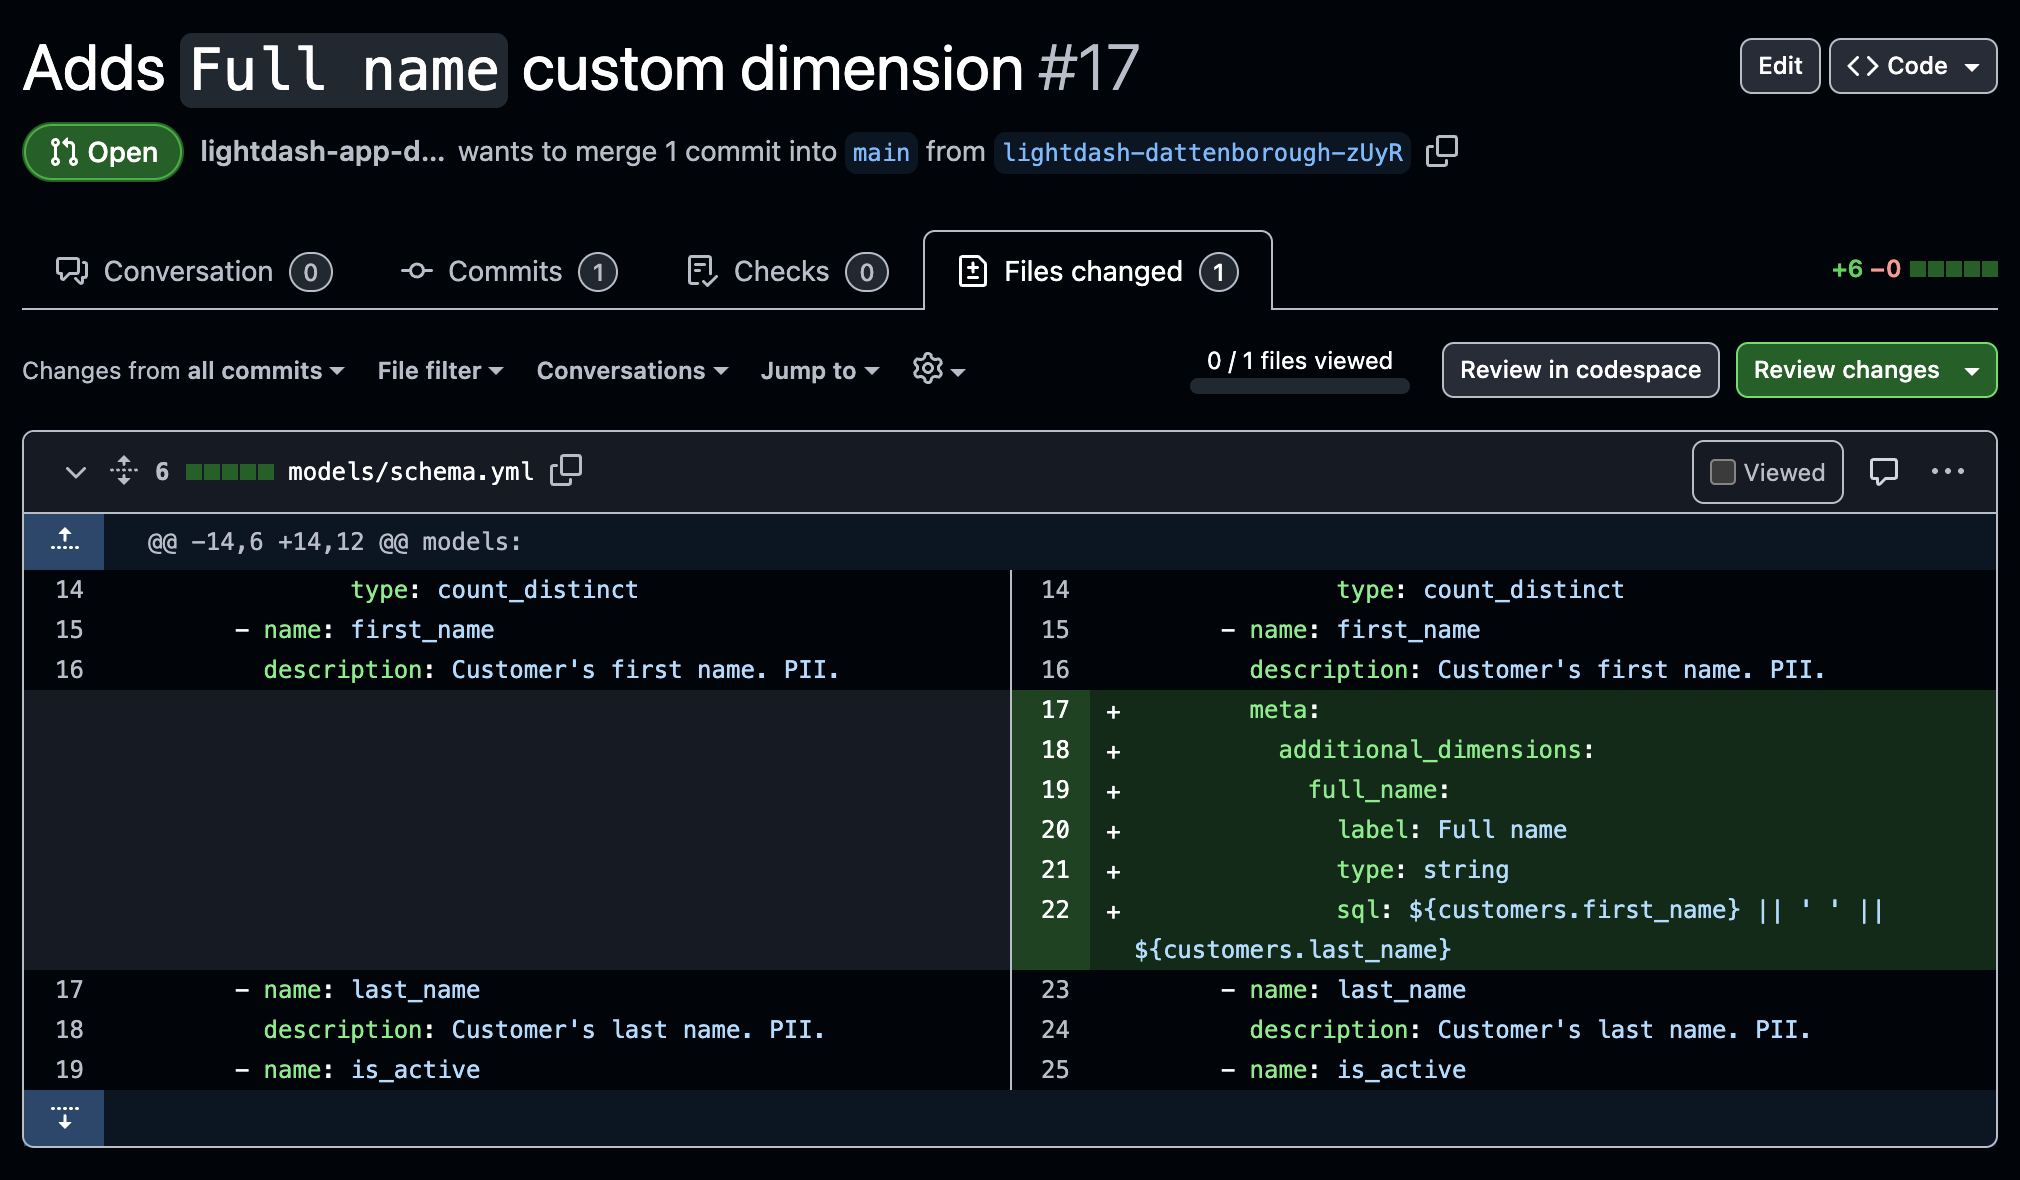
Preview the Dimension YAML and open a pull request.
-
Approve and merge the pull request in your dbt project.
Refresh dbt in Lightdash (or, if you’re using GitHub actions, your project will automatically refresh once your changes are merged).
Known limitations
Bin Dimensions
Writing back bin Dimensions is not supported at the moment. If you want to help test our beta feature, please reach out to support.Write-back Dimensions automatically replacing Custom Dimensions
At the moment, if you write back a Custom Dimension to your dbt project’s YAML, the Custom Dimension will not be automatically replaced with the new YAML Dimension. Once your new Dimension is created in dbt, you’ll need to manually update your charts and replace the Custom Dimensions with the new Dimension.Write back dbt Models from the SQL Runner
You can use Lightdash to build models in dbt from queries that you’ve built in the SQL runner. We recommend writing back models from the SQL runner if you’re planning to use the query regularly so it can be easily used, governed and managed like other dbt models in your Lightdash project. To get started, build and run a query in the SQL runner, then select theWrite back to dbt option from the Save drop-down.
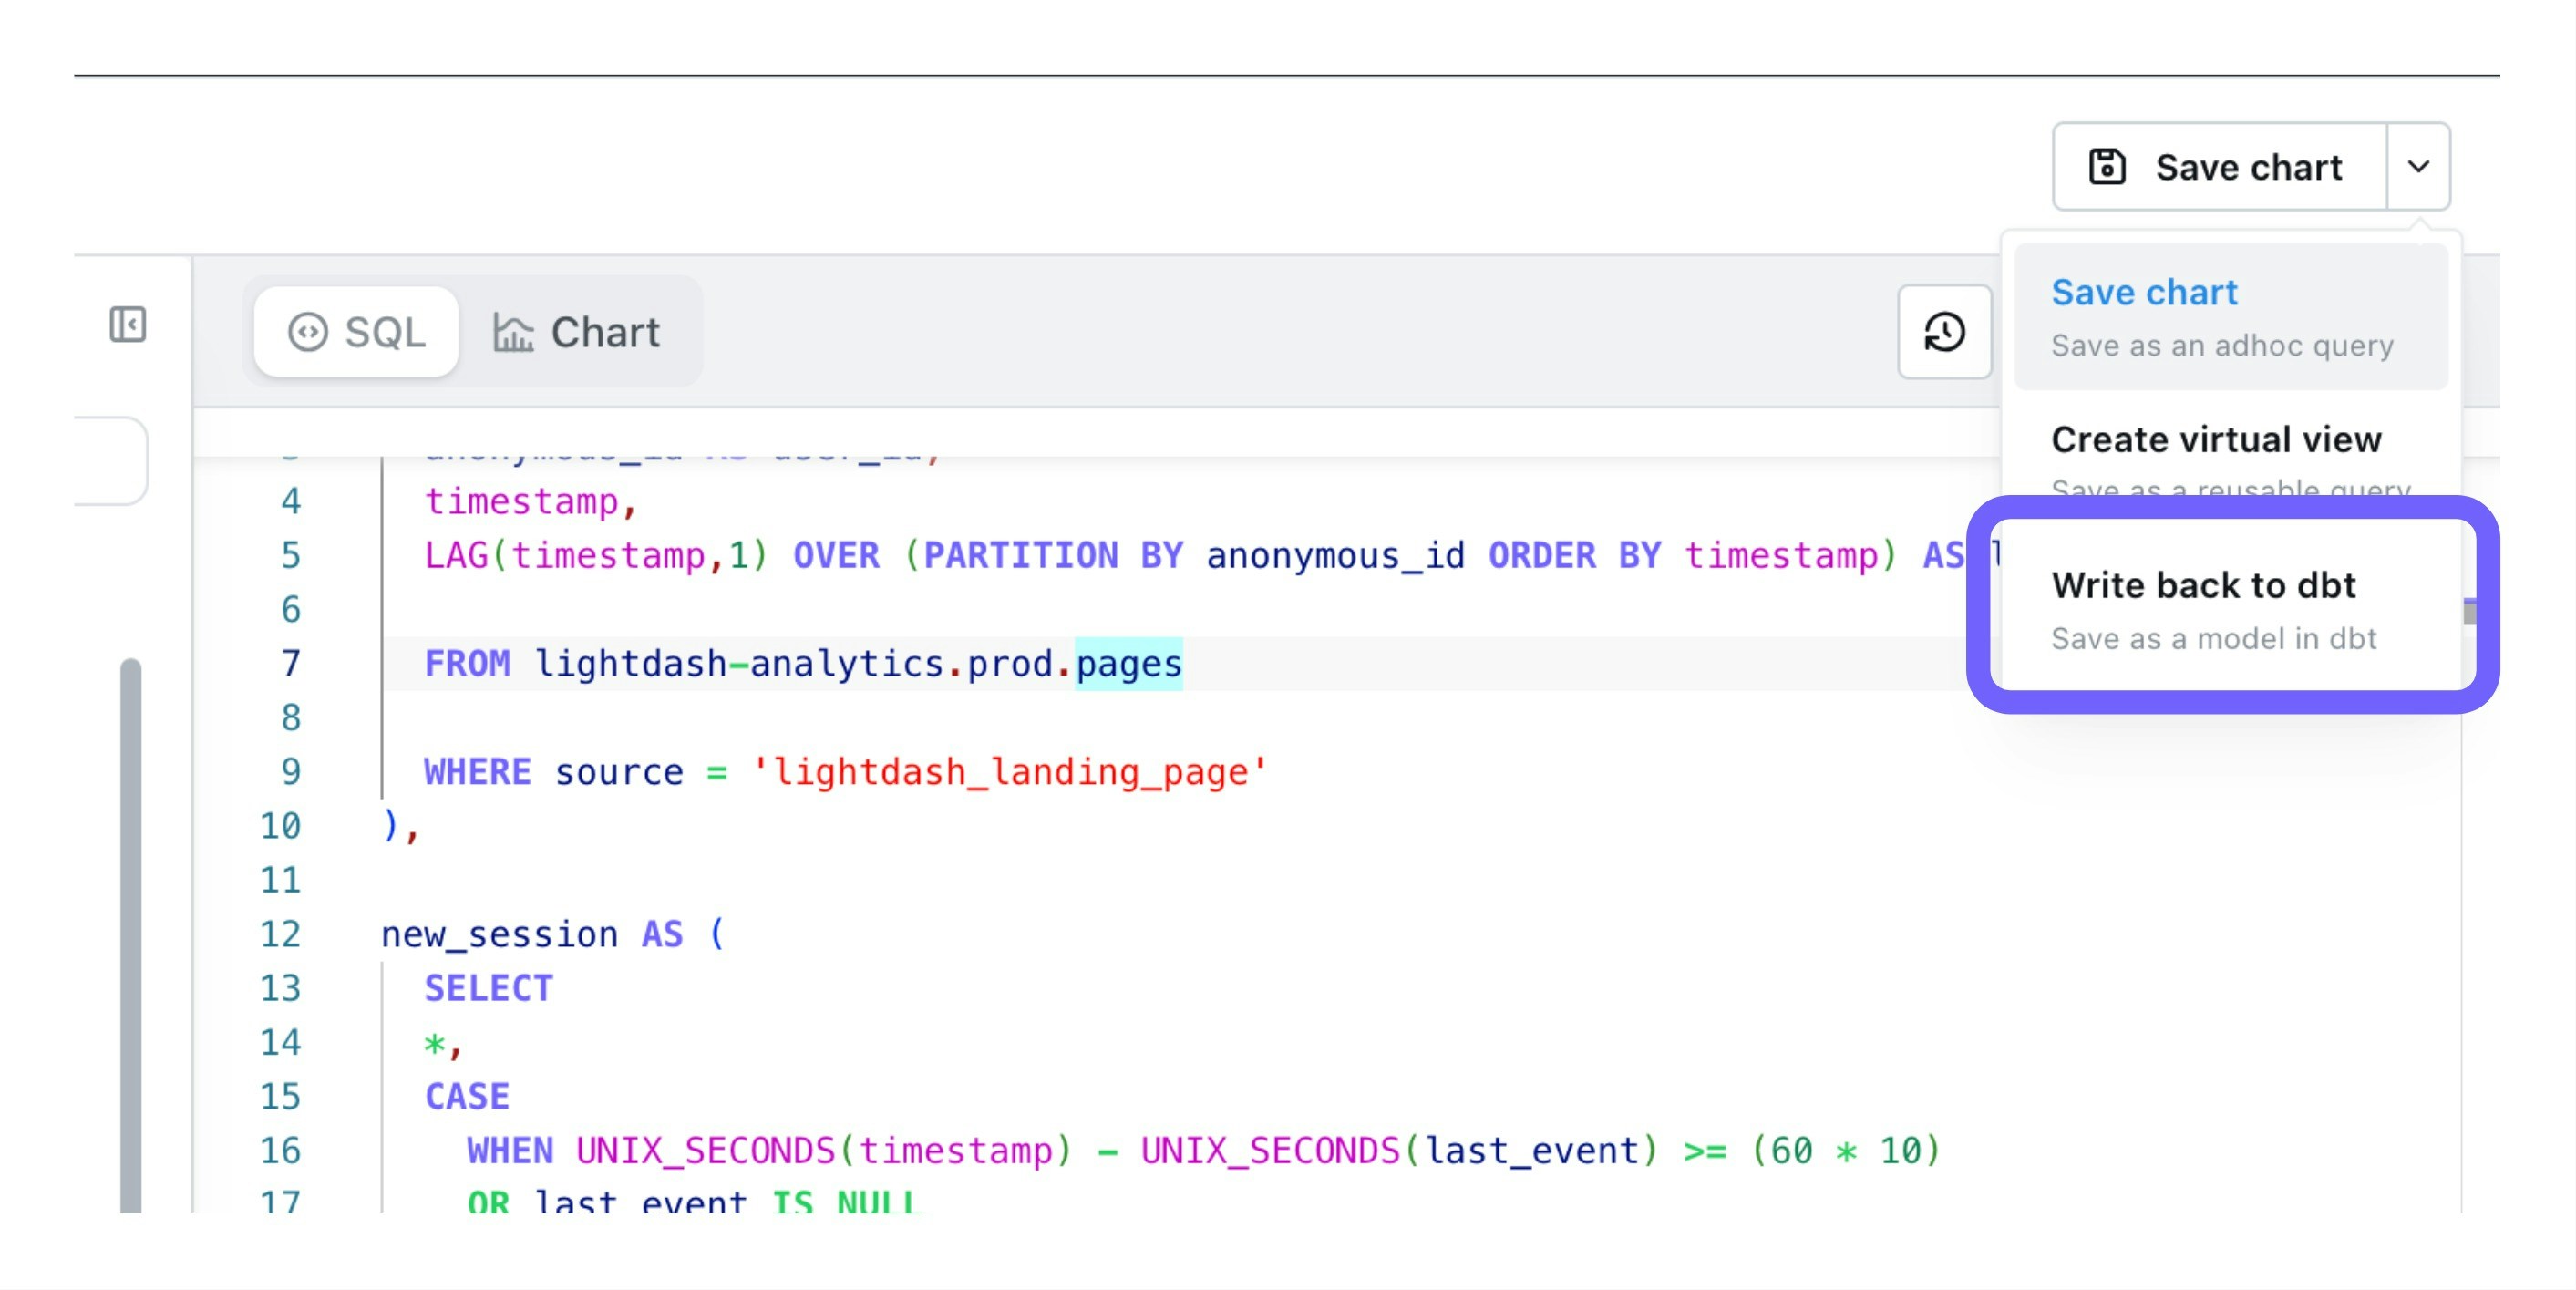
Open pull request will open a pull request created by Lightdash against your dbt project in GitHub or GitLab.
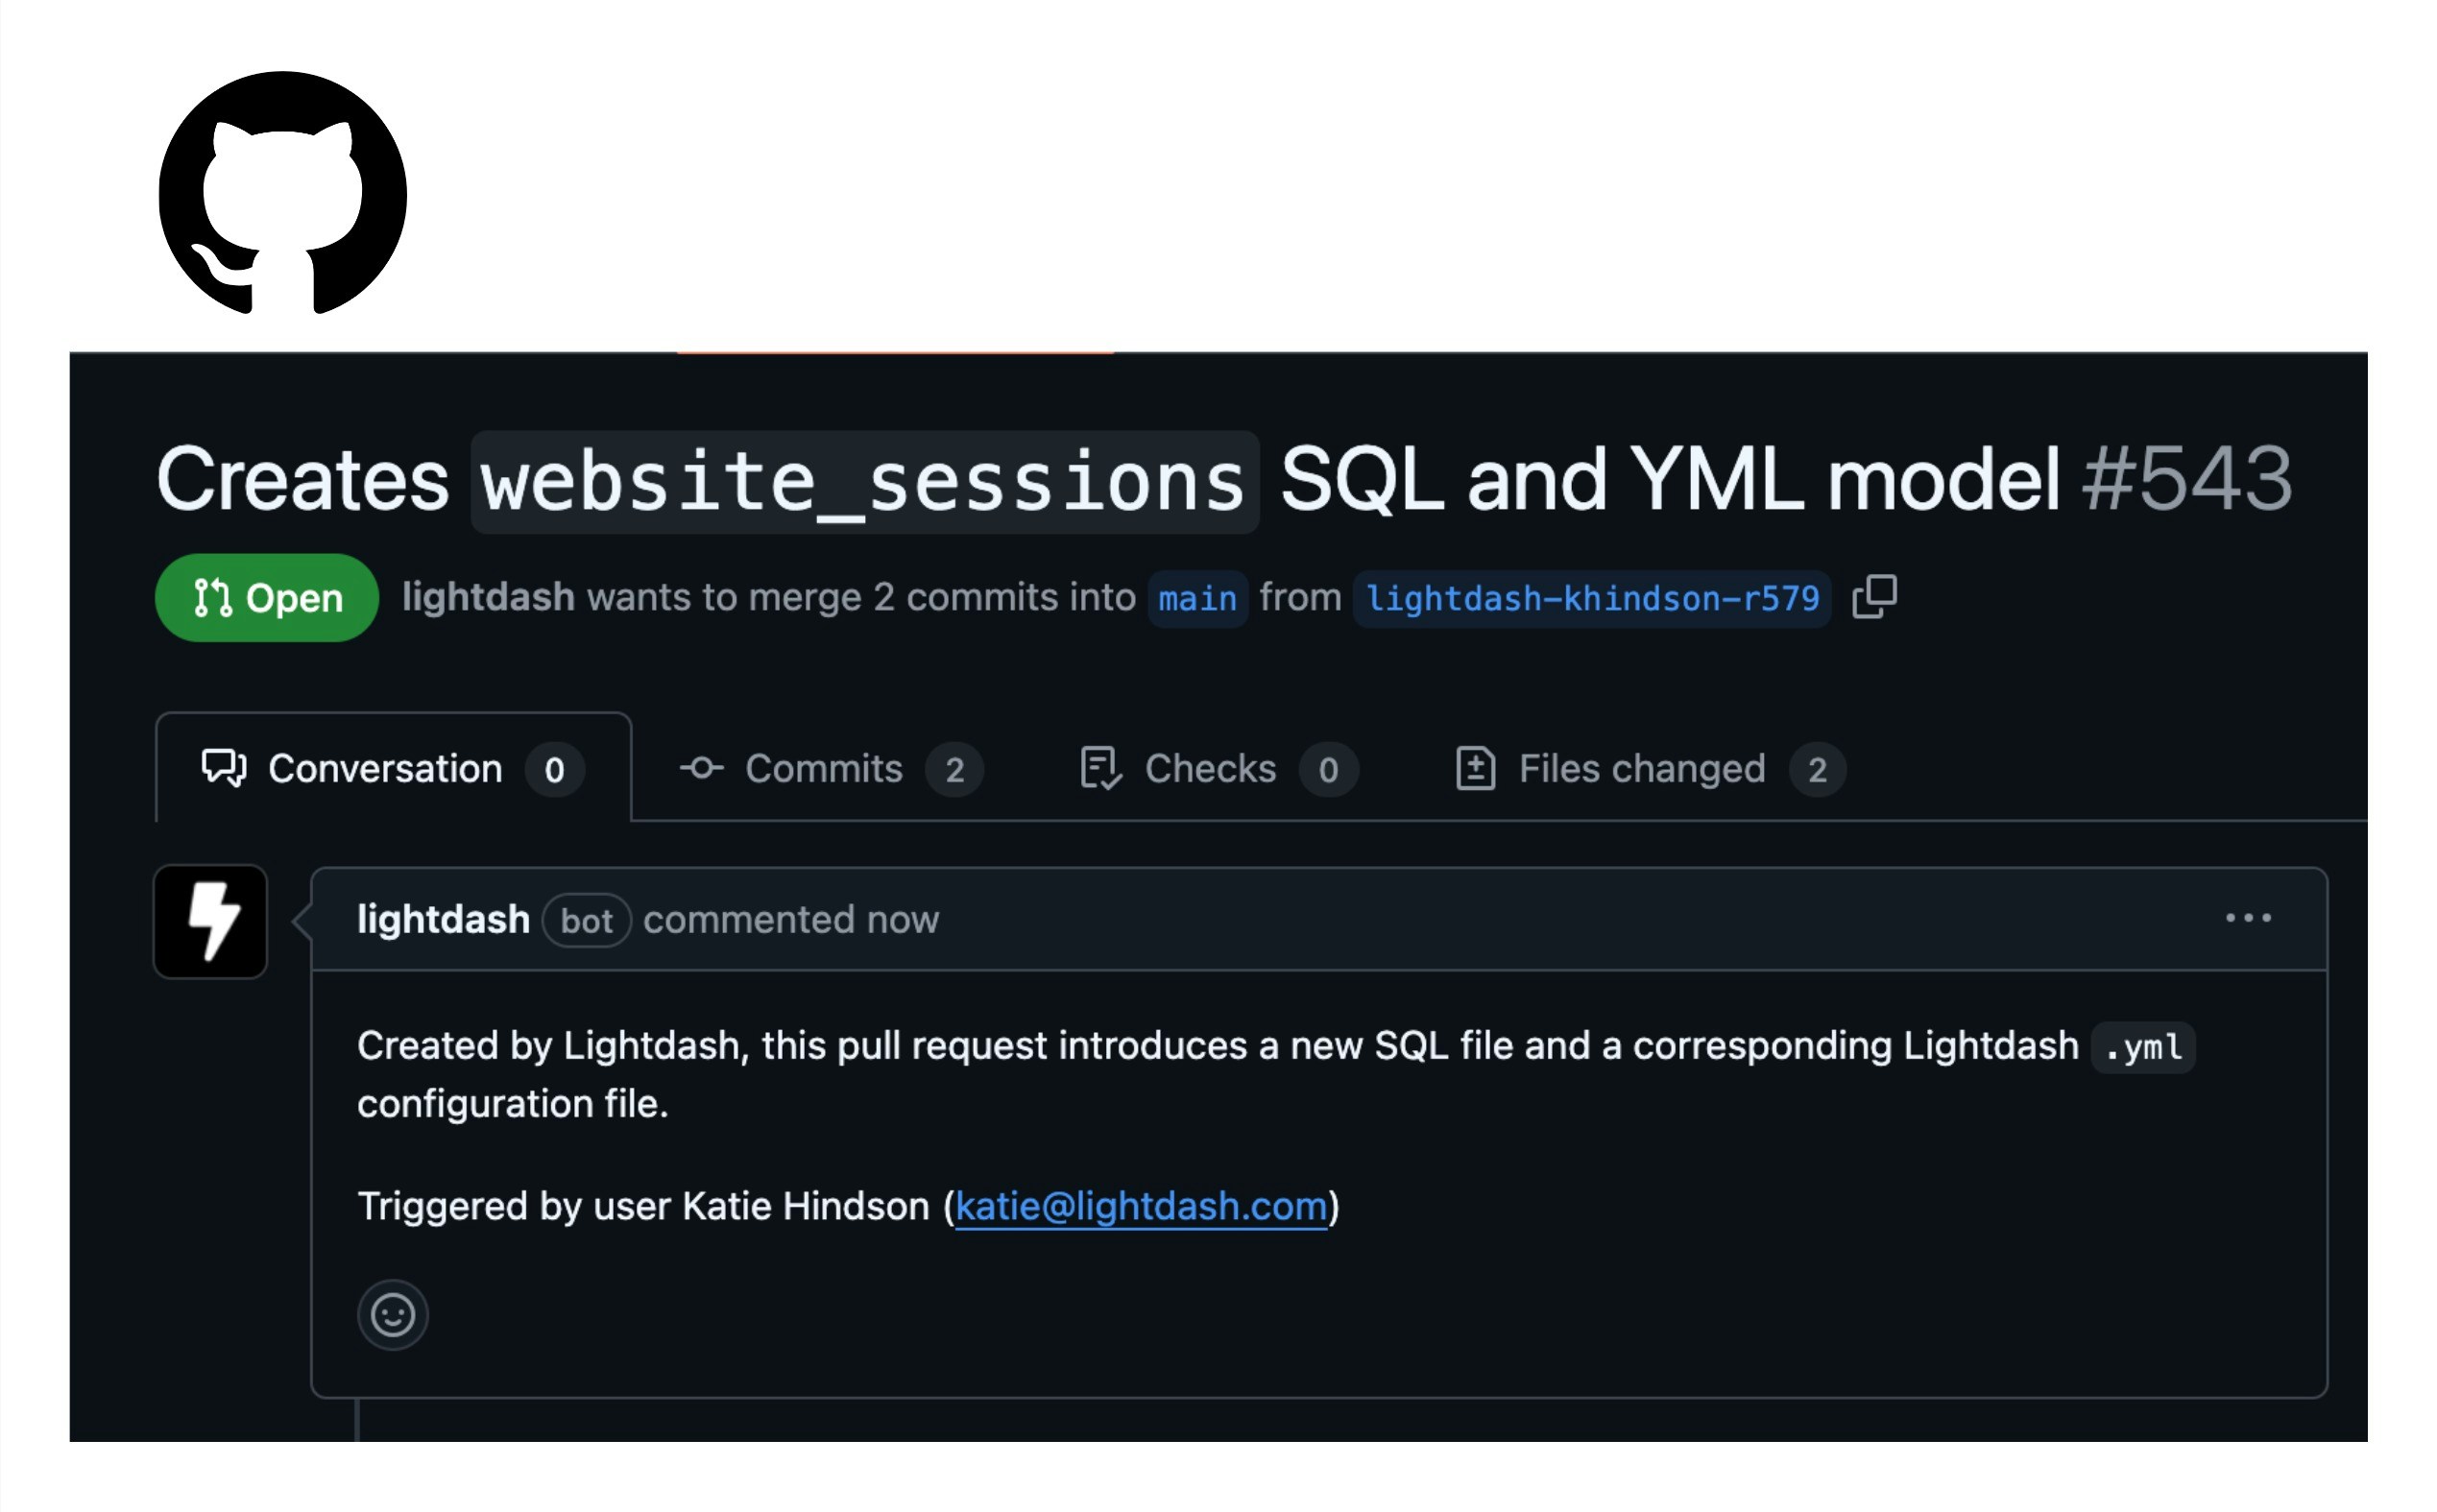
models/lightdash/ directory. The model will have the tag created-by-lightdash included in the model config.
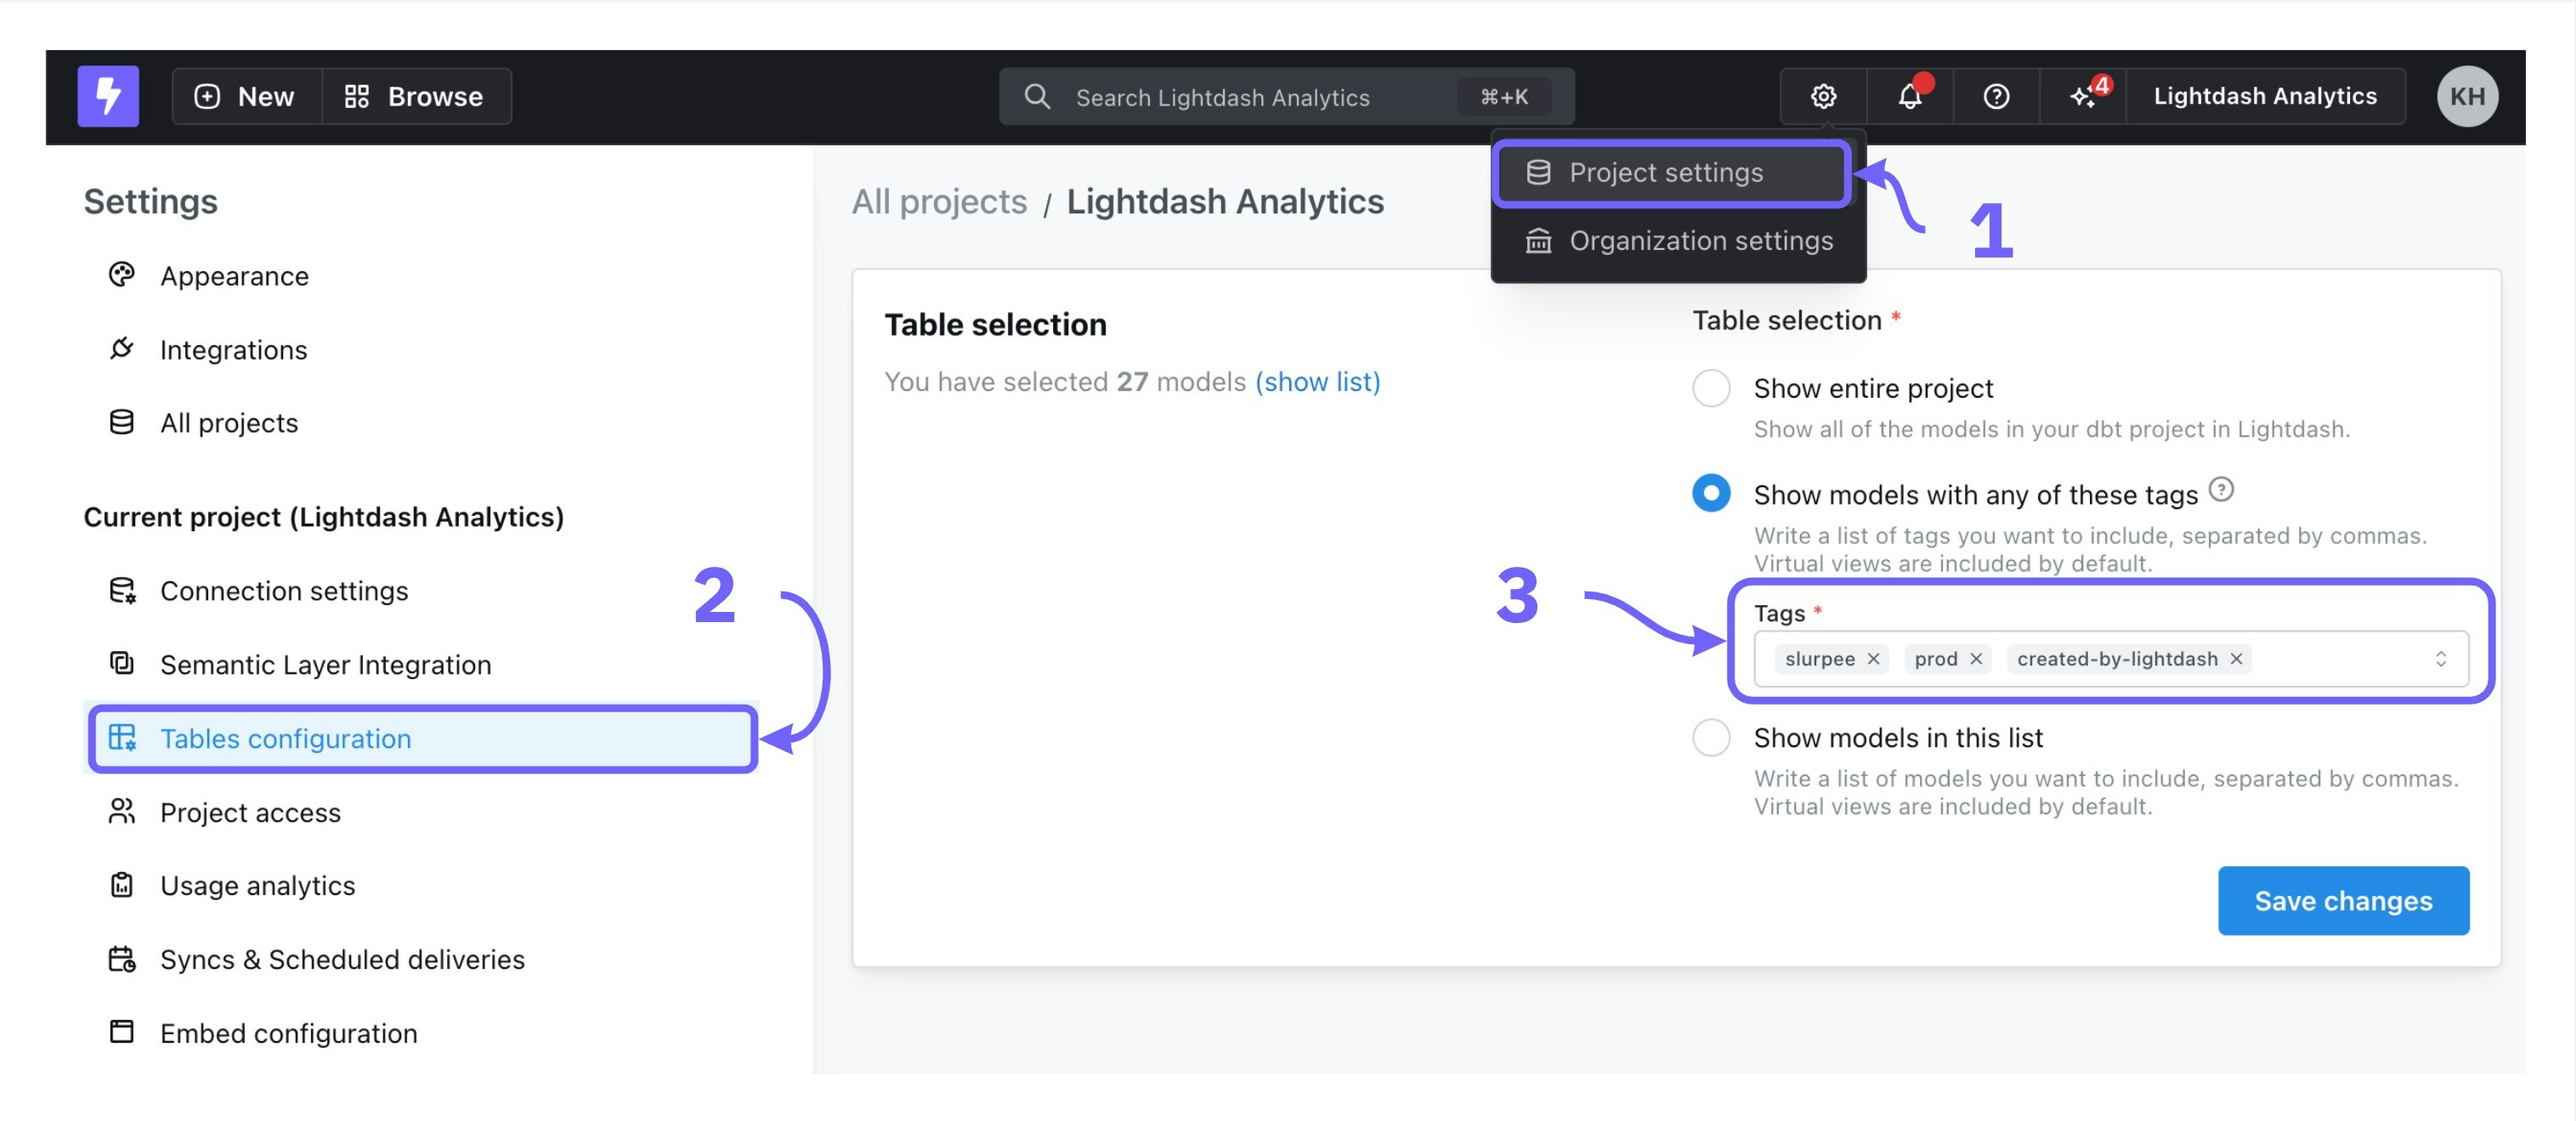
Getting your model to appear as a Table in Lightdash
You might need to adjust your Table Configuration settings in your project to have your new models appear as Tables in Lightdash.
If you’ve selected:
Show entire projectthen you don’t need to do anything. The models should appear automatically if you refresh your dbt project connection.Show models with any of these tags, you’ll need to addcreated-by-lightdashto the list of accepted tags. By default, models that you write back to dbt will have the tagcreated-by-lightdashincluded in the model config.Show models in this list, you’ll need to manually add the new models to the list of accepted models here.
Running your models in dbt
If you get anError: not found your_table_name, it’s likely because you haven’t built the table generated by your new model in your data warehouse yet. There are a couple of ways to handle this:
Manual approach
Once your model is merged to your dbt project, you can rundbt run -s your_model_name_here to create the table in your data warehouse. You might need to add --target prod if your default profile is set to dev!
Automated approach using dbt Cloud
If you’re using dbt Cloud to manage your dbt project, you can create a job that will automatically run any new models with the tagcreated-by-lightdash.
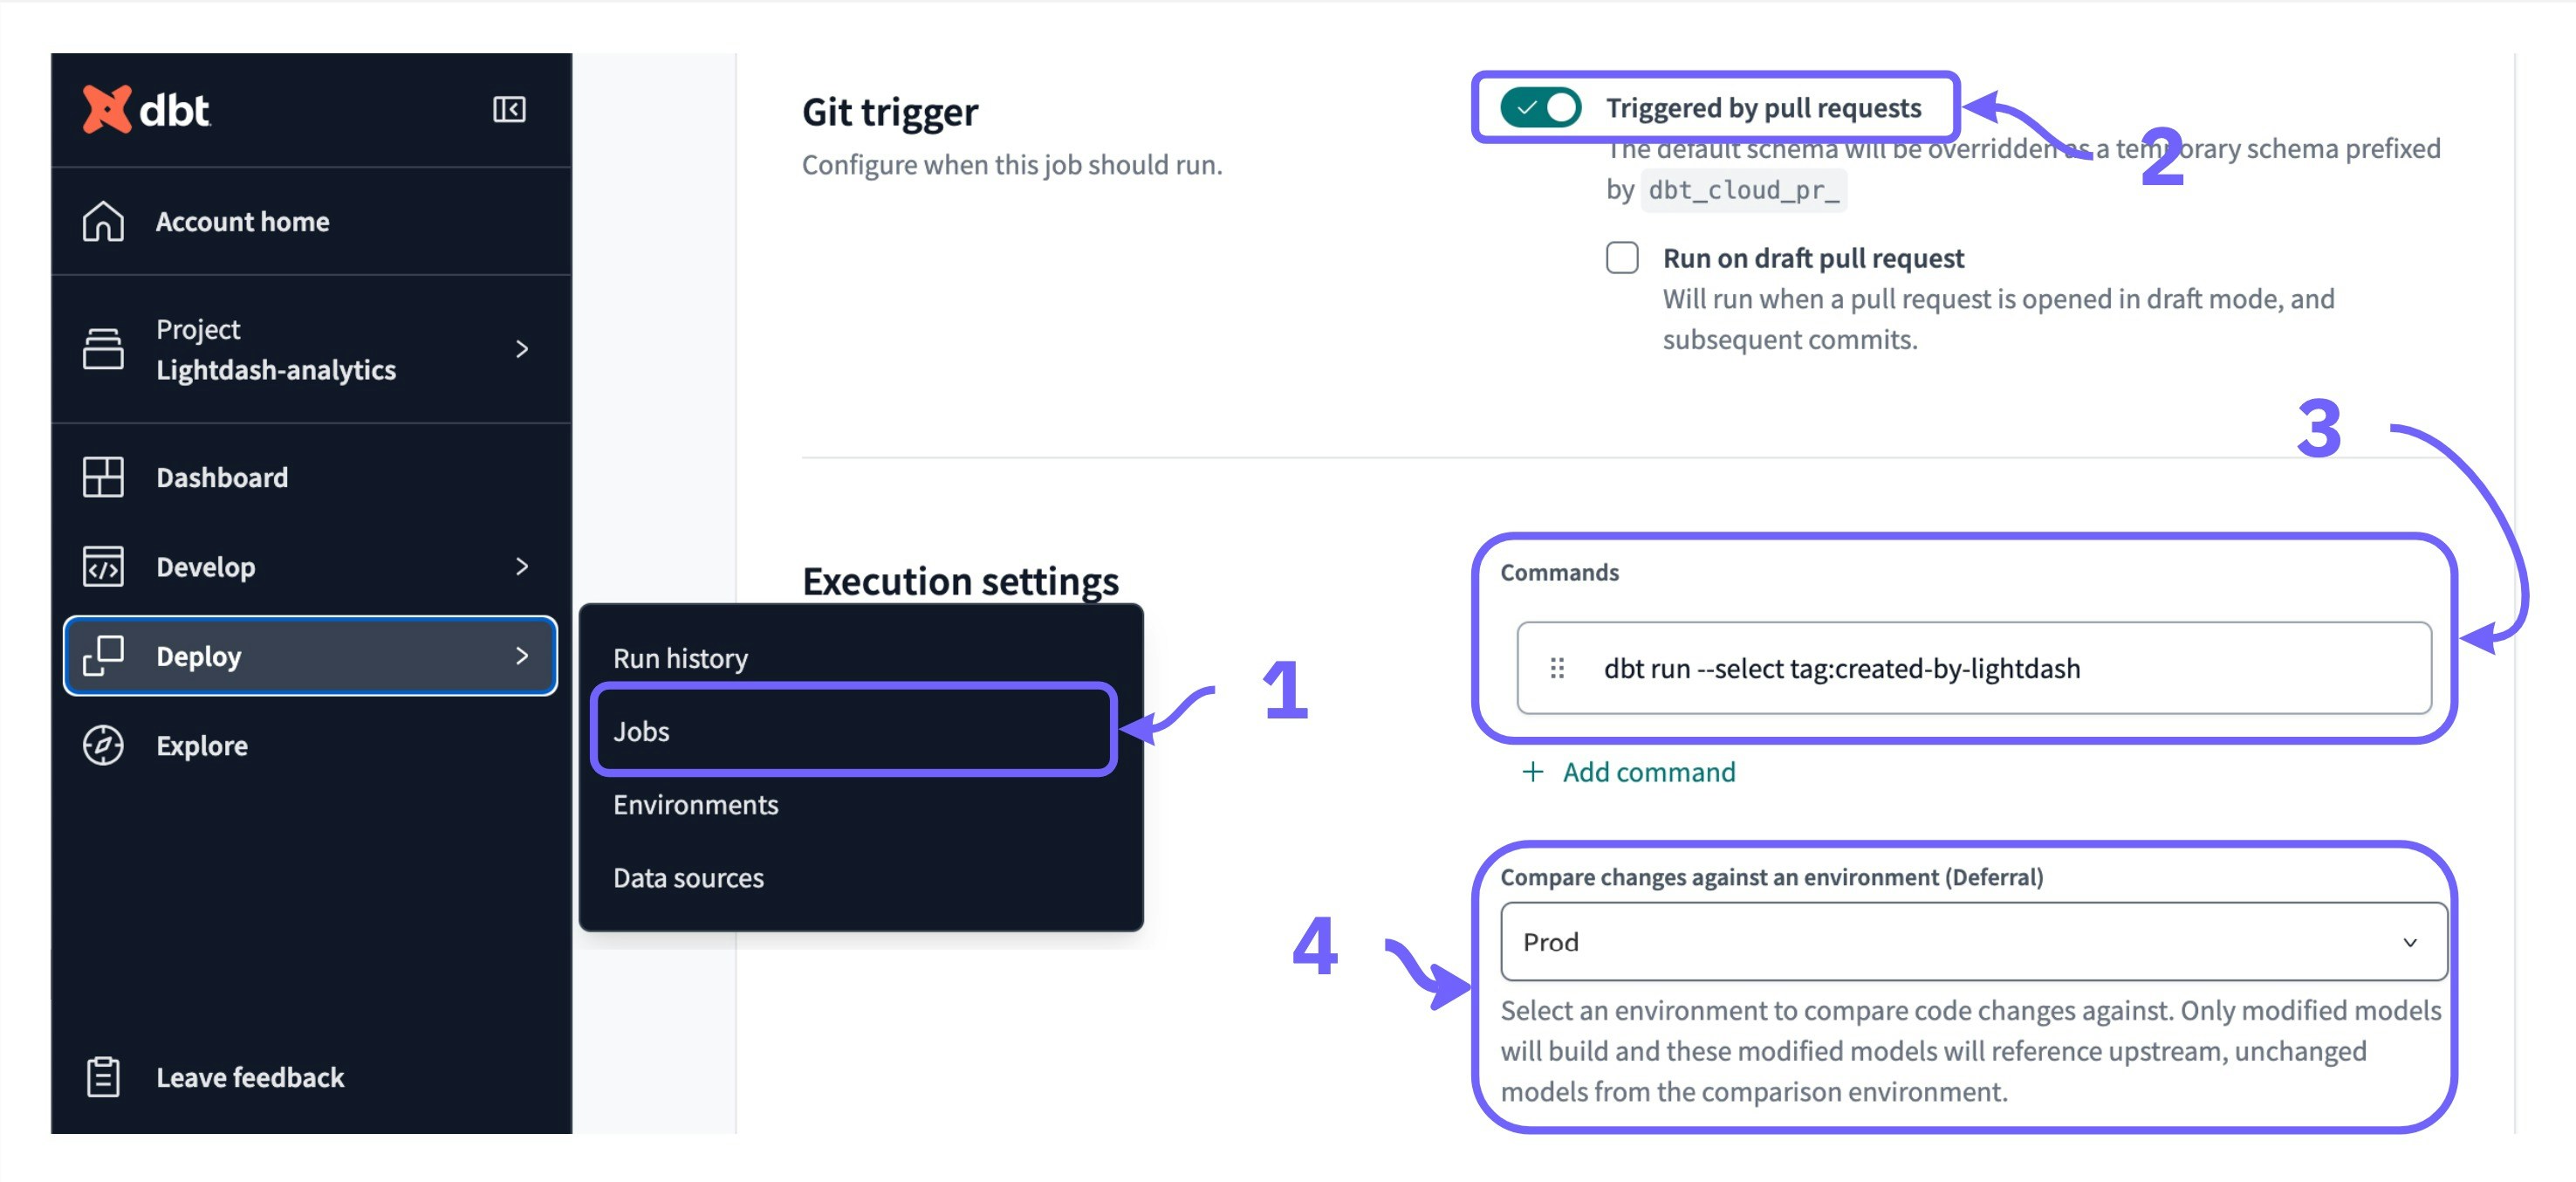
To create a job that does this, you’ll want to:
- open dbt Cloud, head to
Deploy—>Jobsand clickcreate new job - toggle on
triggered by pull requestsin theGit Triggersection - add the command
dbt run --select tag:created-by-lightdash - set
compare changes against environmenttoprod. This will make sure that this job only runs when a model is changed from your pull request