Syncs
You can set up as many syncs as you like, and if you make any changes to the content, Lightdash will update the syncs the next time they’re sent.Creating a Sync
All users with editor access or above can create Syncs. To do this, open your chart in view or edit mode, click the three-dot menu in the top-right corner, then click onGoogle Sheets Sync.

Create new Sync. Clicking Create new Sync takes you to the configuration screen to setup a new Google Sheets Sync.
By default, data will be synced to the first tab in your Google Sheet and it will overwrite all the content. If you want to select a specific tab, use the Save in new tab option.
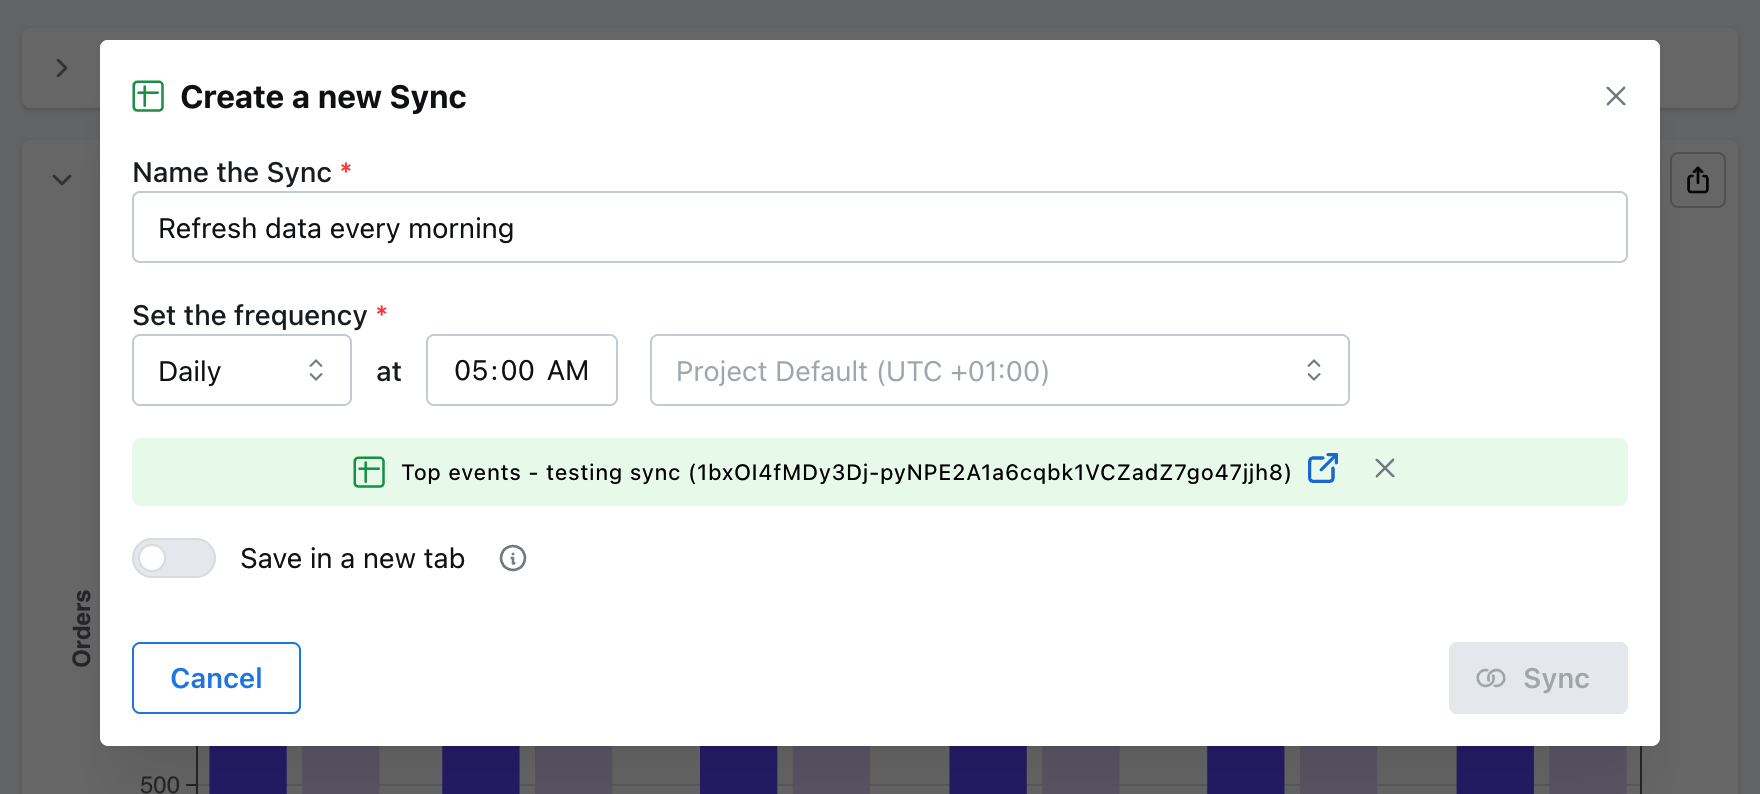
Sync options
- Name: this is the name of your Sync in Lightdash
- Frequency: this is how often your Google Sheet will be synced. You can make this hourly, daily, weekly, monthly, or custom - each frequency has its own options. For example, with a monthly schedule, you set the day of the month and the time that you want your Sync to be happen. The custom frequency lets you write out your own custom Cron expression if you need something more specific than our standard options. All times for the scheduler are in UTC.
- Select Google Sheet: Use the file picker to select the Google Sheet that you’d like to sync your chart results to. Note: You need to sync to an existing Google Sheet, so ensure you have created it before you can select it here.
- Save in new tab: when enabled, it lets you set a tab name that will be used to store your sync data. The tab will be created if it doesn’t exist yet in the sheet. This will avoid overwriting the first tab of the sheet.
Sync.
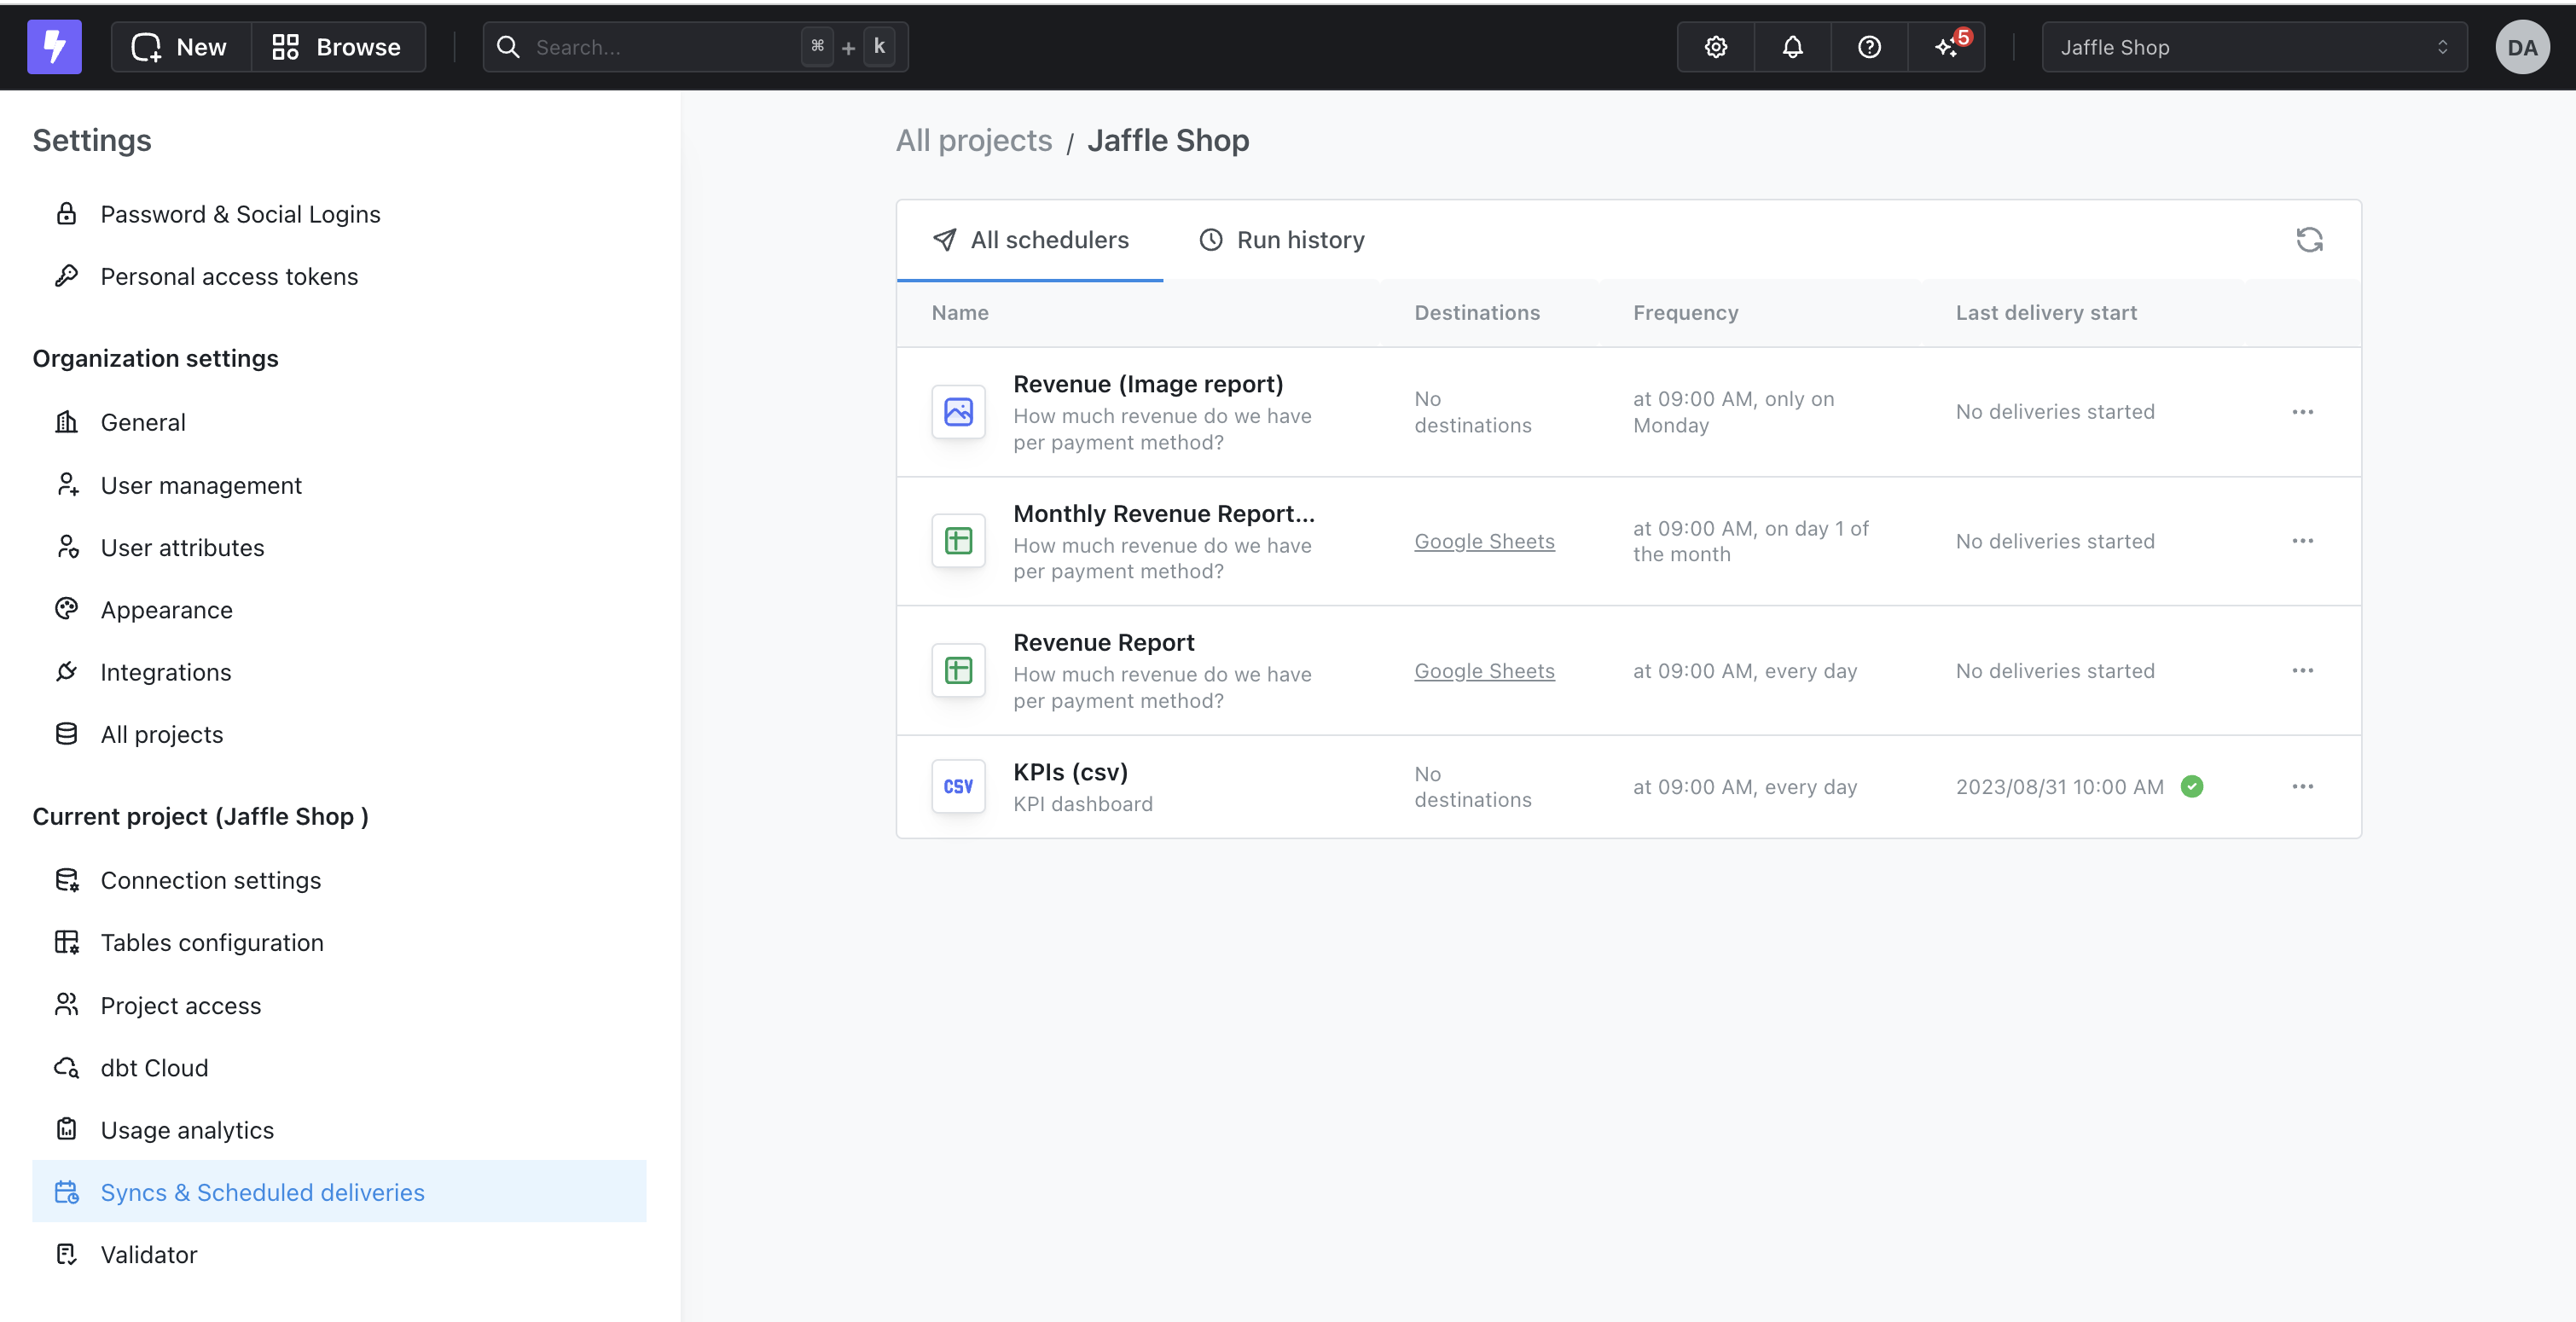
Overview of your Syncs
Users who have an admin role in your project can access an overview of your Syncs in the Project Settings. In theSyncs & Scheduled deliveries overview page, you can see a list of all of your Syncs (along with your Scheduled Deliveries), their most recent delivery status, and a history of all of the previous deliveries in your project.
To access the overview page, just head to your Project Settings, then to the Syncs & Scheduled deliveries tab.