Deploy to AWS with Restack
To deploy Lightdash to your own AWS with Restack:- Sign up for a Restack account.
- Add AWS credentials with AdministratorAccess.
- One-click cluster creation with Restack.
- Deploy Lightdash on Restack.
- Start using Lightdash.
- Deploy multiple instances of Lightdash.
Sign up for a Restack account
To Sign up for a Restack account, visit www.restack.io/signup. You can sign up with your corporate email address or your GitHub profile. You do not need a credit card to sign up. If you already have an account, go ahead and login to Restack at www.restack.io/login.
Add AWS credentials with AdministratorAccess
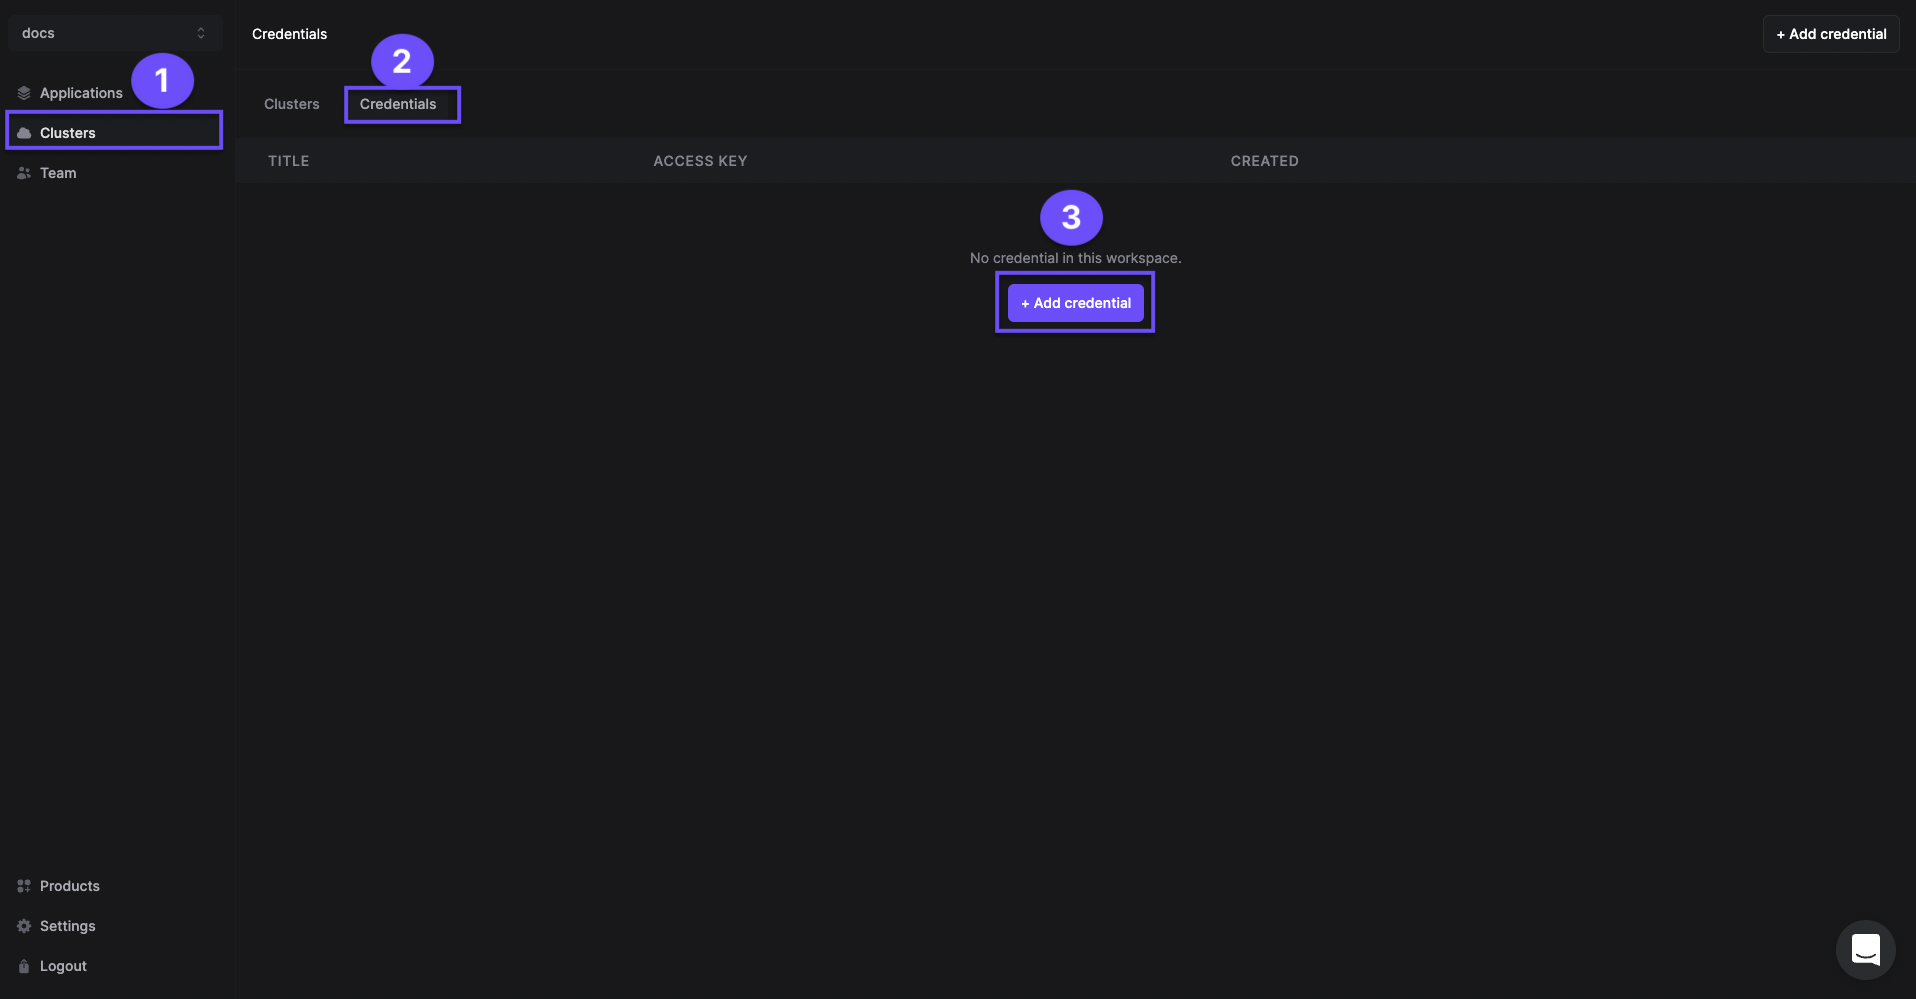
To deploy Lightdash in your own AWS infrastructure with Restack, you will need to add your credentials as the next step. Make sure that this account has AdministratorAccess. This is how Restack can ensure an end-to-end cluster creation and cluster management process.- Navigate to Clusters in the left-hand navigation menu.
- Select the Credentials tab.
- Click Add credential.
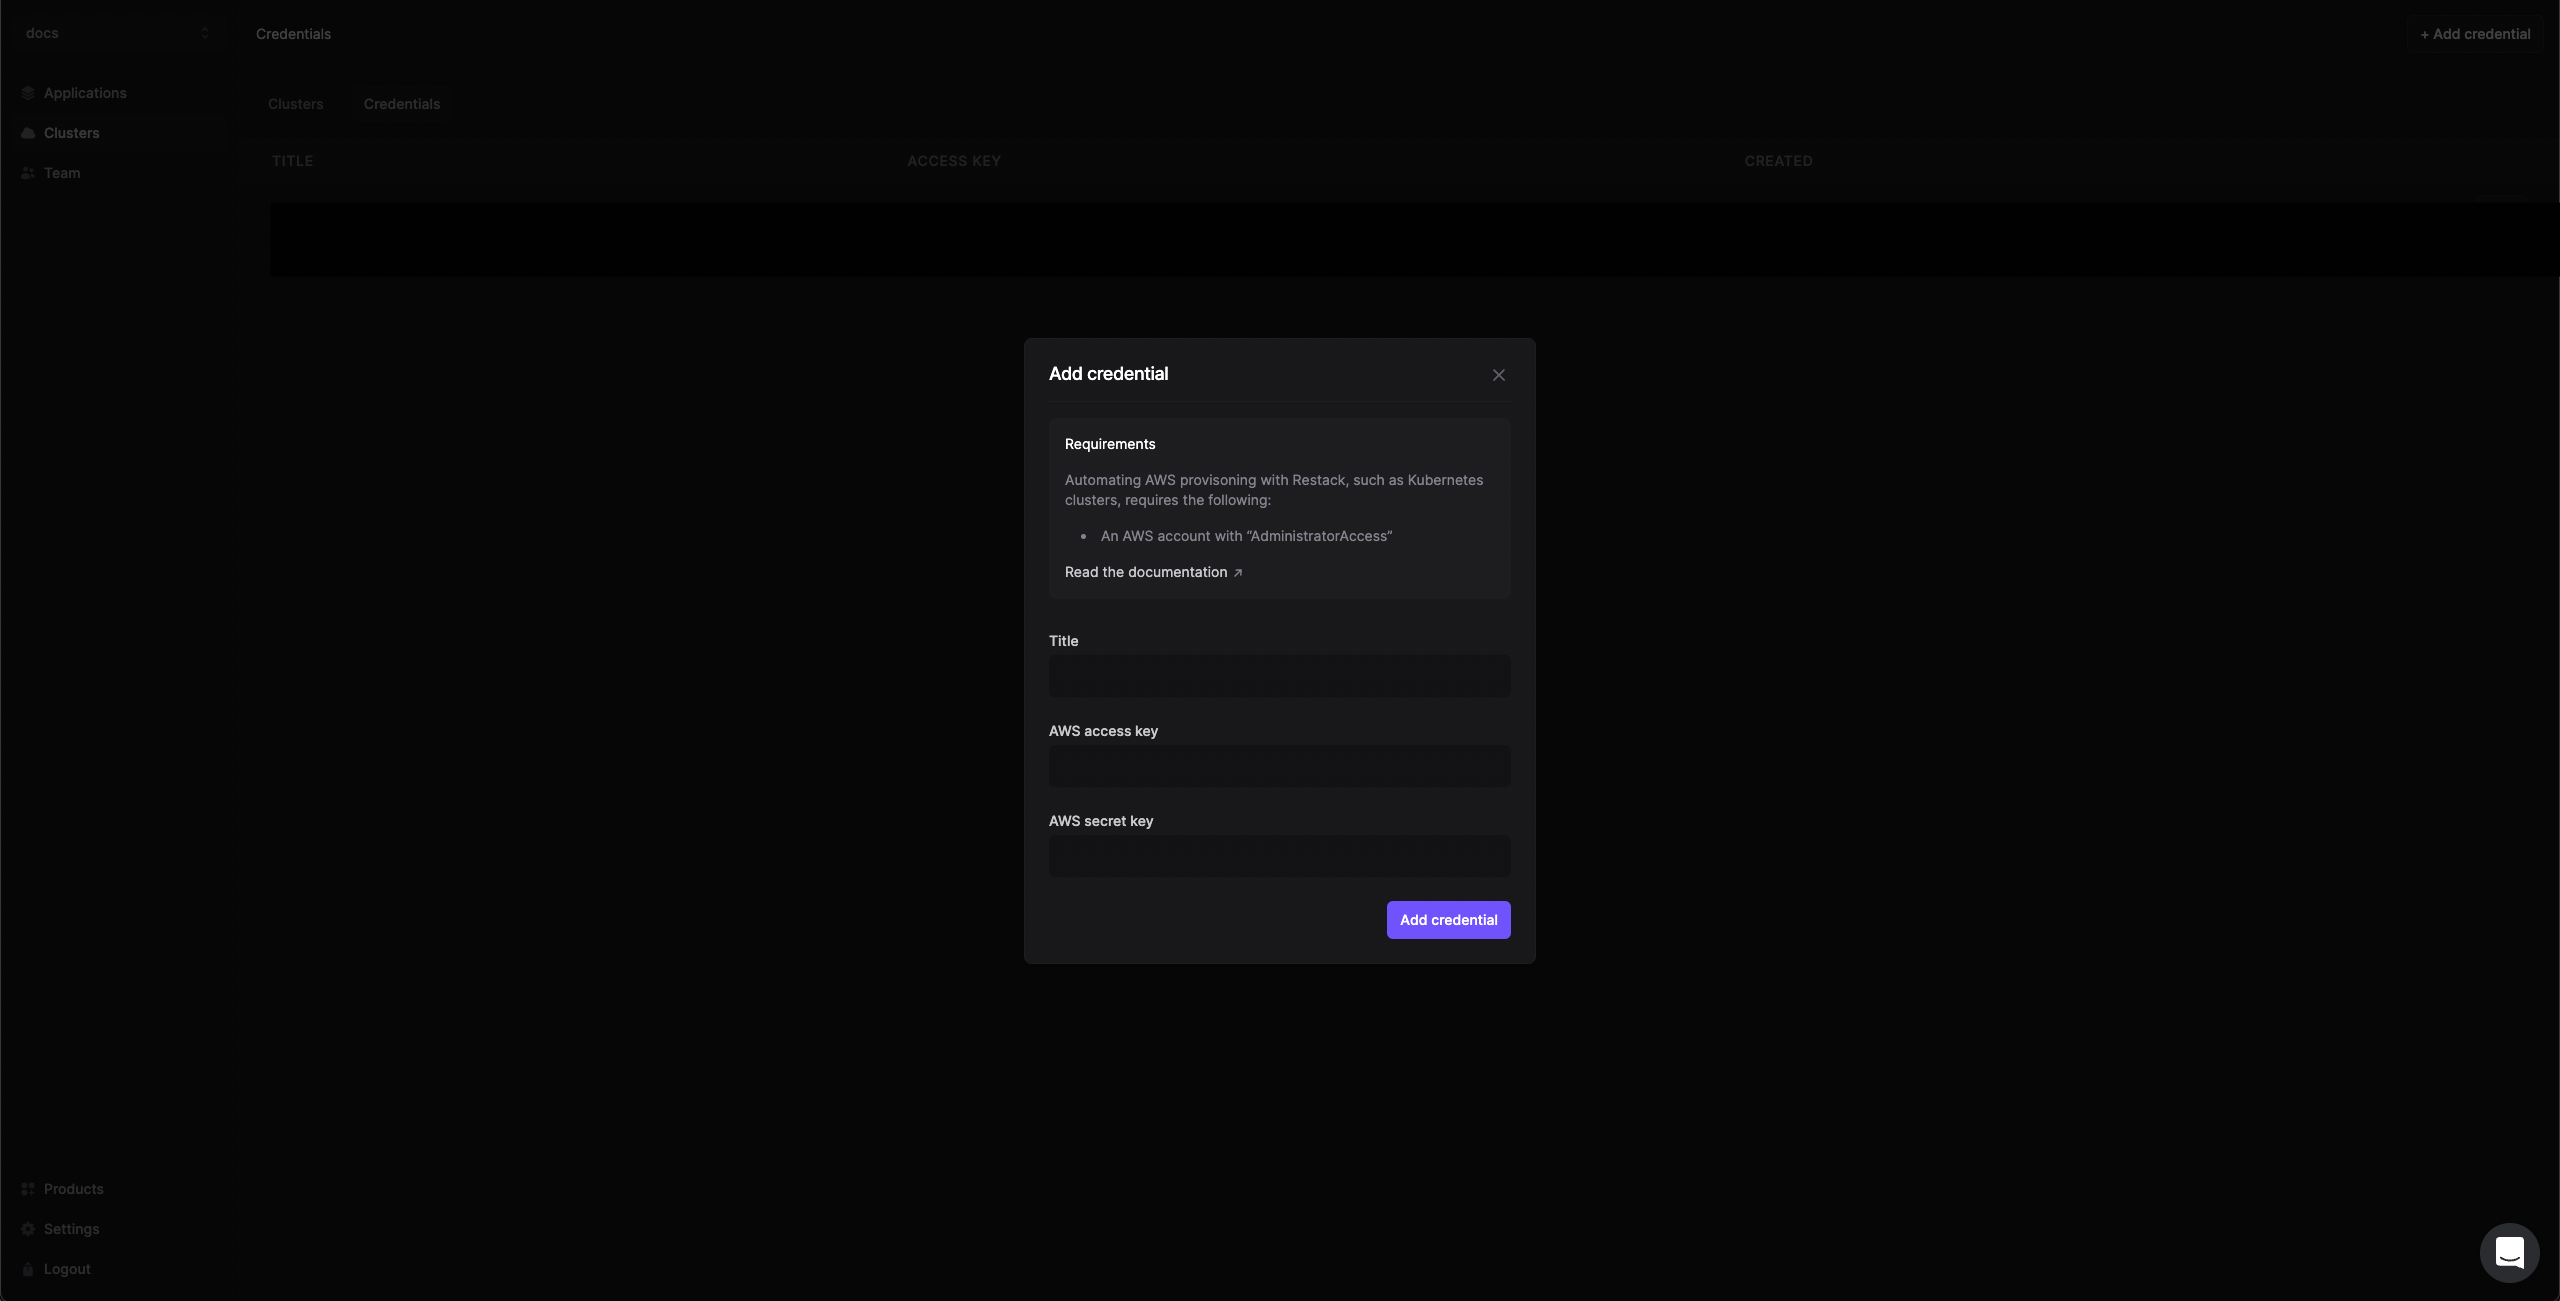
- Give a suitable title to your credentials for managing them later.
- Enter your AWS Access Key ID and AWS Secret Access key.
- Click Add credential.
How to get your AWS Access key ID and AWS Secret Access Key
One-click cluster creation with Restack
Why do I need a cluster?Running your application on a Kubernetes cluster lets you deploy, scale and monitor the application reliably.
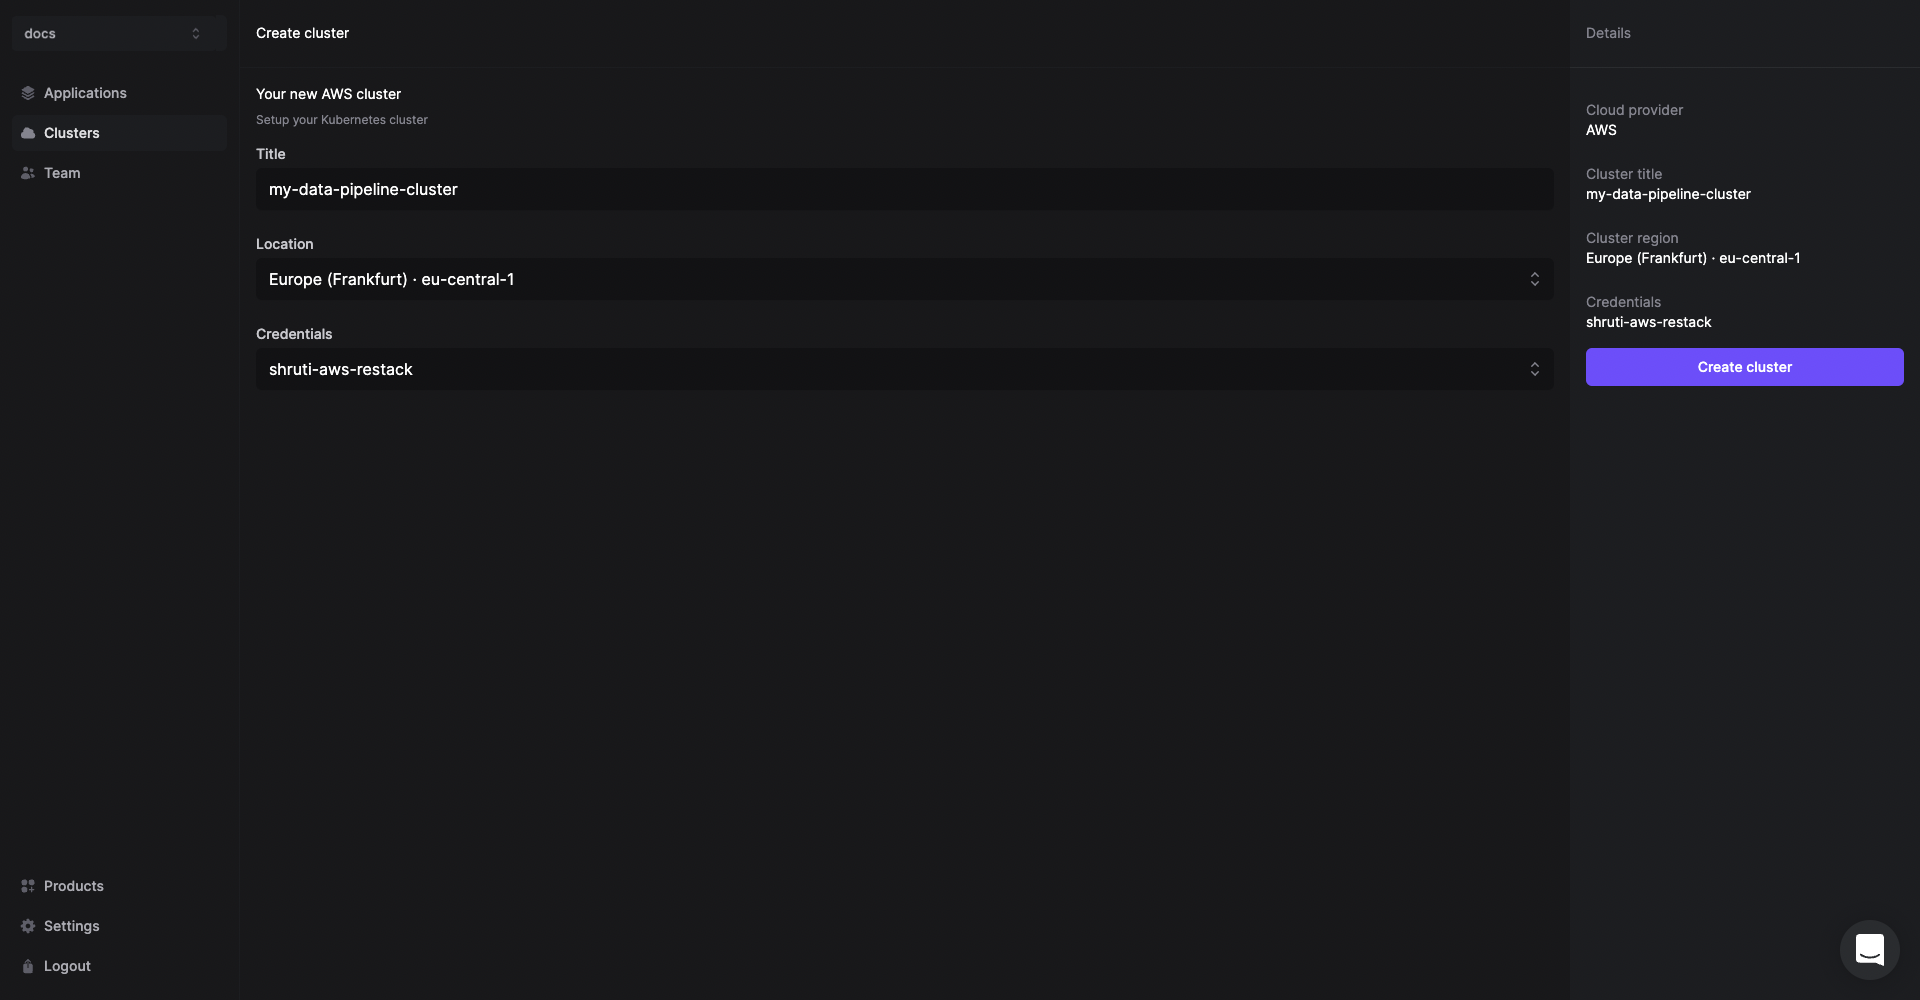
- Navigate to the Clusters tab on the same page and click on Create cluster.

- Give a suitable name to your cluster.
- Select the region you want to deploy the cluster in.
- Select the AWS credentials you added in the previous step.


Deploy Lightdash on Restack
- Click Add application from the Cluster description or go to the Applications tab in the left hand side navigation.
- Click Lightdash.
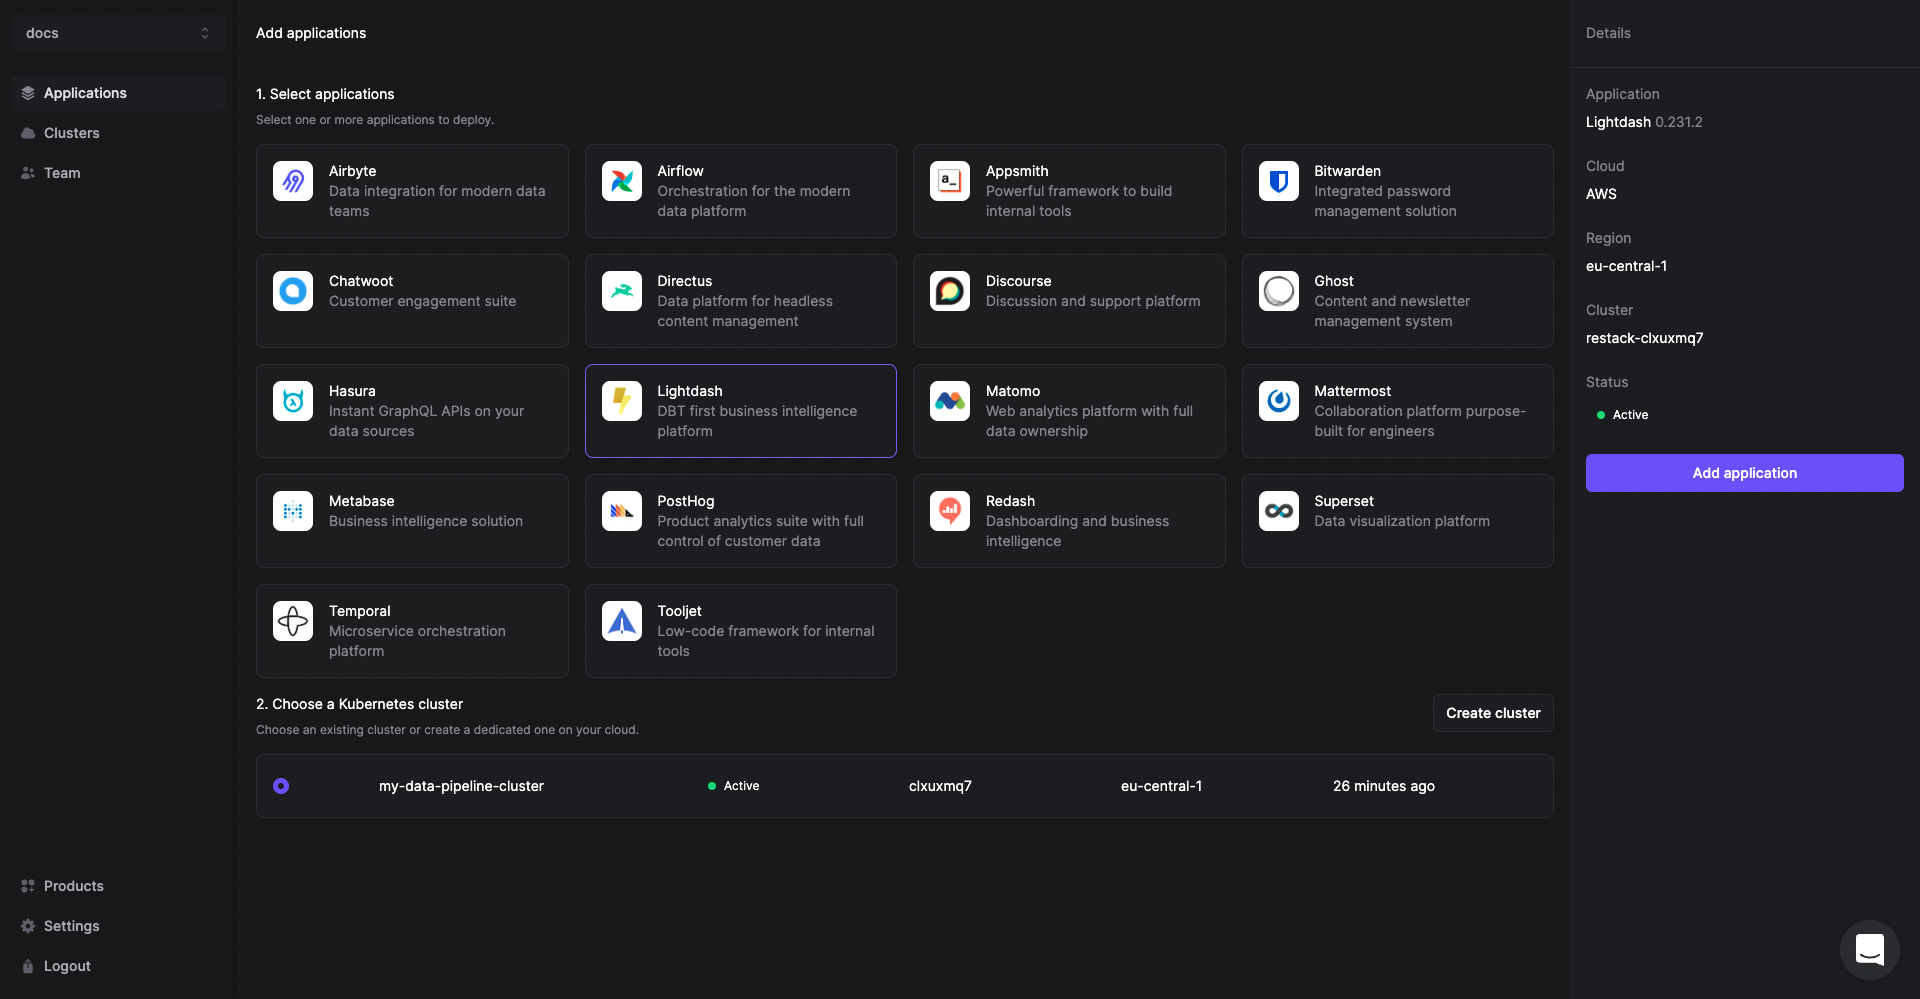
- Select the cluster you have already provisioned.
- Click Add application.
Start using Lightdash
Lightdash will be deployed on your cluster and you can access it using the link under the URL tab.
