Embedding is available to all Lightdash Cloud users and Enterprise On-Prem customers. Get in touch to have this feature enabled in your account.
What can you embed?
Lightdash supports embedding three types of content, each designed for different use cases:Dashboards
Embed complete dashboards with multiple visualizations, filters, and tabs. Perfect for providing comprehensive analytics views in your application. Use cases:- Executive dashboards in admin panels
- Customer-facing analytics portals
- Embedded reporting for SaaS applications
Charts
Embed individual saved charts for focused, single-metric displays. Charts provide a minimal UI for clean integration. Use cases:- Single KPI widgets in applications
- Embedded metrics in marketing pages
- Focused analytics in workflows
Chart embedding requires the React SDK. iframe embedding is only available for dashboards.
AI agents
Embed a Lightdash AI agent so customers can chat with their data and generate charts without leaving your product. Each embed is scoped to a single agent and space. Use cases:- “Chat with your data” experiences inside customer-facing apps
- Self-serve analytics where customers can ask ad-hoc questions
- Scoped AI access where each customer can only see their own content
AI agent embedding requires the React SDK. iframe embedding is not supported for AI agents.
Data apps
Embed a data app as standalone content in an iframe — the full app, no dashboard or surrounding chrome. Useful when you want to surface an entire AI-generated app as a feature in your product. Use cases:- Customer-facing interactive reports
- Embedded narratives or slide-show apps in your product
- Self-serve analytics views built on your semantic layer
How can you share or embed content?
Lightdash offers three ways to share embedded content. The choice depends on whether you need to embed content in your own application or simply share a link. Shareable URL is the simplest option. Lightdash can generate a standalone URL that anyone can open directly in their browser — no iframe, no SDK, and no Lightdash account required. This is useful when you want to share a dashboard with users outside your organisation (e.g., clients, partners, or stakeholders) without embedding it in an application. The URL uses the same JWT-based security as the other methods, so it expires after the time you set and can include user attributes for row-level filtering. iframe embedding lets you embed a dashboard inside your own web page. You generate a JWT, construct a URL, and add it to an<iframe> tag. There are no additional setup requirements and this works anywhere (React, Vue, plain HTML). Note that iframe embedding currently only supports dashboards (chart embedding via iframe is not supported).
React SDK (@lightdash/sdk) is the most powerful option. It supports both dashboards and charts, lets you pass filters programmatically, hook into user interaction callbacks (like when someone navigates to Explore), and apply custom styling to match your app. It requires a React/Next.js app and CORS configuration on the Lightdash instance (Cloud customers need to contact Lightdash to set that up).
All three methods use the same JWT-based authentication and security model.
Quick comparison
| Feature | Shareable URL | iframe | React SDK |
|---|---|---|---|
| Dashboards | ✓ | ✓ | ✓ |
| Individual charts | ✗ | ✗ | ✓ |
| AI agents | ✗ | ✗ | ✓ |
| Data apps (standalone) | ✓ | ✓ | ✗ |
| Requires embedding in an app | No | Yes | Yes |
| Setup complexity | Low | Low | Medium |
| CORS needed | No | No | Yes |
| Programmatic filters | Via JWT config | Via JWT config | Via SDK filters prop |
| Custom styling | No | Limited | Full control |
| Framework requirement | None | None | React / Next.js |
Passing filters to embedded dashboards
Both methods support filters, just differently:- JWT config — Set filters in the token payload at embed time. Works for both methods.
- React SDK
filtersprop — Pass them dynamically at runtime. Better if filters need to change based on the logged-in user.
CORS
CORS controls which external browser origins can call the Lightdash API. You only need to configure CORS when your embedded application calls Lightdash from the browser, for example when using the React SDK. Shareable URLs and iframe embeds do not need CORS. Go to Project settings -> Embed configuration -> CORS and add each origin your application uses.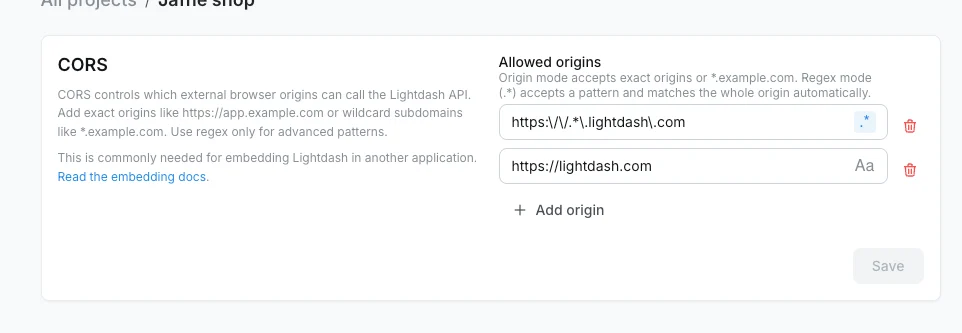
https://lightdash.comallows only that exact origin.*.lightdash.comallows HTTPS subdomains likehttps://app.lightdash.comand is saved as a regex pattern.
.*) for advanced patterns. Enter the pattern body only; Lightdash matches the whole origin automatically. For example, use https:\\/\\/.*\\.lightdash\\.com to allow subdomains of lightdash.com.
Quick start: Embed a dashboard
This quick start will walk you through embedding your first dashboard using an iframe.Step 1: Create an embed secret
First, you need to generate a secret per project. This secret is like a password that will help you encrypt the URLs so we know the access is valid.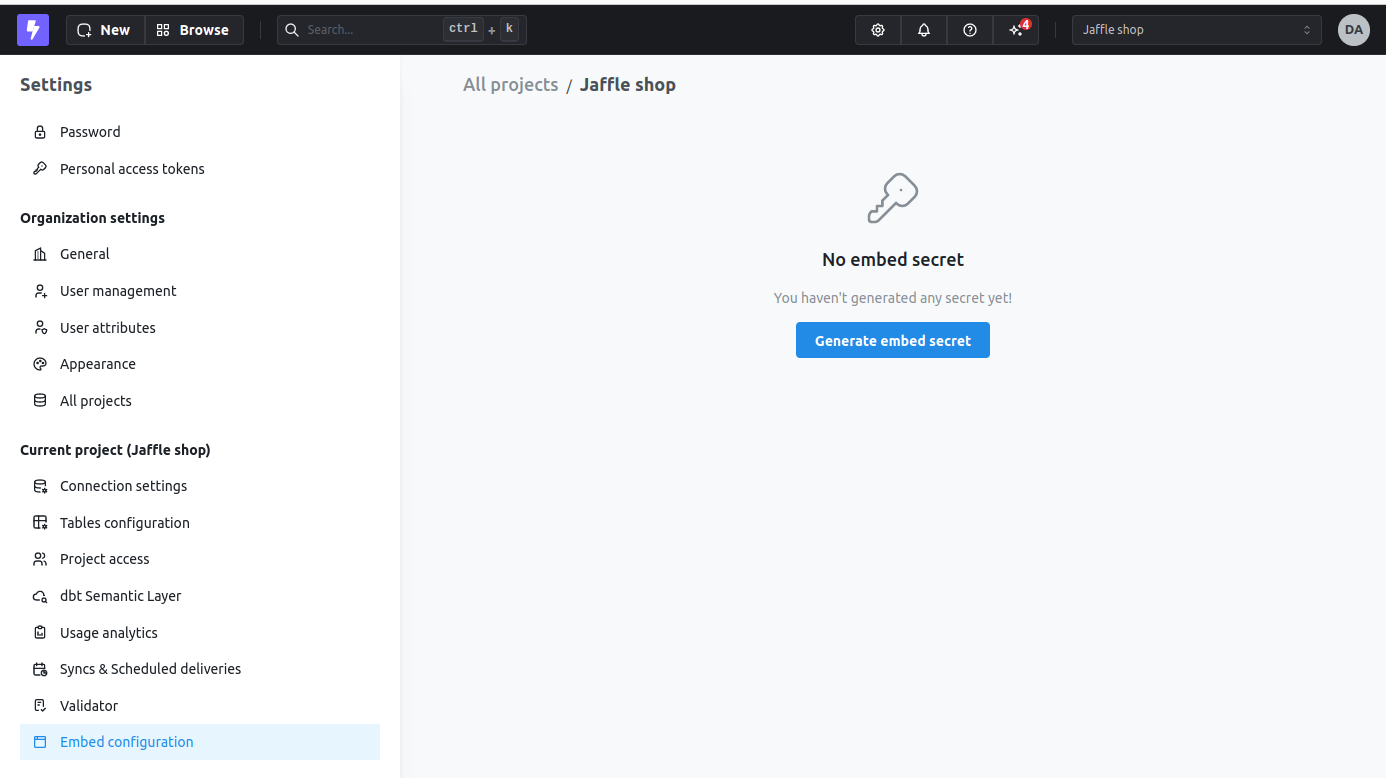
Generate new secret button. If you do this, people with an old URL will automatically lose access to any previously shared embed URL.
Step 2: Add allowed dashboards
Only selected dashboards can be accessed via embed URLs. Add the dashboard you want to embed to the allowed list.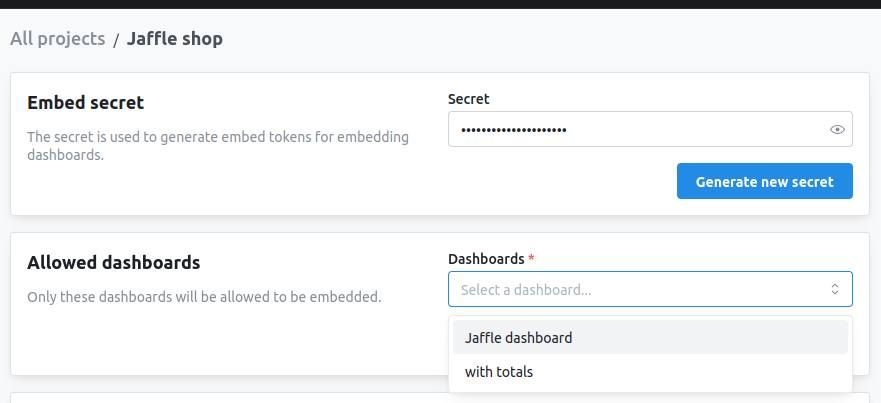
Step 3: Configure and preview
Under the “Configure” section, you can:- Select which dashboard to embed
- Set token expiration time
- Configure interactivity (filters, exports, etc.)
- Add user attributes for row-level security
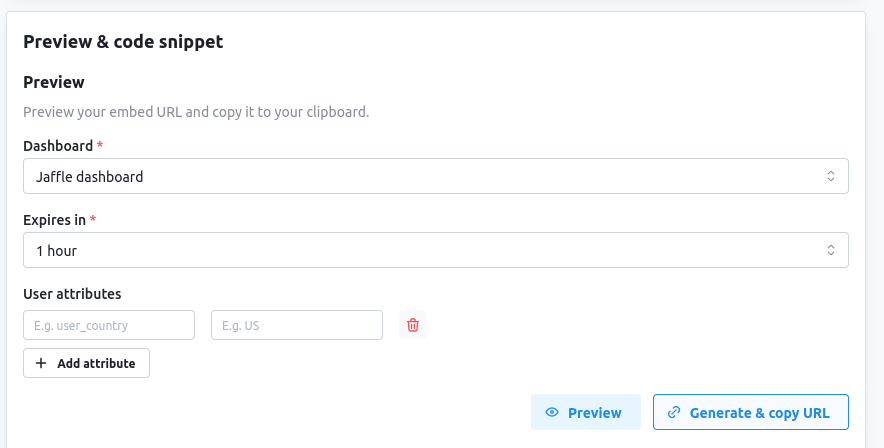
Preview to see how the embedded content will look, and click on Generate & copy URL to get a one-off embed URL for testing.
Step 4: Generate tokens programmatically
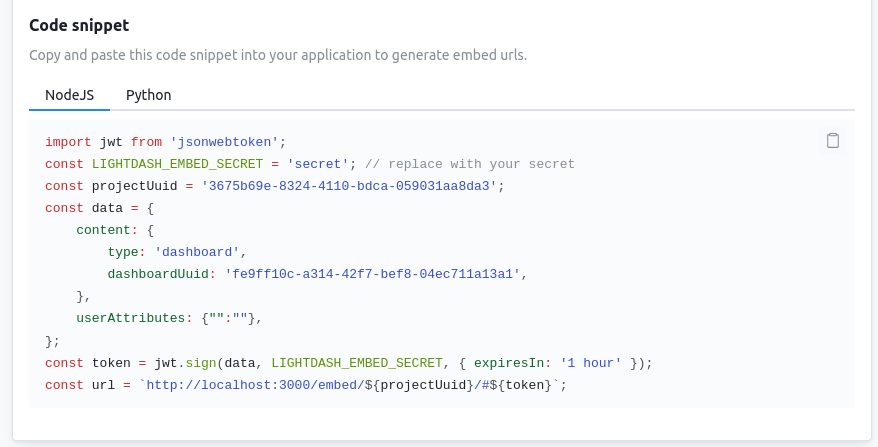
Although you can generate URLs directly from Lightdash with a long expiration, it is recommended to generate your own JWTs in your backend with a short expiration using yoursecret to make sure people can’t be using embed URLs outside your app.
Lightdash provides code snippets you can copy and use in your app to generate valid embed URLs:
Next steps
Embedding dashboards
Complete guide to dashboard embedding with all configuration options
Embedding charts
Learn how to embed individual charts for focused displays
Embedding AI agents
Let customers chat with their data inside your application
Embedding data apps
Embed a standalone data app in an iframe, no dashboard required
User attributes & row-level security
Show different data to different users with user attributes
iframe embedding reference
URL patterns and HTML embedding details
React SDK reference
Seamless React integration with advanced features
Embedding API reference
Complete JWT structure and configuration options
Common questions
Do I need a Lightdash account to view embedded content?
No, embedded Lightdash content is available to view by anyone (not just folks with a Lightdash login). So, for example, you could embed a dashboard in your product, and anyone who has access to your product would have access to that dashboard. No need to login to Lightdash. You can also share a dashboard URL directly with someone outside your organisation — they just open the link in their browser. We make sure that the links are secure and have a set expiry time that you pick.How does security work?
Embedded content is secured using JWT (JSON Web Tokens) that you sign with your embed secret. The token includes:- What content to display (dashboard or chart)
- Expiration time
- User attributes for row-level filtering
- Permissions for interactivity (filters, exports, etc.)