Embedding is available to all Lightdash Cloud users and Enterprise On-Prem customers. Get in touch to have this feature enabled in your account.
Overview
This document provides complete API reference for JWT structure and configuration options used across all embedding and sharing methods. Lightdash supports three ways to share embedded content:- Shareable URL — Generate a link that anyone can open directly in their browser, no iframe or SDK needed. Ideal for sharing dashboards with external users like clients or partners.
- iframe embedding — Embed dashboards inside your own web pages using a standard
<iframe>tag. - React SDK — Embed dashboards and charts in React/Next.js apps with full programmatic control.
- iframe embedding reference - URL patterns, HTML embedding
- React SDK reference - React components, props, TypeScript
Known limitations
- Embedding works for dashboards, charts, AI agents, the metrics catalog, and data apps. To embed explores, use the
canExploreflag in a dashboard or metrics catalog token. - The Filter dashboard to option when clicking on individual chart segments will not work on embedded dashboards.
Embed secret
The embed secret is used to generate JWTs for embedding content. This secret acts like a password that encrypts and signs your tokens.
Generate new secret. If you do this, all previously generated embed URLs will be invalidated immediately.
JWT structure
All embedding methods use JWTs to authenticate and configure embedded content. The token structure includes three main parts:Common fields
All tokens share these fields:Dashboard token
For embedding dashboards with multiple tiles, filters, and interactive features.Chart token
For embedding individual saved charts with minimal UI:Chart tokens use
contentId (the saved chart UUID) instead of dashboardUuid. Chart embeds are scoped to the specific chart and cannot access other content.AI agent token
For embedding a Lightdash AI agent so users can chat with their data from inside your app. See Embedding AI agents for the full walkthrough.AI agent tokens are scoped to a single agent. A token issued for one
agentUuid cannot be used to access another agent, and dashboard or chart tokens are rejected on AI agent routes. The agent can only read dashboards and saved charts from writeActions.spaceUuid, and saves new charts back into that same space.Metrics catalog token
For embedding the project metrics catalog so embedded users can browse metrics and, optionally, continue into Explore. See Embedding the metrics catalog for the full walkthrough.Metrics catalog tokens only authorize the metrics catalog surface (and, when
canExplore is true, the embedded Explore launched from a metric). Dashboard, chart, AI agent, and data app tokens are rejected by the metrics catalog routes, and metrics catalog tokens are rejected on other embed routes.Data app token
For embedding a data app as standalone content in an iframe (no dashboard). See How to embed data apps for the full guide.A
dataApp token authorizes only the named app. It cannot render any other data app, chart, or dashboard, even if that content is on the embed allowlist. Interactivity options like canExportCsv, canExplore, and dashboardFiltersInteractivity do not apply to dataApp tokens.API access token
Use an API access token when your host app needs to call Lightdash APIs through the React SDK, for example to list spaces, dashboards, and charts withLightdash.useLightdashContent.
API access tokens do not embed a specific dashboard or chart. They let the React SDK call supported Lightdash API endpoints with the permissions of
serviceAccountUserUuid.- API access tokens must be generated server-side with your embed secret.
- API access is authorized through the service account. The token can only list or read content that the service account can access.
- A space UUID passed to an API hook is a filter, not a permission grant.
- API access tokens cannot perform embed write actions. Use an embed token that supports
writeActionswhen embedded users need to save charts or dashboards.
Interactivity options reference
Dashboard filters interactivity
Controls whether users can interact with dashboard filters.enabled: 'all'- All dashboard filters are visible and interactiveenabled: 'some'- Only filters listed inallowedFiltersare interactiveenabled: 'none'- Filters are applied but not visible or editablehidden: true- Filters are configurable at runtime, but UI is hidden (works with ‘all’ or ‘some’)canAddFilters: true- Render an Add filter button so viewers can add temporary filters over any filterable field in the dashboard’s explores. Only effective when filter interactivity is enabled (enabled: 'all', orenabled: 'some'with a non-emptyallowedFilters). Viewer-added filters live in session state and the temp-filter deep-link parameter — a fresh embed URL starts clean. JWTs without this field behave exactly as before (button hidden). Metric filters in the picker still require themetric-dashboard-filtersfeature flag on the org.
All filters available as interactive:
All filters configured on the dashboard will be shown in the embedded dashboard and interactive.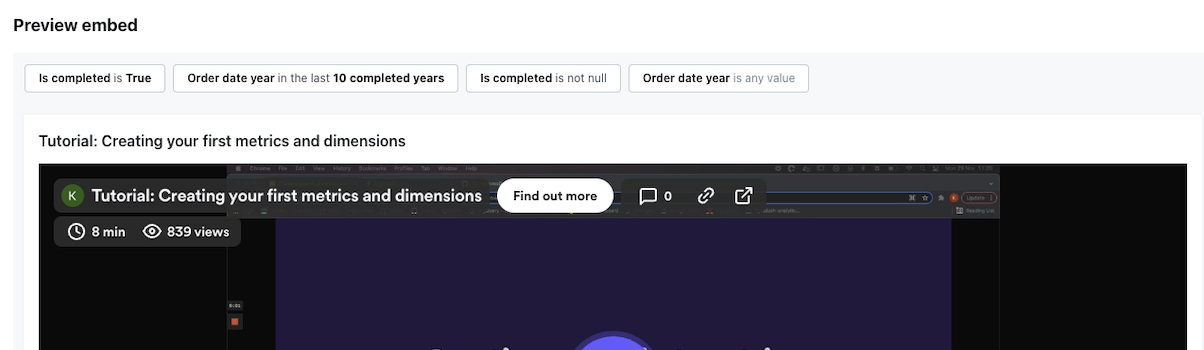
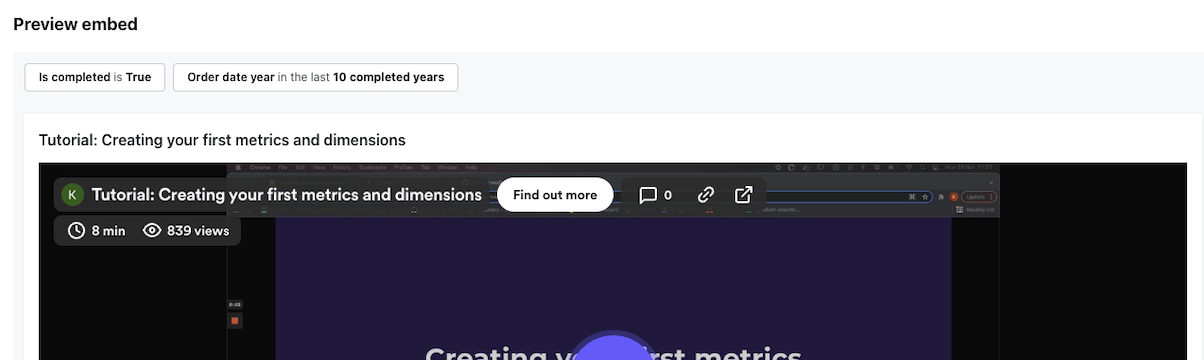
Specific filters only
Only the filters you select will be shown in the embedded dashboard for users to interact with. All dashboard filters are still applied.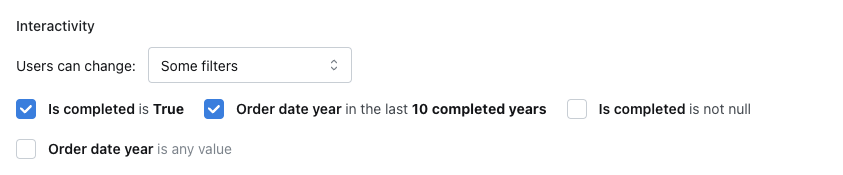
Filters applied but hidden:
Filters are applied to the dashboard, but users cannot see or modify them.
Let viewers add their own filters:
SetcanAddFilters: true to render an Add filter button in the embedded filter bar. Viewers can add temporary filters against any filterable field in the dashboard’s explores. These filters live only in session state and the temp-filter deep-link parameter — reopening the embed URL clears them, and they are never saved back to the dashboard.
enabled: 'all', or enabled: 'some' with a non-empty allowedFilters). Omitting canAddFilters preserves the existing behavior (button hidden).
Parameter interactivity
Controls whether users can modify dashboard parameters.Export options
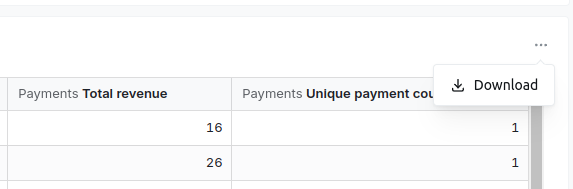
Control what users can export from embedded content.- Enables “Download CSV” in chart tile menus
- Each chart can be exported individually
- Exports the data shown in the visualization
- Enables “Download as image” in chart tile menus
- Exports charts as PNG files
- Captures current chart state
- Enables print icon in dashboard header
- Exports entire dashboard page as PDF
- Includes all visible tiles

Date zoom
Allows users to zoom into time-series data by changing granularity.Explore from here
Enables navigation from dashboard charts to the explore view.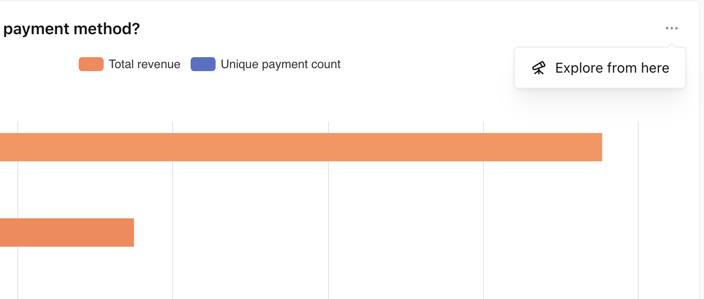
- Modify dimensions and metrics
- Apply different filters
- Change chart types
- Run custom queries
- Save charts
- Share results
- View SQL
View underlying data
Allows users to view the raw data table behind visualizations.canExportCsv for that).

View data apps
Allows data app tiles on an embedded dashboard to render and run their metric queries.canViewDataApps grants the embed JWT the additional permissions a data app needs to mint a preview token and execute its queries. User attributes and SQL filters on the JWT still apply, so row-level access controls are enforced inside the data app exactly as they are on chart tiles.
When this option is off (the default), data app tiles on the dashboard render as a placeholder and no queries run. Turn it on when you trust the embed audience to see the data the app can request and you want the tile to behave the same as it does in Lightdash.
Write actions
Write actions let embedded users save changes back to Lightdash. When the JWT includes awriteActions claim, Lightdash uses a configured actor (a service account or a regular user) to perform the write on behalf of the embedded viewer, and forces created or edited content into a specific destination space.
With writeActions, embedded users can:
- Save a new chart from the embedded Explore view.
- Edit an existing embedded dashboard with the React SDK — rename it, add saved charts from the allowed space, and move or resize tiles. See
Lightdash.Dashboardedit mode. - Create a brand-new dashboard with the React SDK using
Lightdash.DashboardBuilder.
spaceUuidis required and must belong to the same project as the embed.- You must provide exactly one of
serviceAccountUserUuidoruserUuid. - The actor must belong to the same organization as the project and (for
userUuid) be active. - The actor’s permissions and space access still apply — the embed inherits whatever the actor can do in that space.
- When editing or building a dashboard, add-tile content is filtered to
spaceUuid, so embedded users can only pick saved charts from the allowed space. - Dashboards and charts created or edited through write actions are normal Lightdash objects — they can be viewed and edited from Lightdash and vice versa.
- Newly saved charts are not added to the embed allowlist automatically. They behave like normal private content and won’t be re-embeddable unless you add them explicitly.
- API access tokens do not support write actions. They are for supported API reads, such as listing content through the React SDK.
Configure write actions
Configure write actions from Settings → Embedding by toggling Enable write actions and selecting:- Service account — the Lightdash actor that performs the write. You can pick an existing service account or create one inline. Only service accounts with a writable role (Admin, Developer, Editor, or an equivalent custom role) can be used.
- Space for created content — the destination space. You can pick an existing space or create one inline.
writeActions claim with the selected service account user UUID and space UUID. Copy that snippet into your backend token-generation code.
Using a service account
Service accounts are the recommended actor for embed write actions because their attribution stays consistent regardless of which embedded user is viewing.Using a regular user
If you want saved charts attributed to a specific Lightdash user (e.g. an internal owner), useuserUuid instead. The user must be active in the organization.
Allowed content
Allowed dashboards
Only dashboards added to the “allowed dashboards” list can be embedded.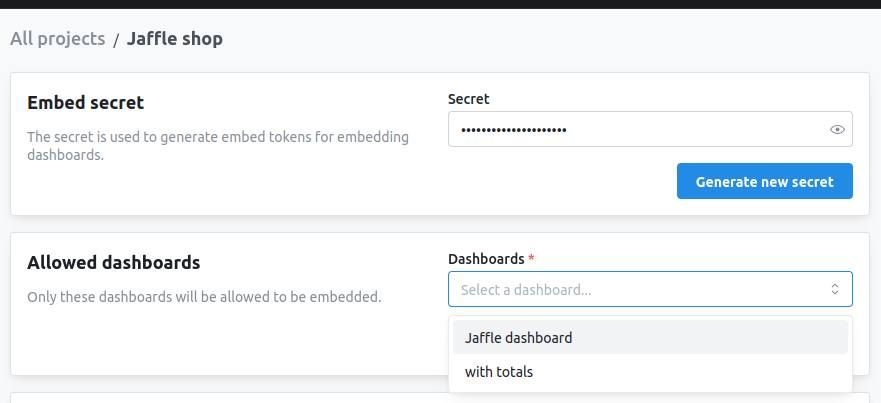
Allowed charts
Charts must be explicitly allowed for embedding. Add charts to the allowed list in your embed settings.Chart embeds provide more granular access control than dashboards. Each chart must be individually allowed.
Default allow settings via environment variables
For self-hosted deployments, you can configure new project embeds to allow all dashboards and/or charts by default using environment variables:
When these are set to
true, new project embeddings will automatically have all dashboards or charts allowed without needing to manually configure the allowed content list.
See the environment variables reference for the complete list of embedding-related configuration options.
User attributes
User attributes enable row-level and column-level security by filtering data based on user properties. Column-level security is especially useful when embedded users can Explore from here, since it ensures restricted fields stay hidden in the explore view as well.userAttributes field drives both row-level and column-level access controls, the same ones available to Lightdash account users:
- Row-level filtering: attributes are substituted into any
sql_filteron the dbt model (e.g.${lightdash.attributes.tenant_id}), restricting which rows the embedded user can query. - Column-level filtering: attributes are matched against
required_attributesandany_attributesrules on dimensions, metrics, and tables. Fields whose rules the embedded user’s attributes don’t satisfy are stripped from the explore entirely: they don’t appear in the field list, can’t be queried, and return Forbidden if requested directly. Metrics derived from a hidden dimension are hidden too.
User metadata
Pass user information to track who’s viewing embedded content.externalId, Lightdash automatically generates one based on the embed token.
Example:
Token expiration
JWTs should have short expiration times for security. Use your JWT library’s expiration parameter:- Development/testing:
'24h'or'1 week' - Production dashboards:
'1h'to'4h' - Production charts:
'24h'(if used in public pages) - Explore sessions:
'4h'to'8h'(longer for analysis sessions)
Code examples
Node.js
Python
Ruby
Java
Security best practices
Never expose embed secret
Generate tokens server-side only
Use short-lived tokens
Validate user ownership
Use user attributes for row- and column-level security
See also
iframe embedding reference
URL patterns and HTML embedding details
React SDK reference
Component API for React integration
Embedding quickstart
Get started with embedding in 5 minutes
User attributes
Implement row- and column-level security