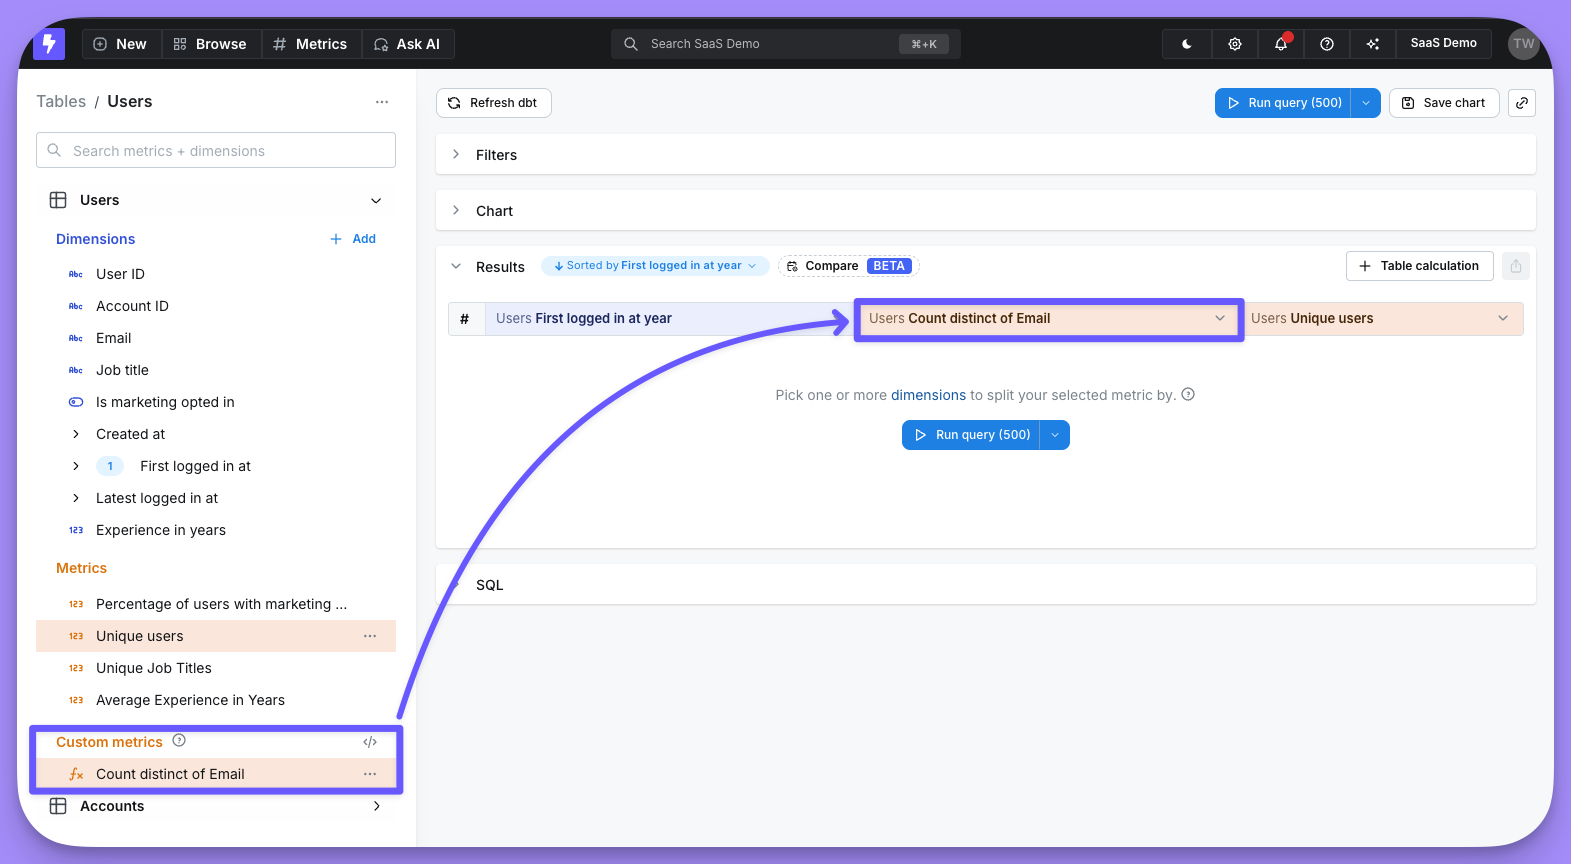
Custom metrics
Custom metrics are only saved in the chart they’re used in and will not be saved in the list ofmetrics available if you open the same Table to build a new chart. Metrics written to your dbt project (or YAML metrics) are reusable by everyone in your project and will always show up in the side bar of available metrics for a Table. We recommend writing back custom metrics that you’re using/creating frequently so they become reusable, governed and available for everyone else to build from.
To create a custom metric:
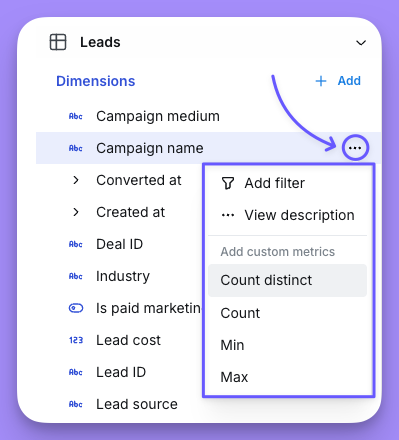
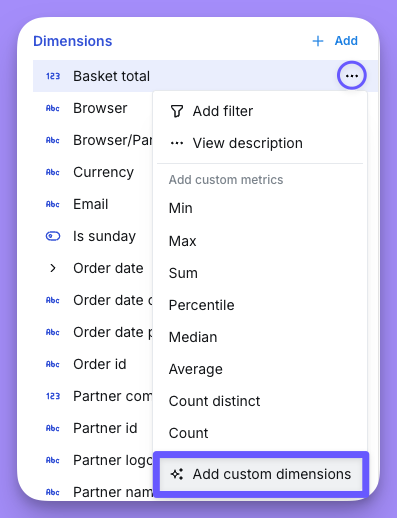
- Click on the dimension’s three-dot
optionsmenu - Click on one of the options available (e.g.
Count Distinct) - Confirm your changes
custom metrics space in your sidebar.
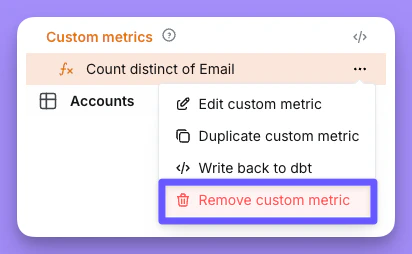
options menu and hit Remove custom metric
Custom metric types
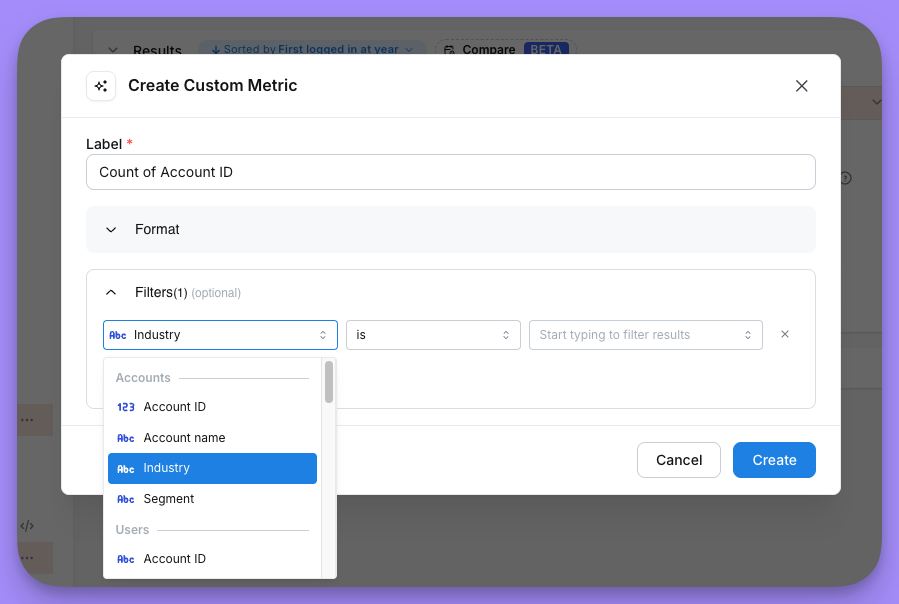
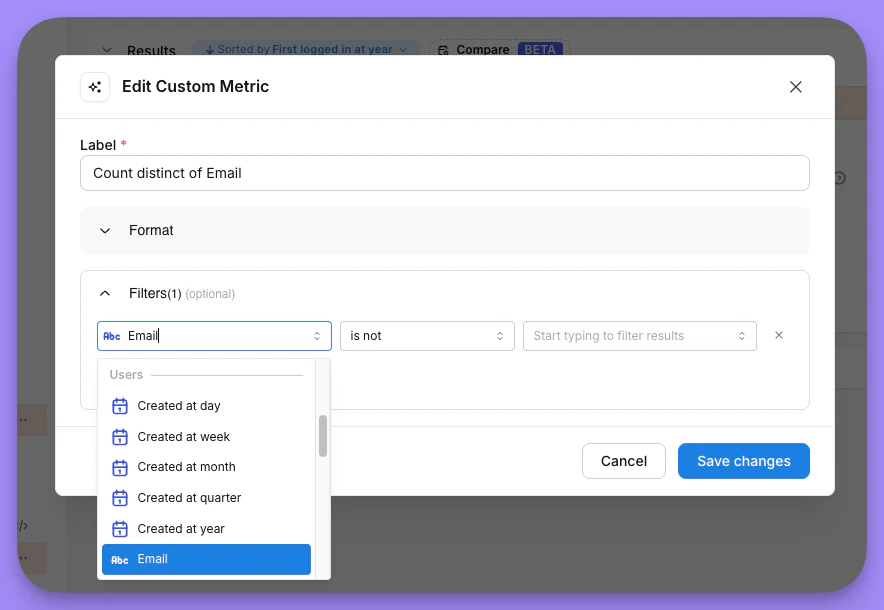
To learn more about the custom metric types, read the metrics reference documentation here. Only aggregate metric types are available as custom metrics.Adding filters to your custom metric
You can add filters to limit the rows included in your metric aggregation. You can add filters when:- You create a custom metric:
- You edit an existing custom metric:
Custom dimensions
Dimensions are used to group results in your query, or filter values from your results. Sometimes, a group or filter that you need hasn’t been added to your project, so you can use a custom dimension to create a grouping or filter on-the-fly. These dimensions are not saved to the table permanently. They are only available in the saved chart or query that they were created in.Using custom dimensions in table calculations
You can reference custom dimensions in your table calculations without needing to qualify them with a table name. Simply use the custom dimension name directly in your calculation formula, just as you would with any other dimension.Bin
Bins are used to split out values of a numeric dimension into custom sets of ranges. Bins can only be used with dimensions that are numeric. Fixed bins (fixed number and fixed width) will update automatically if the min or max values of your dimension change. To create a bin custom dimension, you just need to:- Click on a dimension’s three-dot
optionsmenu - Click on the
binoption - Setup + create your dimension
custom dimensions space in your sidebar.
Custom SQL
Custom SQL dimensions let you pull in new data directly from your database, which means they can sometimes be used to bypass access restrictions. Only users with admin or developer permissions can create custom SQL dimensions — or, on Enterprise plans, any user assigned a custom role that includes the Manage Custom Fields scope (Create and edit custom dimensions). Other users will not see authoring options for custom SQL dimensions, but can still use existing ones in their queries.Security note:
Custom SQL dimensions can query any data from your warehouse, so they should only be created by trusted users (admins and developers). For most cases, it’s safer and more reusable to define dimensions in your dbt files. If you want to make a custom SQL dimension reusable, use the dbt write-back feature to move it into your dbt project.
Custom SQL dimensions can query any data from your warehouse, so they should only be created by trusted users (admins and developers). For most cases, it’s safer and more reusable to define dimensions in your dbt files. If you want to make a custom SQL dimension reusable, use the dbt write-back feature to move it into your dbt project.
When to use custom SQL dimensions
- Quickly create new groupings or calculations that aren’t yet available in your project.
- Reference other dimensions from the main table and joined tables in your explore.
- Prototype new logic before moving it to your dbt project.
When not to use custom SQL dimensions
- If you need the dimension to be reusable or governed for your whole team.
- If you want to ensure consistent access control and security.
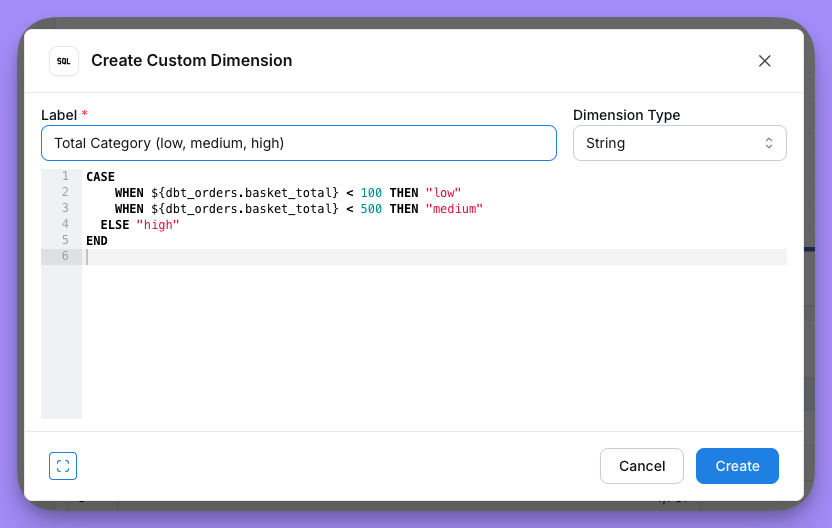
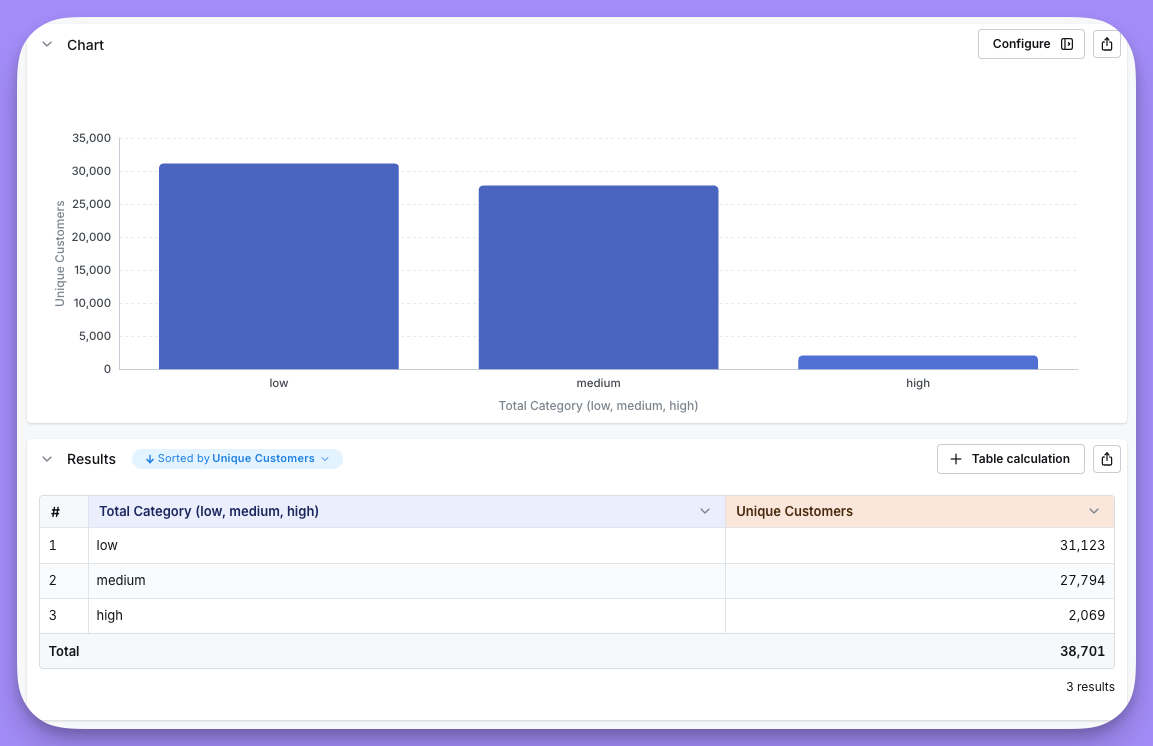
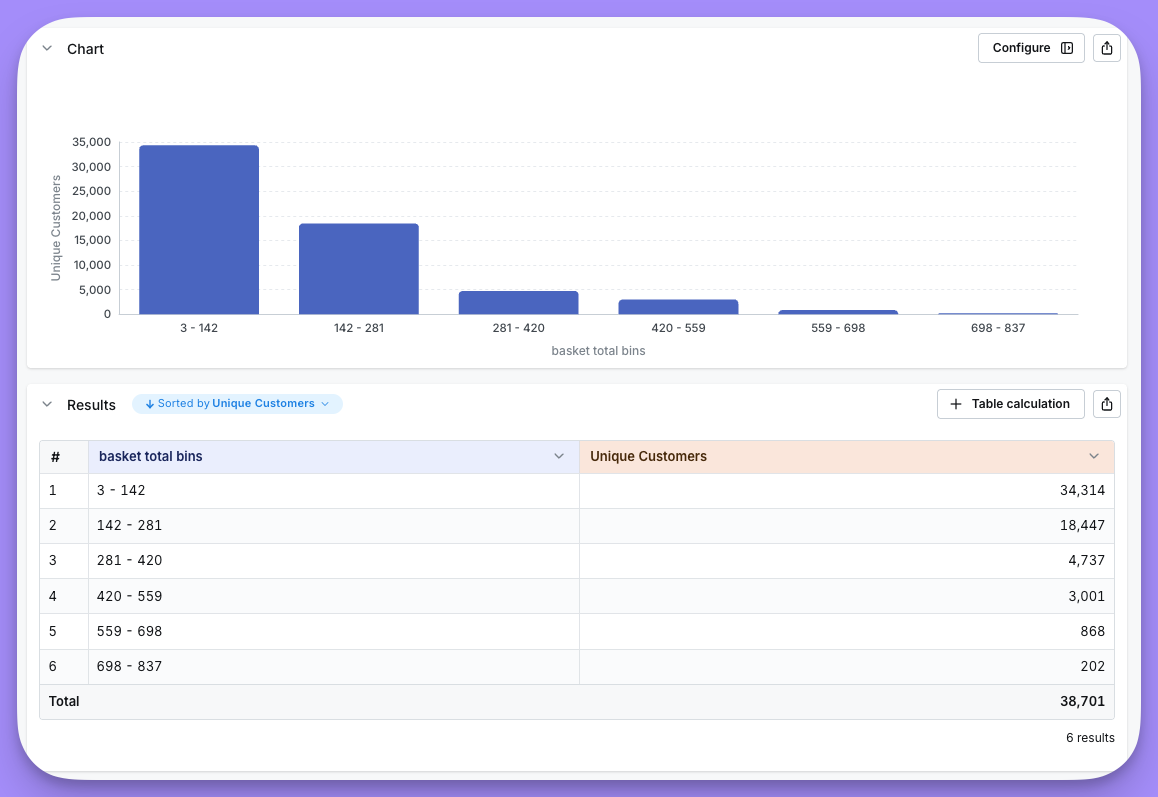
Example: Categorizing order totals
In this example, let’s explore theorders table and create a custom dimension that categorizes my orders’ totals into three categories: low, medium, and high.
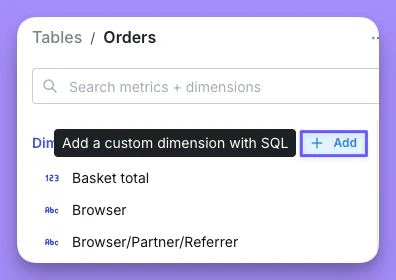
You can click on the button to add a custom dimension on the sidebar: