
Tag the dbt models you want to appear in Lightdash. We strongly recommend adding a dbt tag (e.g.
lightdash) to the models you want to expose as Tables, and configuring your project to only show models with that tag. See Limiting the Tables in Lightdash using dbt tags below.What are Tables?
Tables are the starting point to any data exploration in Lightdash - they’re the data in Lightdash that you can query. The beauty of Lightdash is that we’re pretty well synced with your dbt project. So, in Lightdash, Tables actually come from dbt models that have been defined in your dbt project’s YAML files. If your dbt model has been defined in a YAML file, it will appear in Lightdash as a Table.Adding Tables to your Lightdash project using the CLI
Watch this video, or keep reading for a step-by-step guide on how to add Tables to your Lightdash project using the Lightdash CLI.dbt run. It will also document all of the columns in your new model in a schema.yml file.
For example, if you just created a new orders.sql model and you run lightdash dbt run -s orders, an orders.yml file will be generated in your dbt project with all columns documented, like this:
Next, preview your changes
You’ll be using thelightdash preview command for this step.
Once you’ve generated your Tables and YAML files in dbt, you can test them out in a Lightdash preview environment.
Developer previews are temporary Lightdash projects where you can safely experiment with your metrics, dimensions and charts without affecting your production project.
So, let’s spin up a developer preview and check out our changes. In your terminal, run the commands:
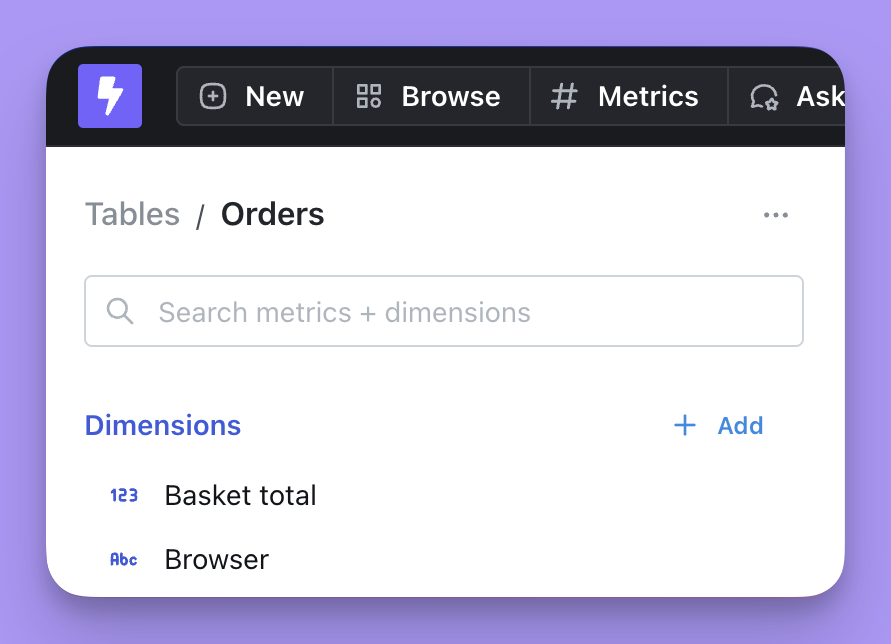
Orders and each column will appear as a dimension:
Last, deploy changes to production
If you’re working with a version controlled project, make sure to merge your changes into production. If you’re working with a local project that isn’t version controlled, you don’t need to worry about syncing your changes. Once you’ve merged your changes, you’ll want to deploy them to production. To do this, run this command in your terminal from your dbt project:Lightdash’s deploy command will deploy using your default dbt target unless you specify to use a different target.For example, if you’ve set up a developer profile where it targets a dev dataset (like
dbt_khindson.my_model_names), then you’ll need to pass the production target in your lightdash deploy command. Something like: lightdash deploy --target prod.Configuring which Tables appear in your Lightdash project
Sometimes, there are models in our dbt project with YAML files that we might not want to appear in Lightdash (staging tables, I’m looking at you 👀). So, we’ve made it possible for you to configure which Tables you want to appear in Lightdash.
To get to your table settings:
- Click the ⚙️ gear icon in the top-right navigation bar
- Choose Project settings
- Click on Tables configuration in the left sidebar (if you don’t see it you might not have access)
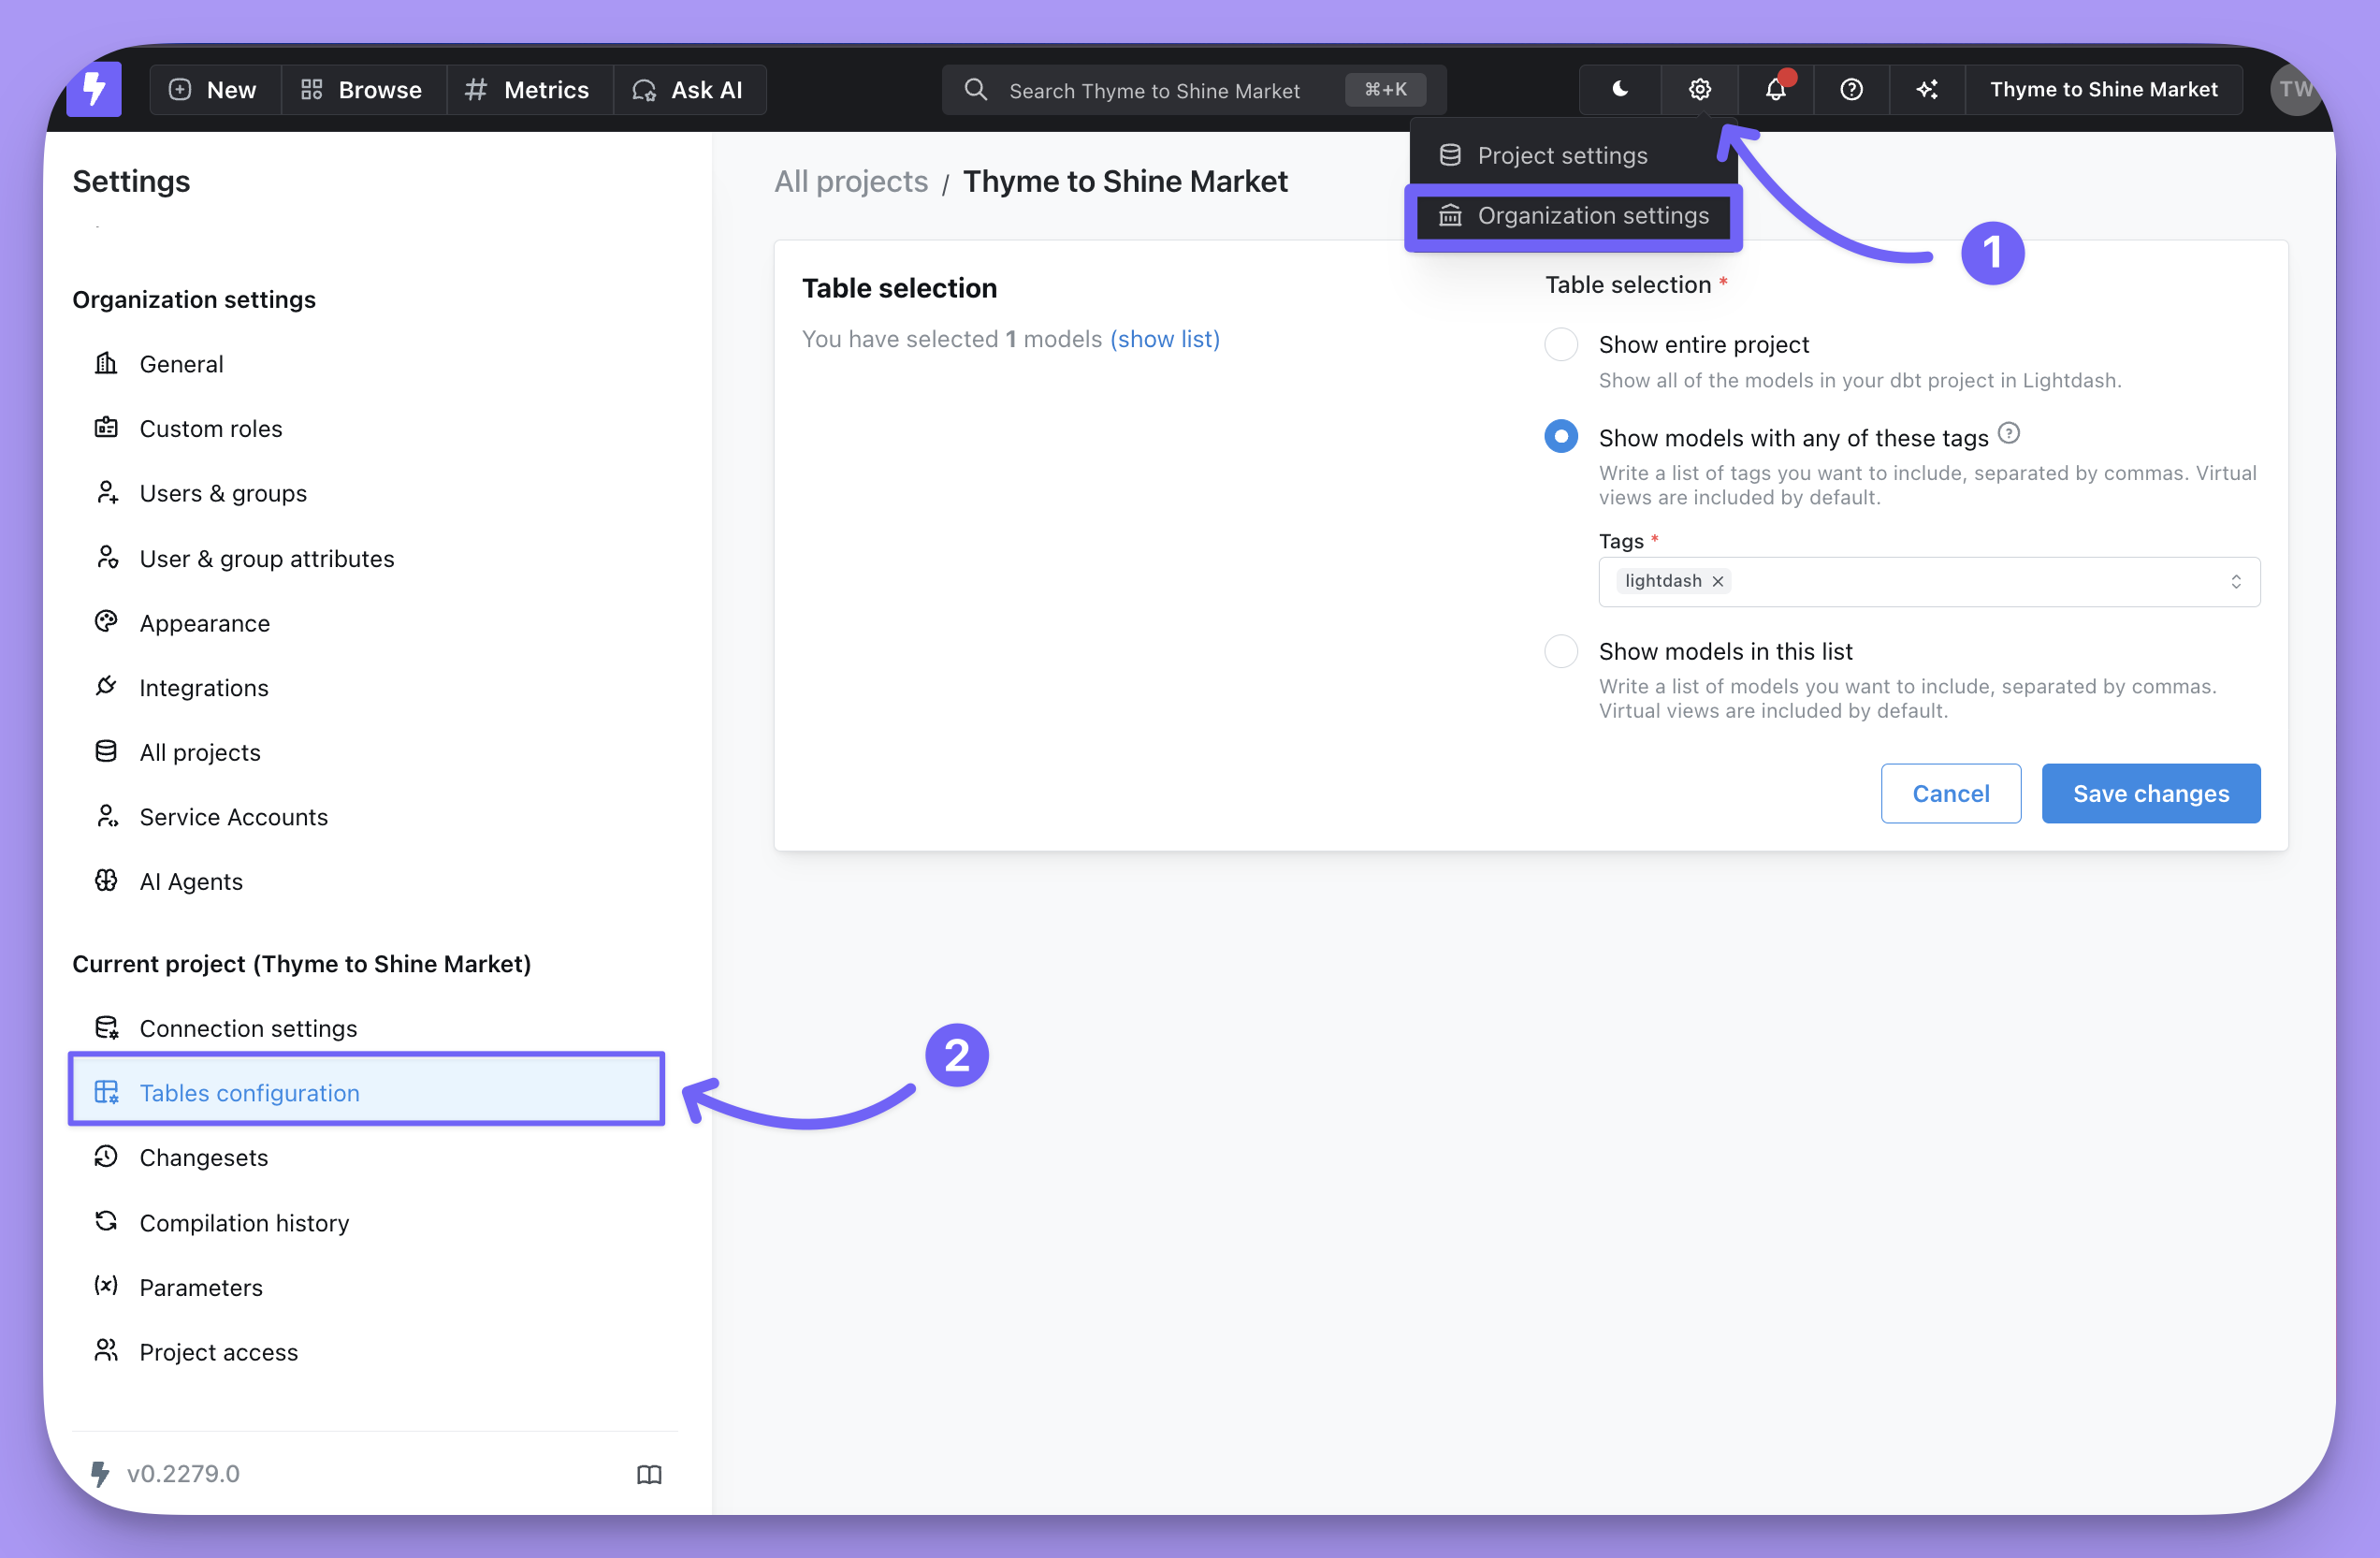
- Show entire project: I hope this one isn’t too much of a surprise. If you select this option, it shows all of the models with YAML files in your dbt project in Lightdash.
-
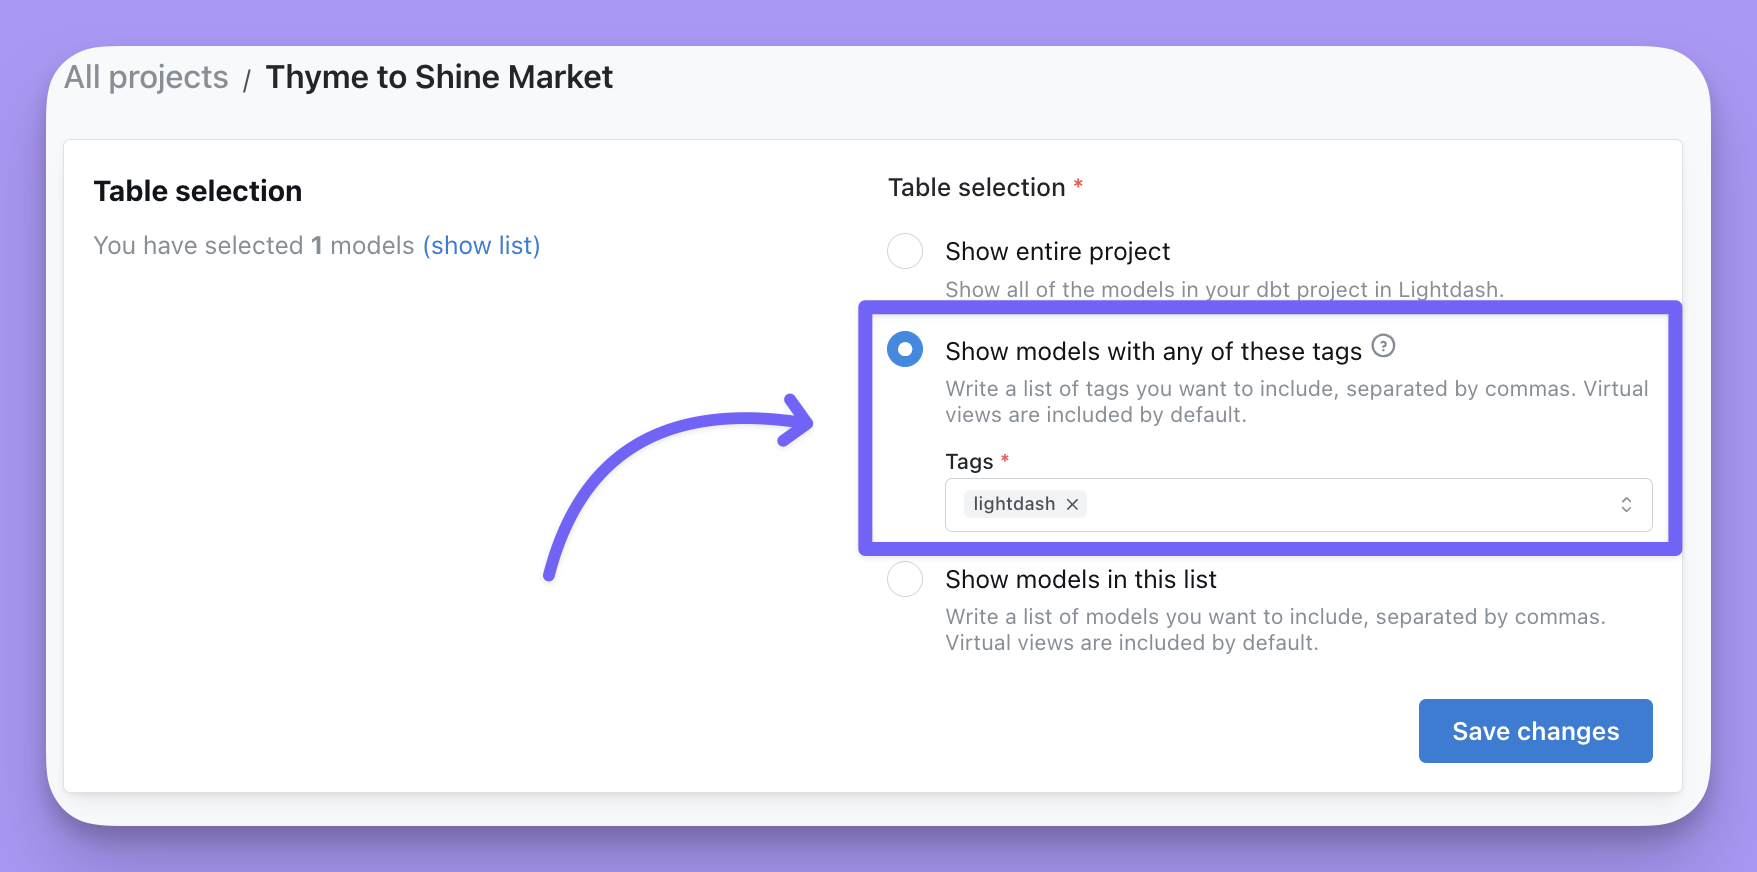
Show models with any of these tags: This option depends on dbt tags. You can learn more about using tags to manage your project here. If you already have a specific model tag (or tags) you want to limit Lightdash to using, this is where you can add them in. For example, all of our production models have the tag
prod, so we’ve configured our Tables using that tag. - Show models in this list: If you’re not keen on using tags then you can manually select the models you want to include as Tables in your Lightdash project using this option.
Changing your Table’s labels, adding joins, and more
Once you’re happy with which Tables are showing up in Lightdash, you can add configurations to your Tables like:-
Changing how the Table name appears in Lightdash (using the
labelsconfig) -
Accessing dimensions and metrics from multiple tables in an explore by joining your Table to other Tables (using the
joinsconfig)
Limiting the Tables in Lightdash using dbt tags
There may be a specific set of models that you want include as Tables in Lightdash. If this is the case, we recommend using dbt tags to tag models. You can use sets of existing tags, or you can create a new Lightdash-specific tag. You can add tags to your YAML file like this:- dbt v1.9 and earlier
- dbt v1.10+
- Lightdash YAML
Advanced tips for managing Tables
One model per YAML file
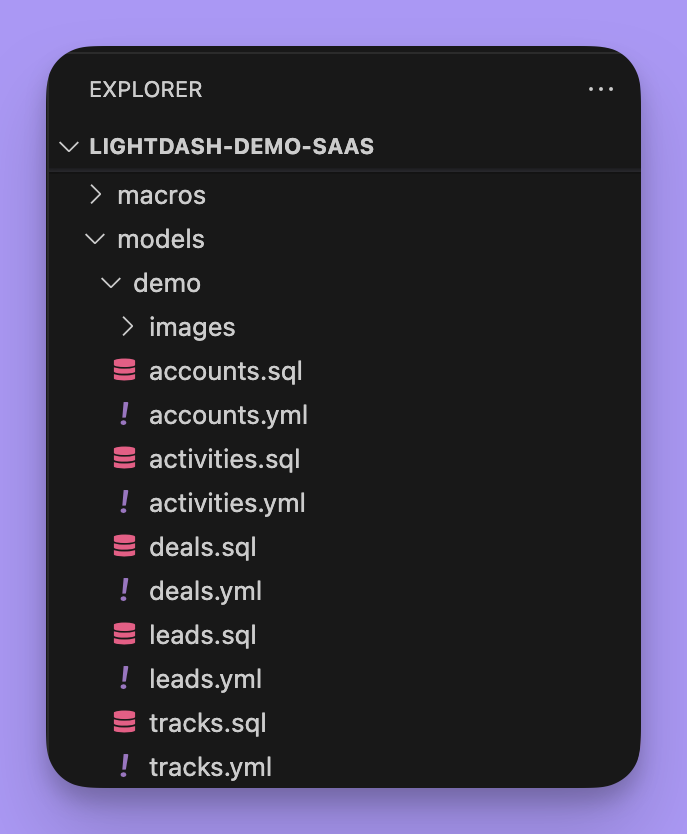
We recommend structuring your dbt project with one .yml file per model (or .sql file). We’ve found that this makes it easier to navigate through your .yml files and easier to manage your dbt models, especially as your project becomes bigger. Here’s an example of our dbt project at Lightdash too see what that looks like in practice:- We have one
.sqlfile per model (these are the files where all of our models’ business logic sits) - We have one
.ymlfile per model (these are the files where all of your Tables’ configuration sits)
schema.yml details for all of their models in a single YAML file at the directory level, and that’s totally fine - it will still work with Lightdash.
But, like we said just above, if you’re trying to decide how to setup your dbt project, we’d recommend having one YAML file per model.
Select the models you want to run using dbt selection syntax
Thelightdash dbt run command supports dbt model selection syntax to generate YAML files for a group of models. This means you can use tags or other model selection syntax to specify which models you want to generate dimensions for in your dbt project.