Scheduled deliveries
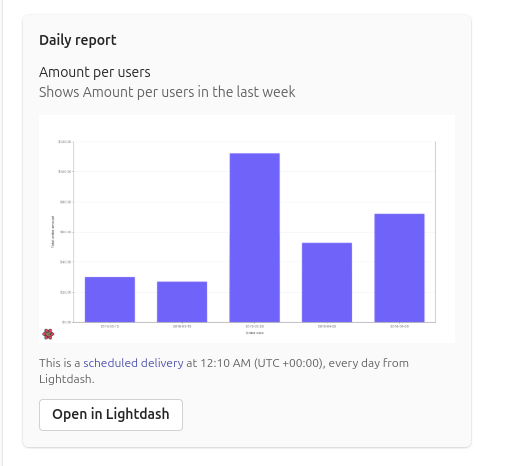
Scheduled deliveries let you send a dashboard or saved chart, and their results to people via email or Slack - even to people who don’t have an account in your Lightdash instance.
If your Lightdash organization has Slack set up, you can create or select an existing saved chart or dashboard, add a scheduled delivery to it, and tell Lightdash when you’d like the send out your update. You can set up as many scheduled deliveries to a saved chart or dashboard as you like, and if you make any changes to the content, Lightdash will update the scheduled deliveries the next time they’re sent.
For security reasons, the delivered files expire after 3 days.
This means old emails or Slack shares will have broken images and there is not an option to retrieve them. If you want to keep the sent files, it’s best to download them from the scheduled delivery.
Enabling scheduled deliveries
Emailed scheduled deliveries are available on all Lightdash Cloud plans.
To set up Slack, an organization admin will have to add the Slack integration.
Creating a scheduled delivery
Only users with admin, developer, editor or interactive viewer roles can create and edit scheduled deliveries.
Note that the interactive viewer role can only create and edit their own scheduled deliveries. Other roles have edit access over all scheduled deliveries.
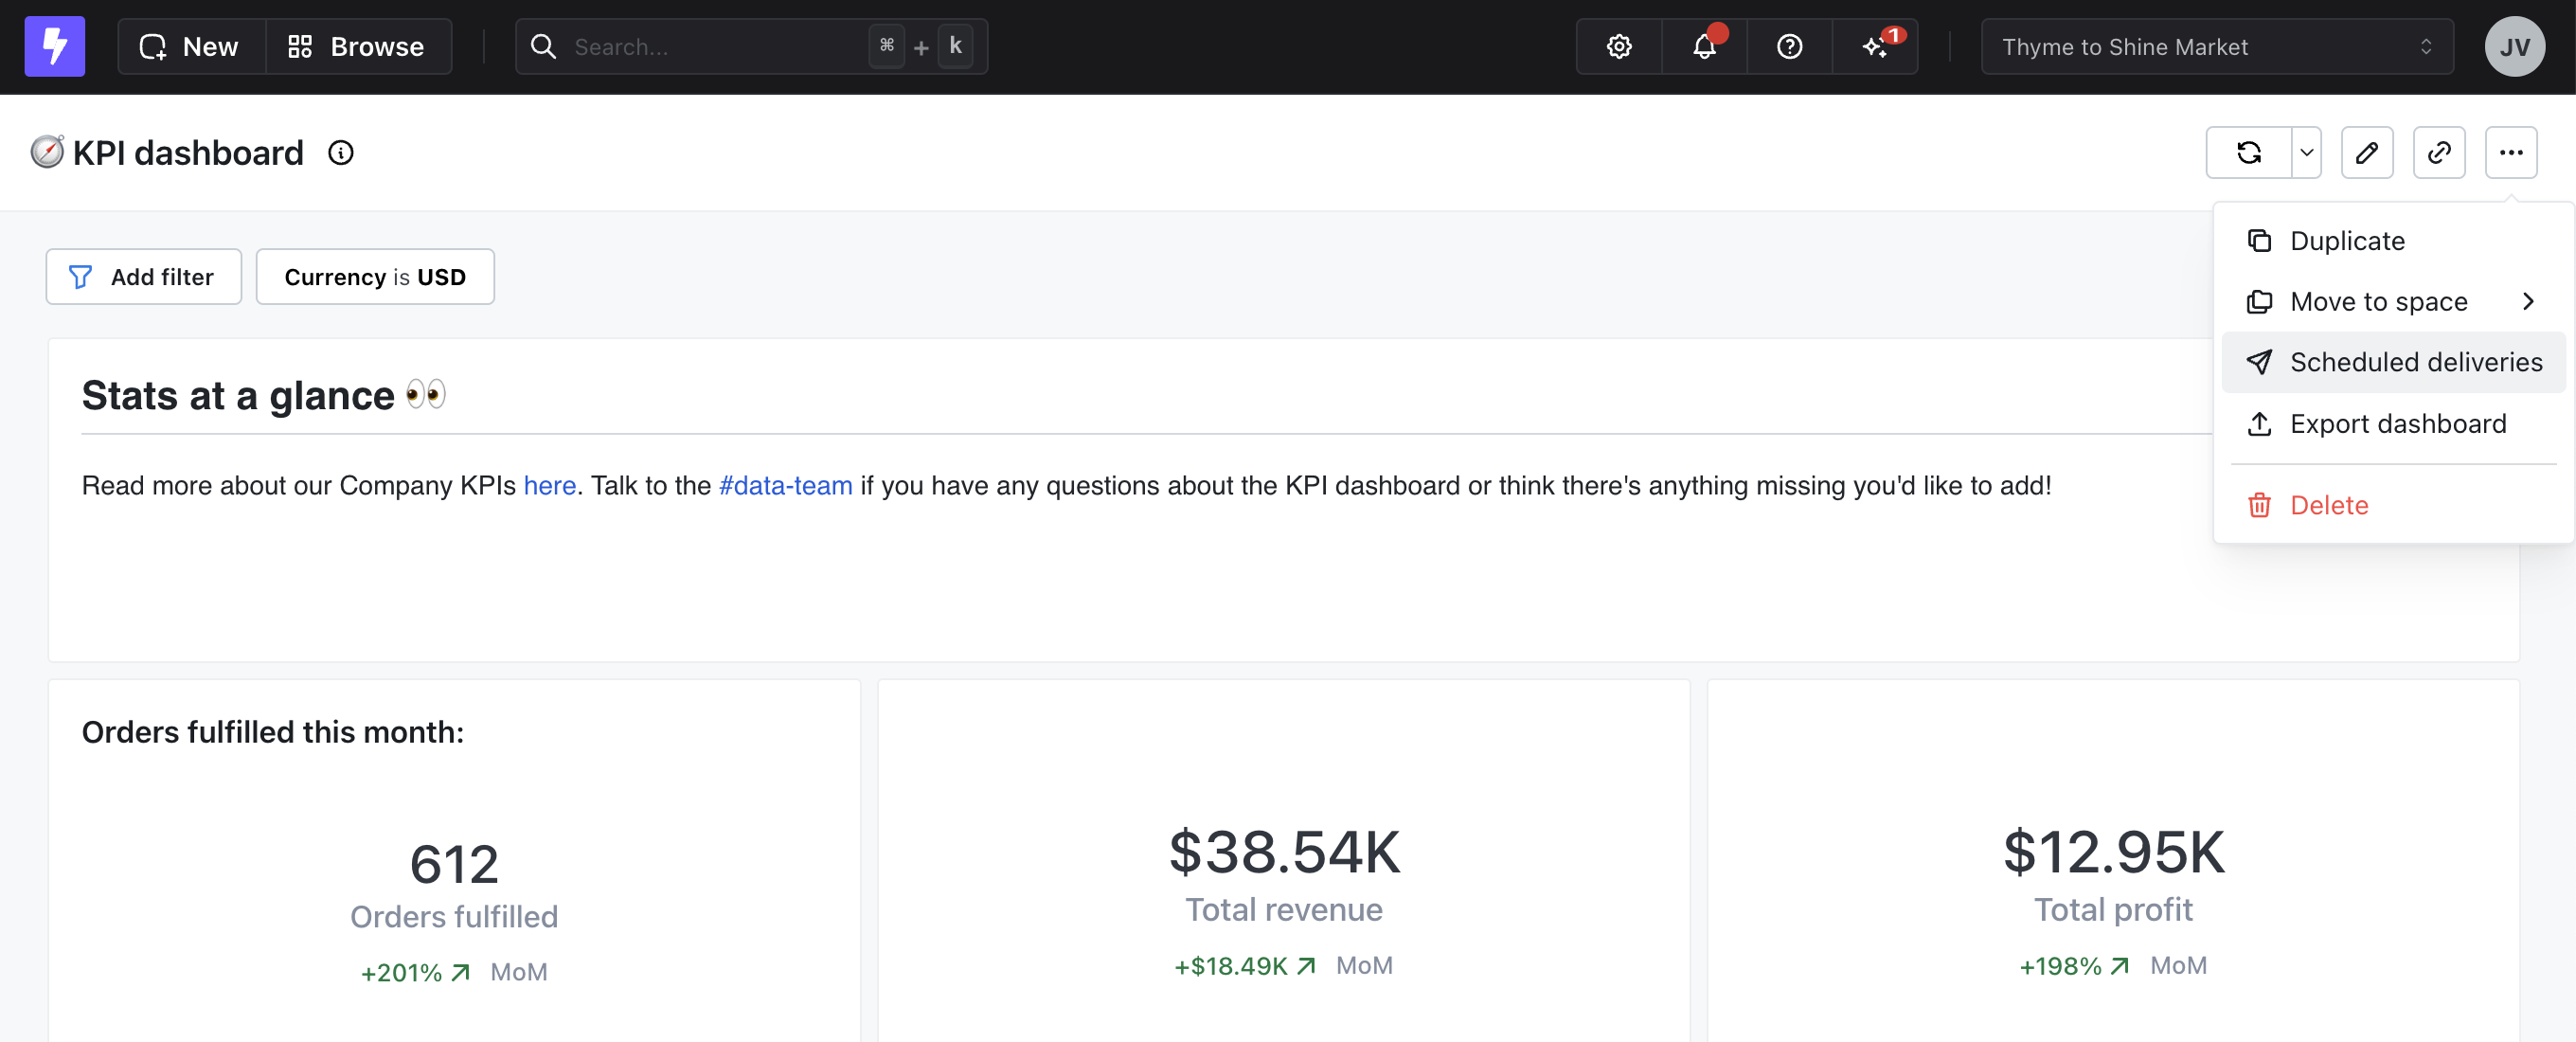
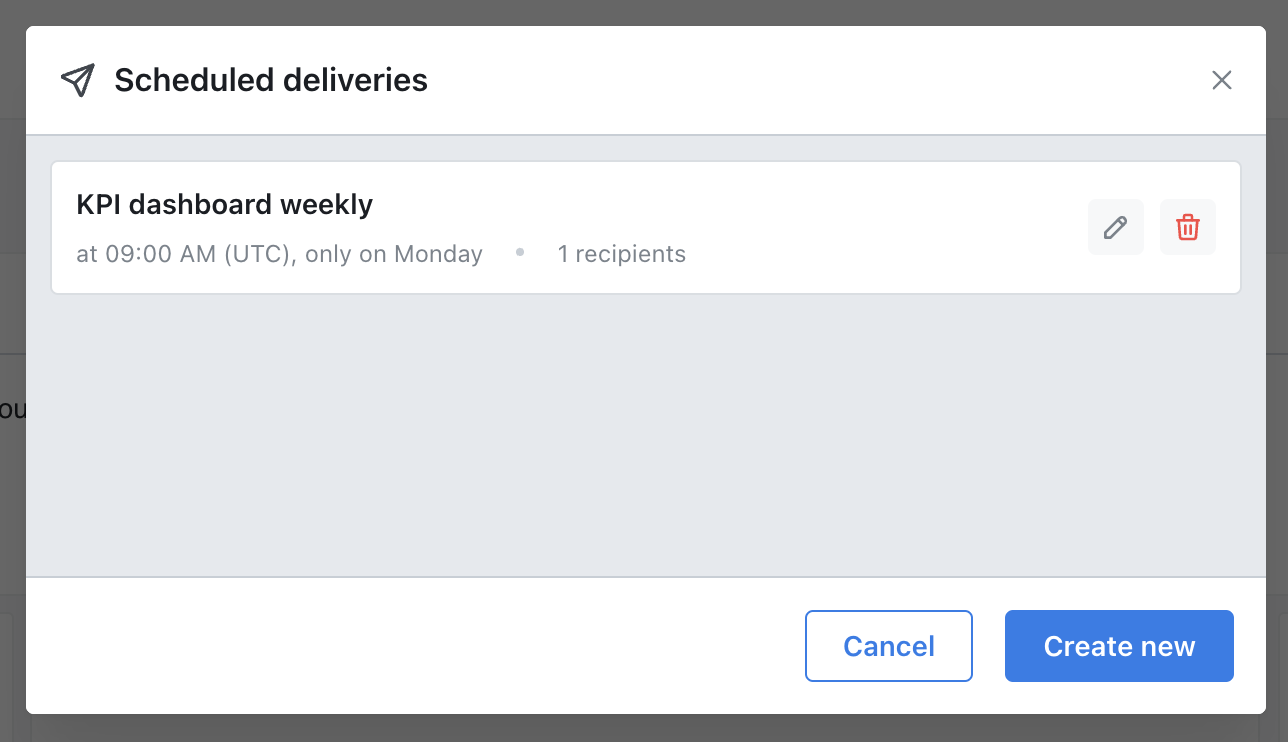
To create a scheduled delivery, click on the three-dot menu in the top-right corner of your chart or dashboard, then click on scheduled deliveries.
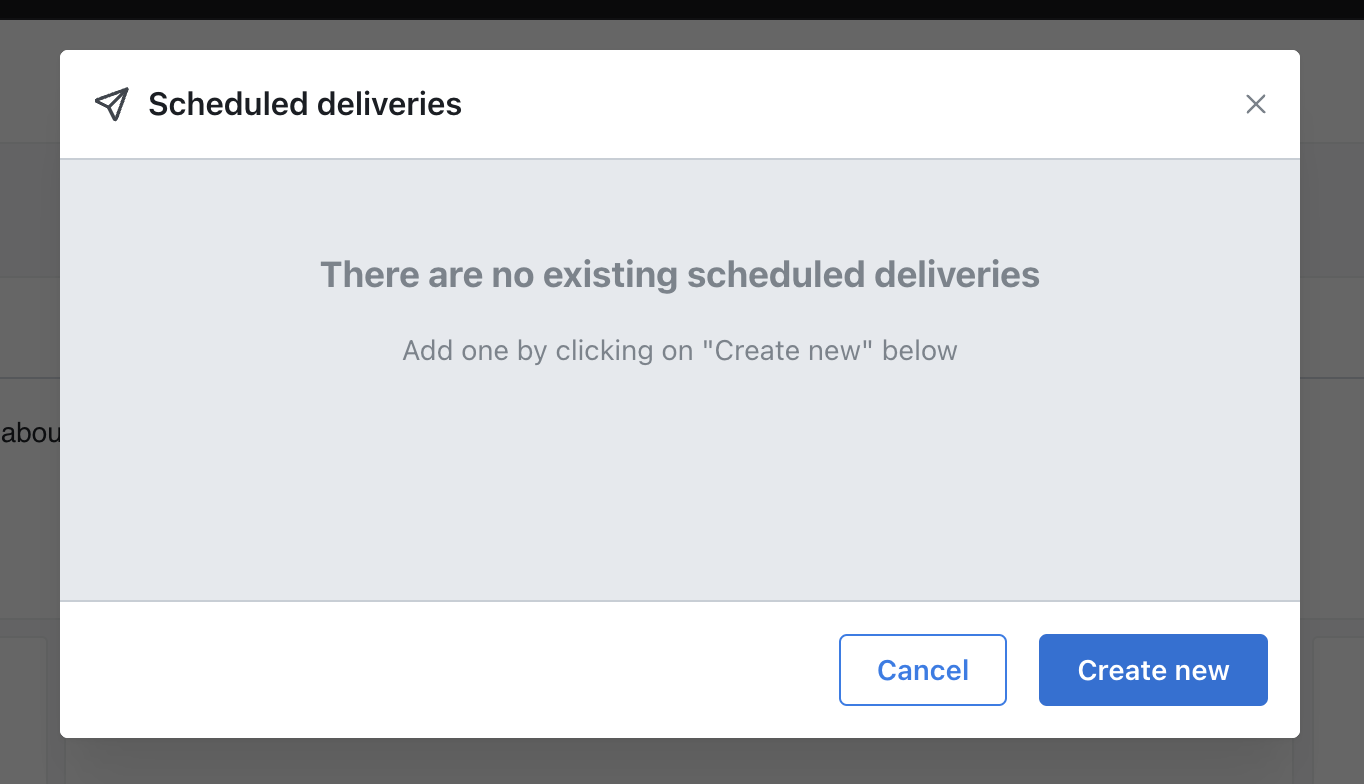
You’ll get a modal that pops up and shows you the list of existing scheduled deliveries for your saved chart or dashboard, and gives you the option to create new.
Setup
Once you click on create new, you’ll be brought to a configuration screen for your new scheduled delivery.
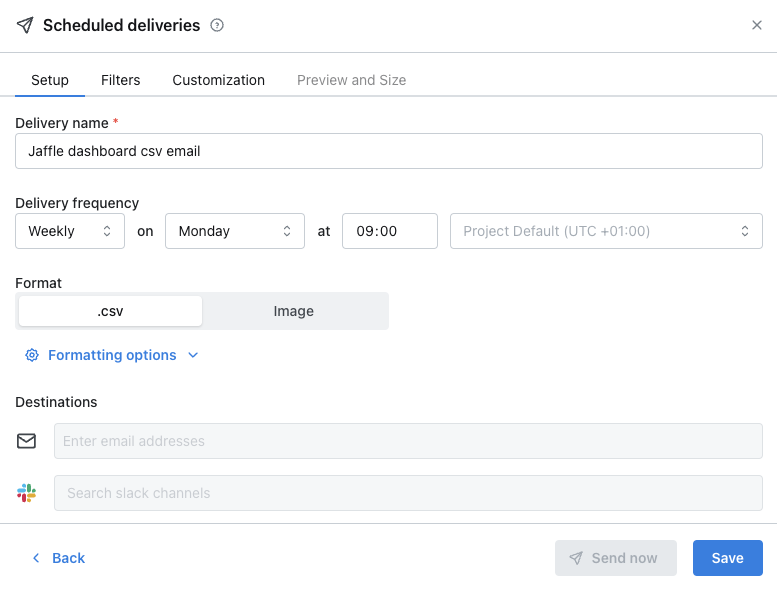
Delivery name
This is the name of your scheduled delivery. This name will appear as the header in your scheduled delivery message.
Delivery frequency
This is how often your scheduled delivery will be sent. You can make this hourly, daily, weekly, monthly, or custom - each frequency has its own options.
The custom frequency lets you write out your own custom Cron expression if you need something more specific than our standard options.
You can also customize the time zone of your scheduled delivery. By default, the deliveries are set to the project’s default time zone. If you update the project’s default time zone, then scheduled deliveries where you have not customized the time zone will automatically be updated to the new default time zone.
Format
Either Image or CSV.
Imagesends an image of the content (chart or dashboard) to your chosen destination. You may also want to send the image as a PDF attachment if you choose to send it over email.CSV: sends a downloadable .csv file of the results table from your chart, or if you’re sending a dashboard, it sends a single message with multiple .csv files for the results tables from each of your charts. You can set thevaluesto either beraw(we remove the formatting applied dates, numbers, or other fields in Lightdash) orformatted(the way the values appear in your table in Lightdash is how they’ll appear in the .csv). You can also adjust thelimitand specify the number of rows that you want to be delivered in your .csv.Results in tablewill deliver the number of results that are currently in the results table for your charts. You can also set a custom number of rows to be delivered usingcustom, or set all results to be delivered so there’s no maximum row limit for each chart usingall results.- Limit on CSV format: We limit CSV downloads to 100,000 cells by default, so if you are trying to download more cells, your file will get truncated.
Send to
You can choose if you want to send your scheduled delivery to Slack, email, or both. You can add as many Slack channels and email addresses as you’d like to here. You can send a scheduled delivery to a person in Slack using @persons-name or to a channel using #channel-name.
Filters
Filters are only available for Dashboard scheduled deliveries.
You can also customise the saved filters(more information on how to save filters in dashboards) applied to your dashboard on the Filters tab. This lets you send a different version of your dashboard to different people, without having to create multiple dashboards.
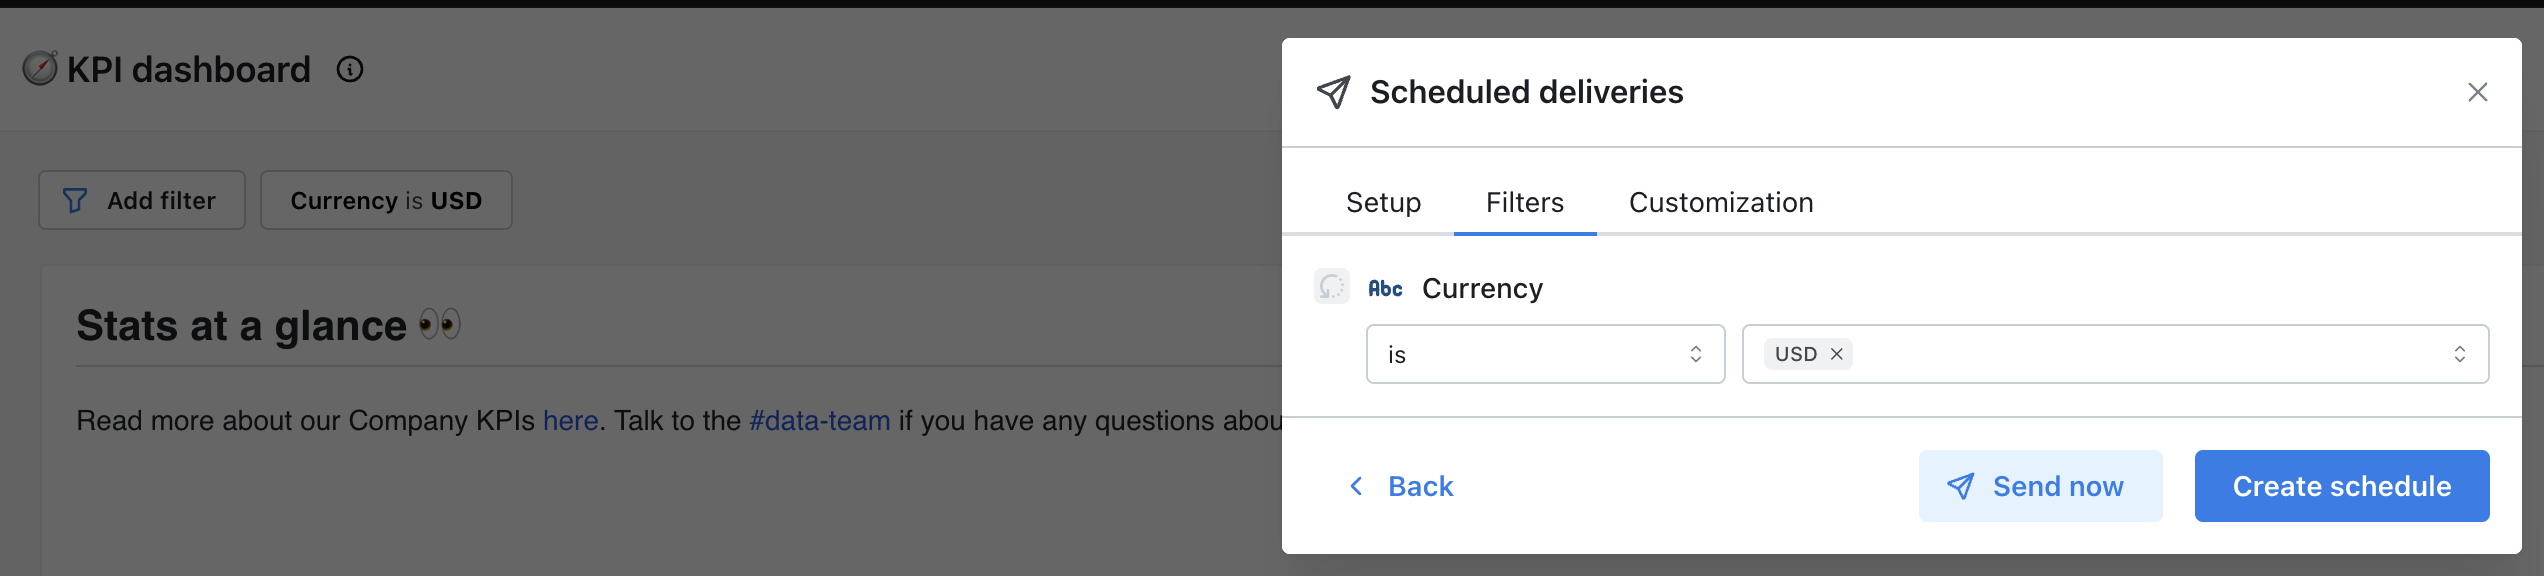
Here, you’ll be able to:
- Update the filter operator (e.g. from “is” to “is not”)
- Update the filter value (e.g. from “USD” to “GBP”)
- Revert the filter back to its original state (the default value of the filter applied to your dashboard)
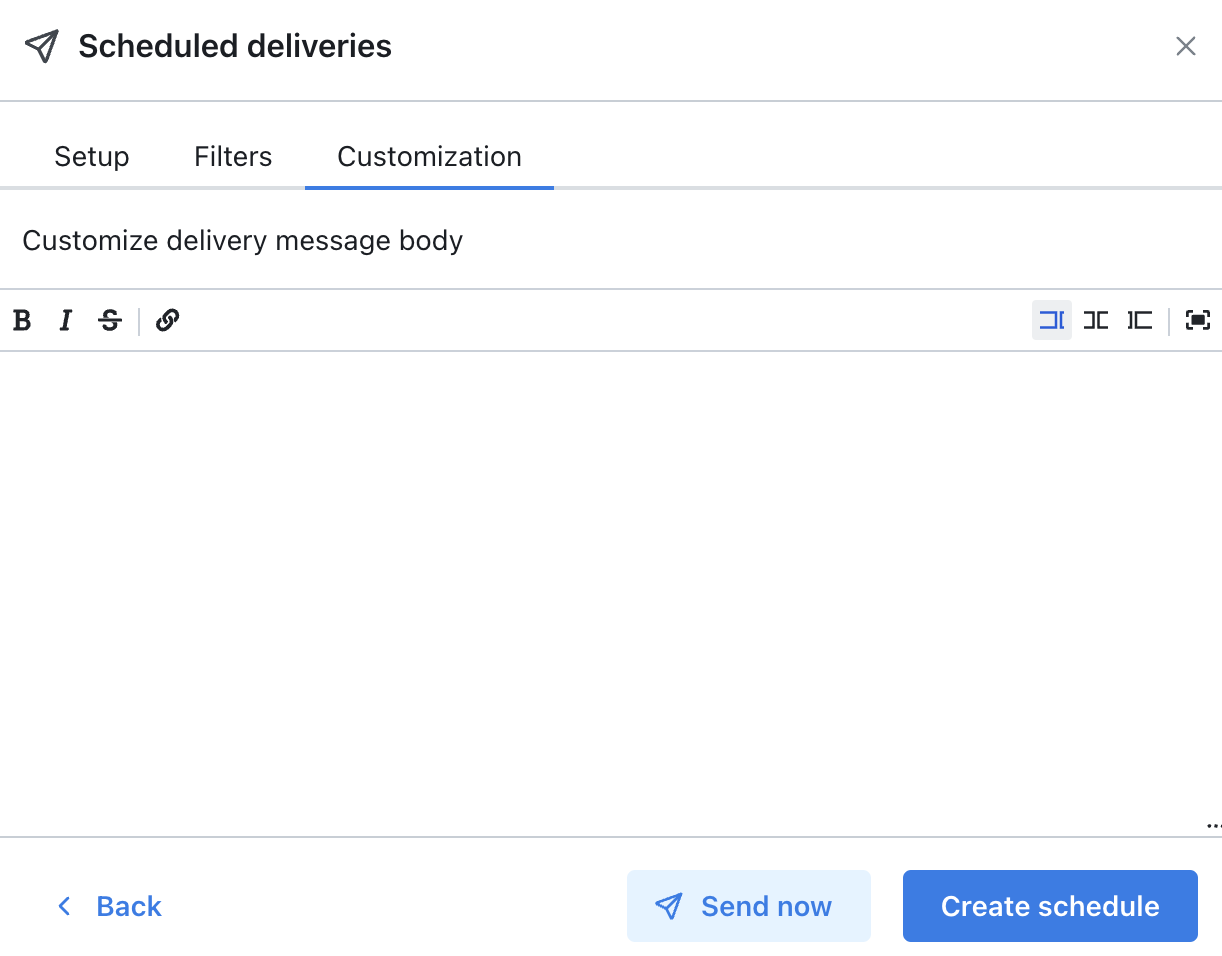
Customization
Finally, you can customize the message that gets sent with your scheduled delivery on the Customization tab.
Editing and deleting your scheduled deliveries
To edit a scheduled delivery, click on the pencil-icon next to the scheduled delivery you want to edit. This will bring you back to the configuration screen for your scheduled delivery, where you can make any changes you’d like. In case you want to delete a scheduled delivery, click on the trash-icon next to the scheduled delivery you want to delete.
Overview of your scheduled deliveries
Users who have an admin role in your project can access an overview of your scheduled deliveries in the project settings.
In the scheduled deliveries overview page, you can see a list of all of your scheduled deliveries, their most recent delivery status, and a history of all of the previous scheduled deliveries in your project.
To access the overview page, just head to your project settings, then to the Syncs & Scheduled Deliveries tab.

Sending to private Slack channels
You must add the Lightdash slack bot into the private Slack channel for it to be able to post scheduled delivery results.
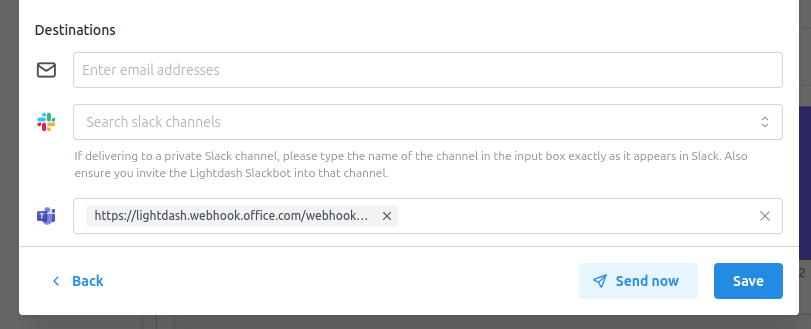
You can also send scheduled deliveries to private Slack channels. To do this, simply type the name of the Slack channel exactly as it appears in Slack into the input text box. Then click on it to confirm and save the scheduled delivery.
Sending to Microsoft teams
You can send your Lightdash scheduled deliveries directly to Microsoft Teams using incoming webhooks. This allows you to keep your team updated with key metrics and reports, right inside your Teams channels.
🔗 How to Create a Webhook in Teams
- In Microsoft Teams, go to the channel where you want to receive the scheduled delivery.
- Click the
...(More Options) next to the channel name and select Connectors. - Find and click on Incoming Webhook, then click Add.
- Name your webhook (e.g., “Lightdash Reports”) and optionally upload an image.
- Click Create, then Copy the webhook URL. You’ll need this for Lightdash.
For more info about how to create webhooks, check the official Microsoft teams documentation.
Once you have a webhook, add it to the the list of destinations in the scheduled deliveries form. You can also test how it looks on Microsoft teams by pressing send now.
Configuring the default time zone
Project admins can set the default time zone used for scheduled deliveries across the project in the Project settings —> Syncs & Scheduled deliveries.
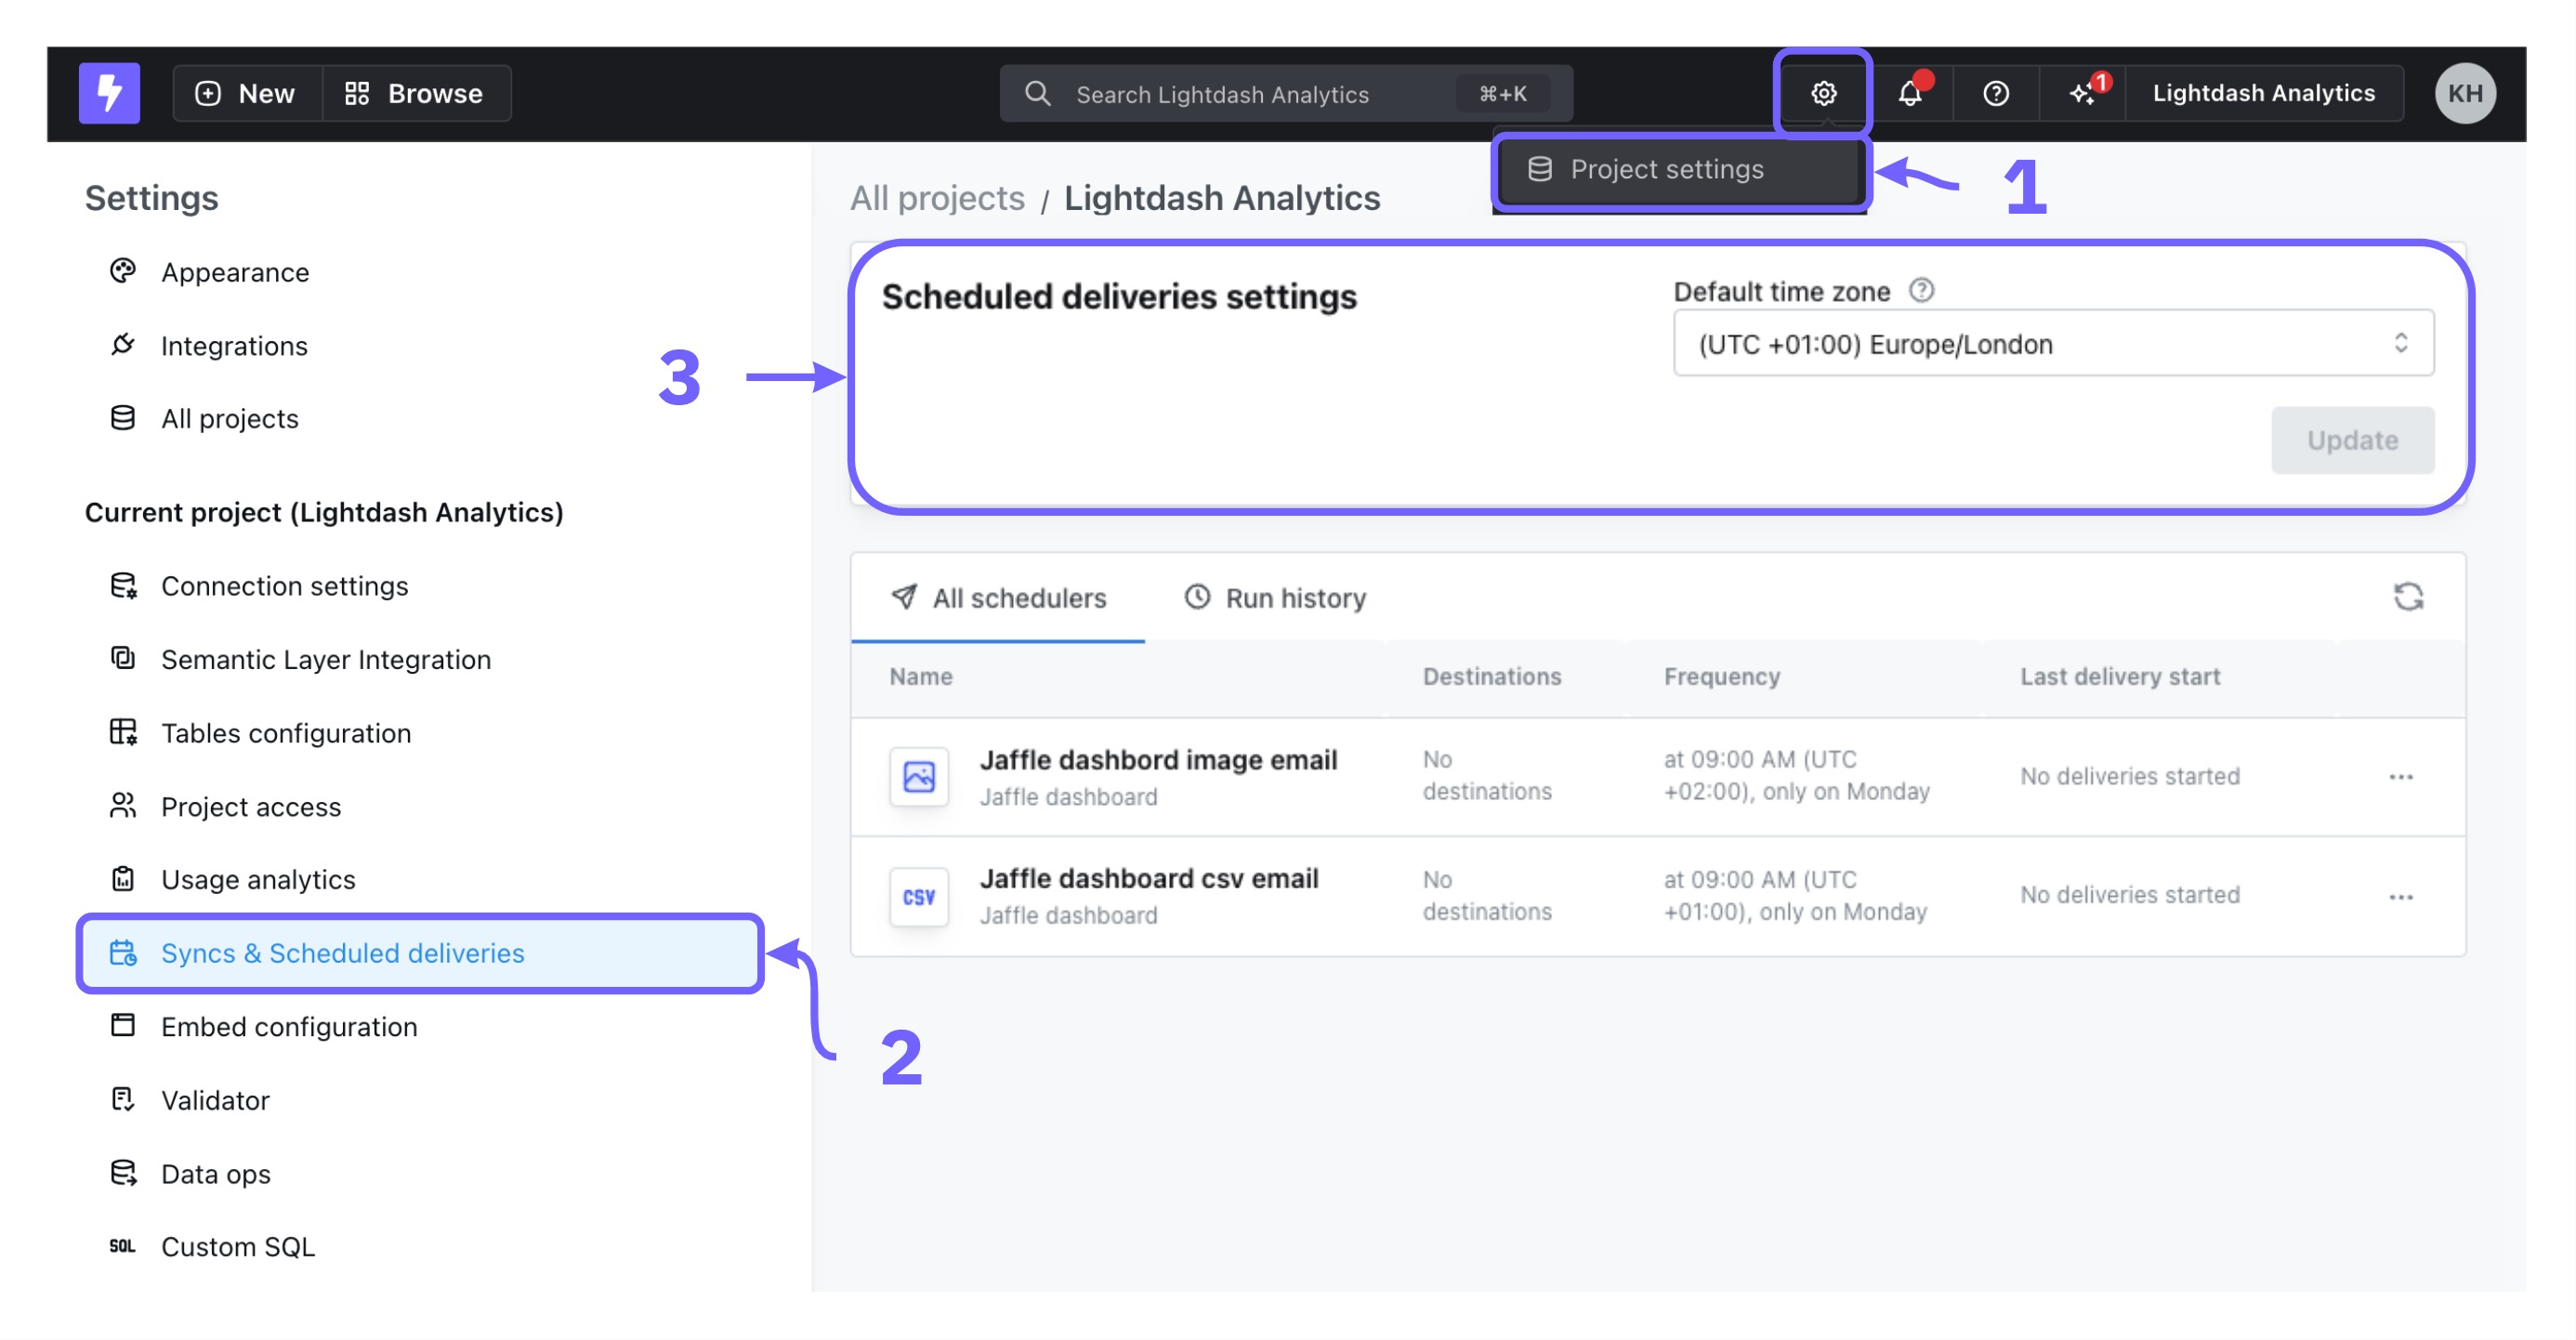
Scheduled deliveries will be set to the project’s default time zone that you pick here.
If you update the project’s default time zone, then scheduled deliveries where the time zone hasn’t been customized will automatically be translated to use the new default time zone.
Users can customize the time zone used in a scheduled delivery. This will override the project default for that scheduled delivery.
For example:
- my project default time zone is set to UTC
- I have a scheduled delivery set to
Weekly on Monday at 15:00 - I change the project default time zone to
(UTC -5:00) America/New York - my scheduled delivery will now be set to
Weekly on Monday at 10:00