Using custom fields
The fields that you see in your dimensions and metrics are created by the people maintaining your Lightdash project.
But, you can create new custom dimensions or metrics for quick calculations and binning on the fly. On this page, we'll explain what custom dimensions and metrics are and how to use them.
Custom metrics
To create a custom metric, you just need to:
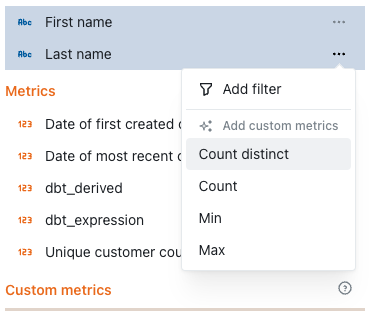
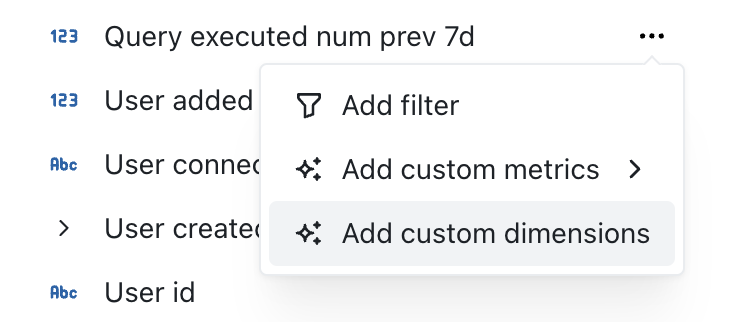
- Click on the dimension's three-dot
optionsmenu - Click on one of the options available (e.g.
Count Distinct) - Confirm your changes
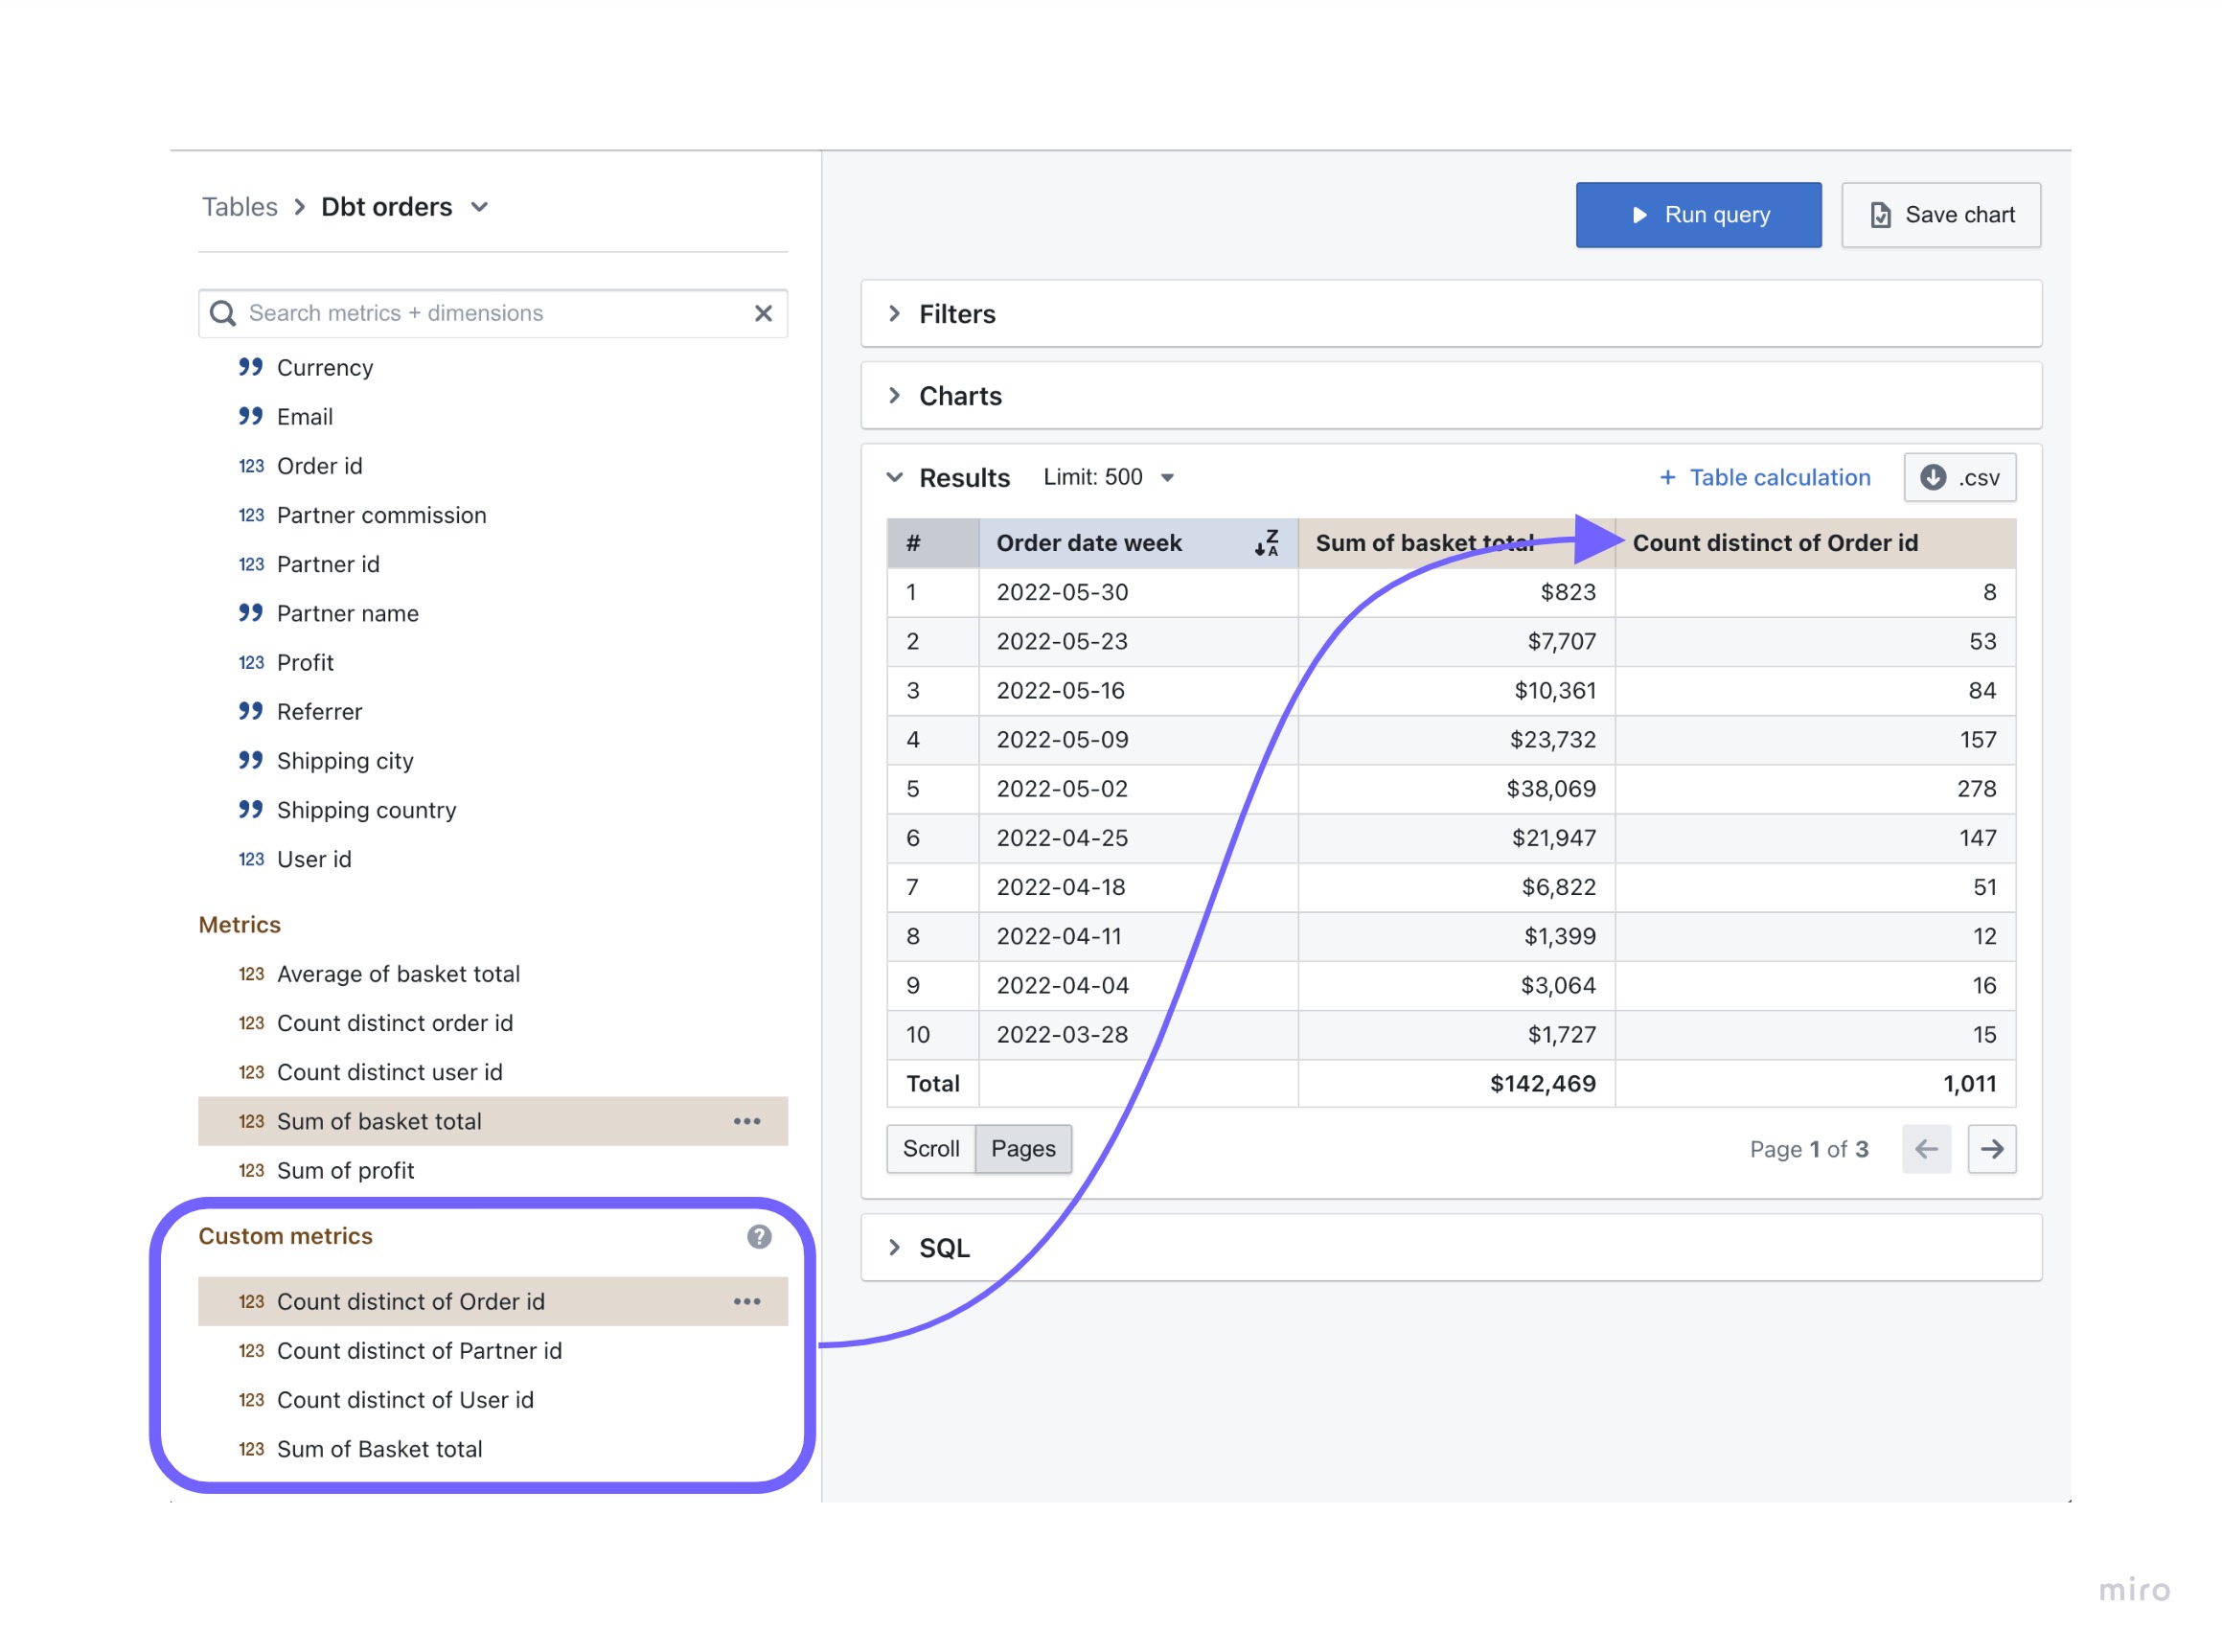
Then, your new metric will be added to your results table automatically and will appear in the custom metrics space in your sidebar.
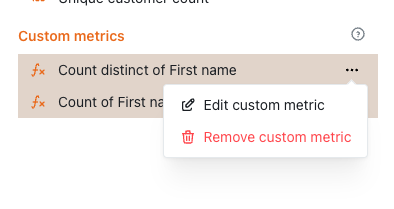
If you want to delete the custom metric, you can just click on the three-dot options menu and hit Remove custom metric
Custom metric types
To learn more about the custom metric types, read the metrics reference documentation here. Only aggregate metric types are available as custom metrics.
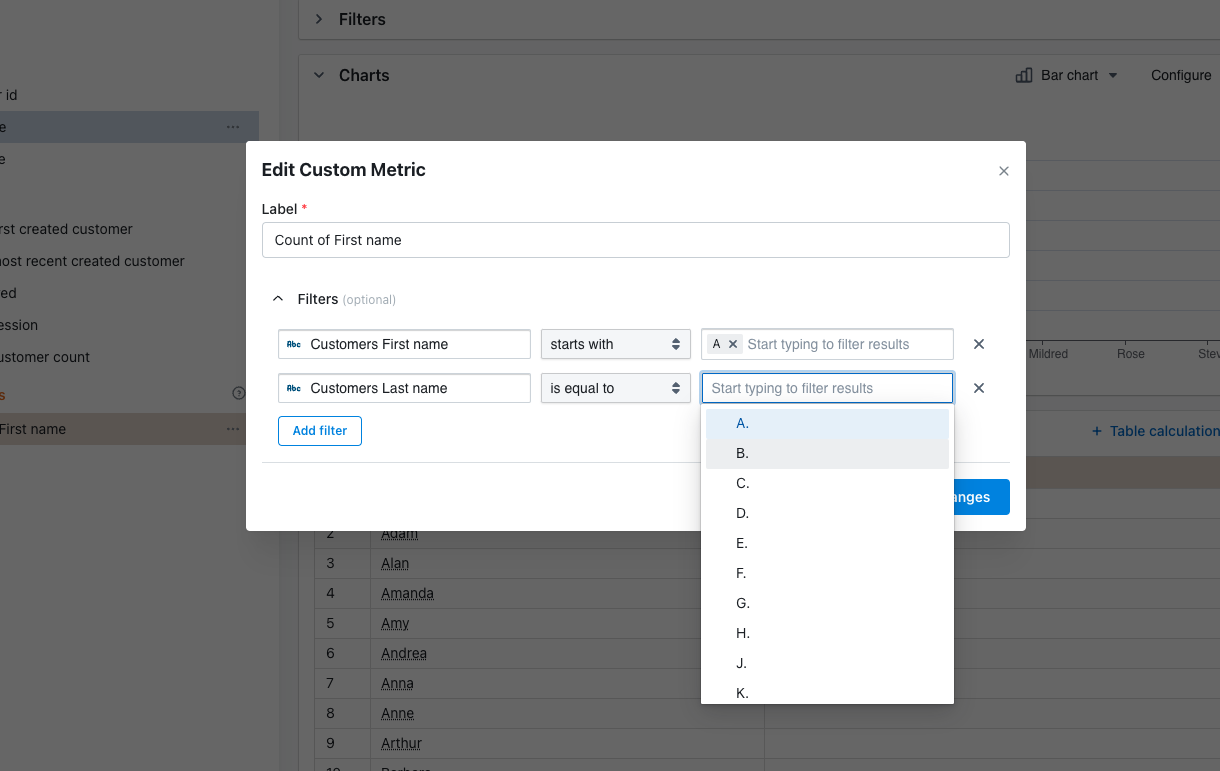
Adding filters to your custom metric
You can add filters to limit the rows included in your metric aggregation. You can add filters when:
You create a custom metric:
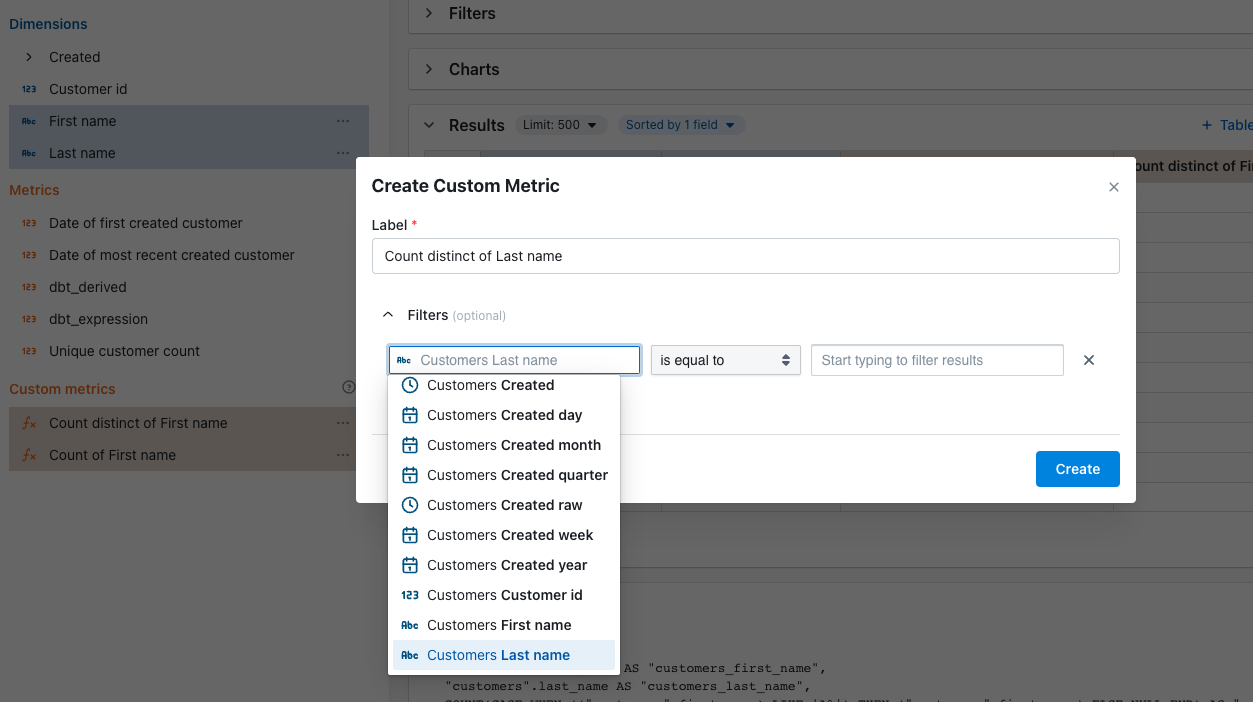
You edit an existing custom metric:
Custom dimensions
Dimensions are used to group results in your query, or filter values from your results.
Sometimes, a group or filter that you need hasn't been added to your project, so you can use a custom dimension to create a grouping or filter on-the-fly.
These dimensions are not saved to the table permanently. They are only available in the saved chart or query that they were created in.
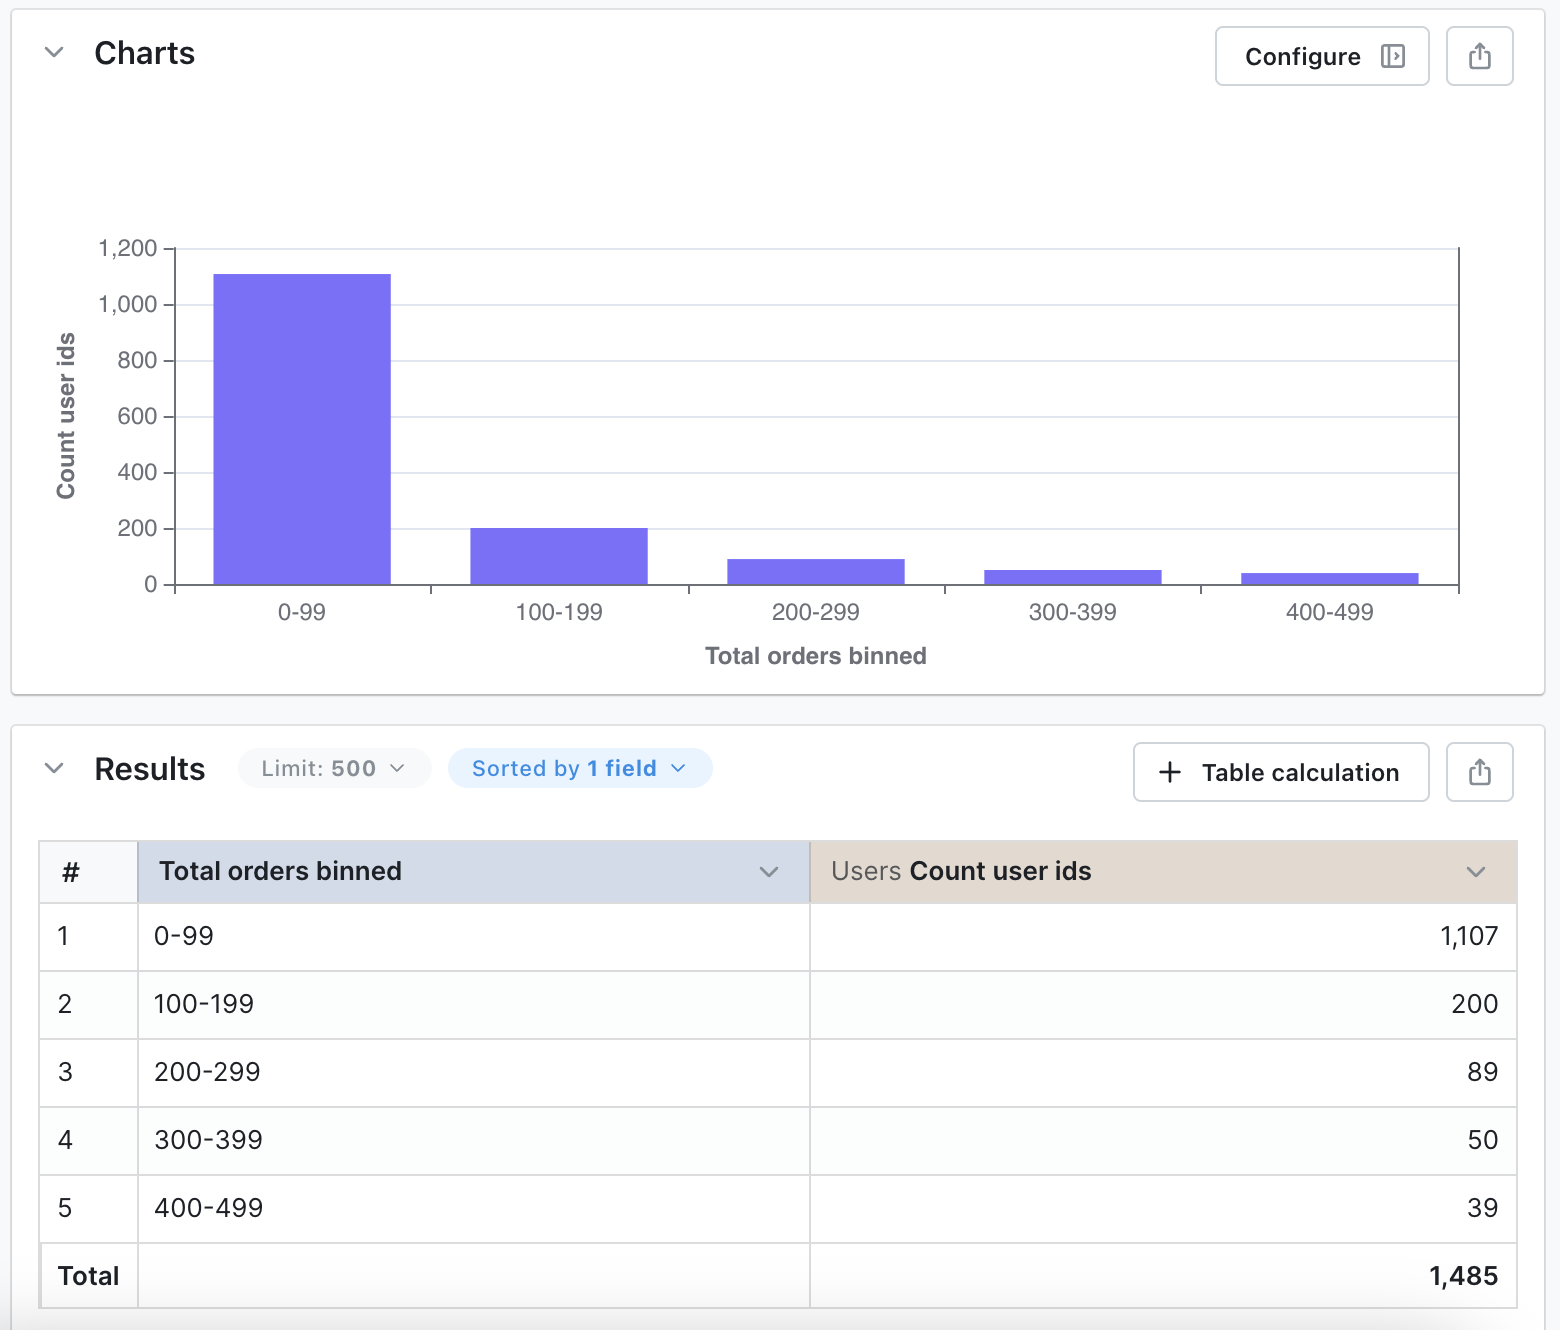
Bin
Bins are used to split out values of a numeric dimension into custom sets of ranges. Bins can only be used with dimensions that are numeric. Fixed bins (fixed number and fixed width) will update automatically if the min or max values of your dimension change.
To create a bin custom dimension, you just need to:
- Click on a dimension's three-dot
optionsmenu - Click on the
binoption - Setup + create your dimension
Then, your new dimension will be added to your results table automatically and will appear in the custom dimensions space in your sidebar.
There are three ways that you can set up your bins:
1. Fixed number of bins
You pick the number of bins that you want to group your dimension into and Lightdash automatically defines the ranges for your bins. The ranges that Lightdash generates for the bins are equal to the range of the values in your dimension divided by the number of bins you selected.
2. Fixed width
You pick the width (a.k.a. ranges) for your bins and Lightdash automatically defines a set of bins with those widths. The number of bins that Lightdash generates is equal to the range of values in your dimension divided by the fixed width that you picked for your bins.
3. Custom range
You manually define the min and max values for each bin. The custom range option is the only binning option that will not automatically update if the min or max values of your dimension change (you would need to manually adjust your custom bins or some values could not be included in your bins).
Custom SQL
You can use completely custom SQL to create a custom dimension. The SQL you use to create these custom dimensions can reference other dimensions from the main table and joined tables in your explore.
Only users with developer access or above can create custom SQL dimensions.
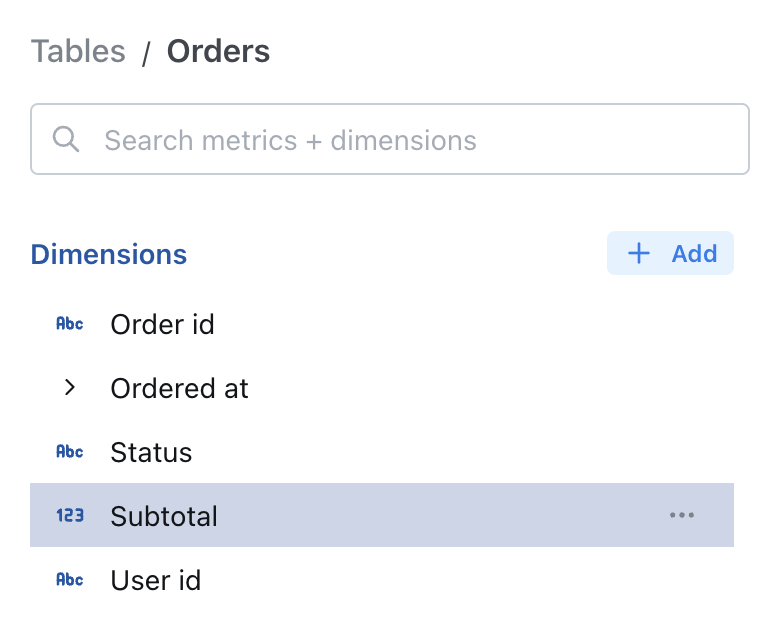
In this example, let's explore the orders table and create a custom dimension that categorizes my orders' totals into three categories: low, medium, and high.
You can click on the button to add a custom dimension on the sidebar:
Then you can write your SQL query to create your custom dimension:
CASE
  WHEN ${orders.subtotal} < 100 THEN 'low'
  WHEN ${orders.subtotal}  < 500 THEN 'medium'
  ELSE 'high'
END

And after you run your query, you will see your new custom dimension categorising your orders' totals:
