

- used to power a single saved chart
- turned into a virtual view so it becomes a reusable table
- written back to dbt as a model
developer or admin access can use the SQL runner.
Getting started with the SQL Runner
The SQL Runner can be accessed from theNew —> Query using SQL Runner option in your navigation bar.

- A list of tables in your data warehouse that Lightdash has access to (based on your data warehouse connection in Lightdash).
- The schema of a selected table.
- The SQL query builder.
- The results from your latest SQL query.

SELECT * query on it. On BigQuery, a partitioned table’s query also gets a WHERE on its partition column, set to today’s date for a date partition or 0 for an integer range partition, with a comment naming the partition type.
To build a query in the SQL Runner, just write your query in the SQL query builder, then hit Run query to see the results.
Charts built in the Explore view show their generated SQL in a read-only SQL section. To edit that SQL, click Open in SQL Runner in that section. The SQL runner opens with the generated query, and saving it creates a separate SQL chart; the Explore chart doesn’t change.
You can access your Query history from your session by clicking on the SQL Query history button beside Run query.

- Build and save a Chart
- Create a Virtual View so your query becomes a reusable table in Lightdash
- Write-back to dbt so your query is saved as a governed model.
- Click the link icon in the top-right to share your query draft with a coworker (or save it yourself to return to later).
Saved charts in the SQL Runner
Once you’ve run your query, you can build a chart by clicking on thechart tab in the SQL Runner.
The charts in the SQL Runner are built from the data that you generated in your query. The chart builder automatically aggregates the data from your query results using the aggregation type that you choose. Depending on the column type, the aggregation options are:
- count (which is a distinct count and will ignore duplicates)
- any (which will count and include duplicates)
- sum
- average
- max
- min

save chart.
SQL runner charts on a dashboard can be filtered in the UI. See the dashboard filter documentation for more information. The SQL runner itself has no filter controls.
Chart types
The SQL runner supports the following chart types:- Table
- Bar chart
- Line chart
- Pie chart
- Big value
Series draw order
For bar, line, and mixed charts, open Chart → Series to choose which series appear in front of others. The list runs from Back → Front: a series lower in the list is drawn on top of a series above it. The last series has a Front badge.- Drag a series by its handle to change its position.
- Bring to front moves a series to the end of the list. Hover over its heading to reveal the button.
- Reverse flips the order in that list.
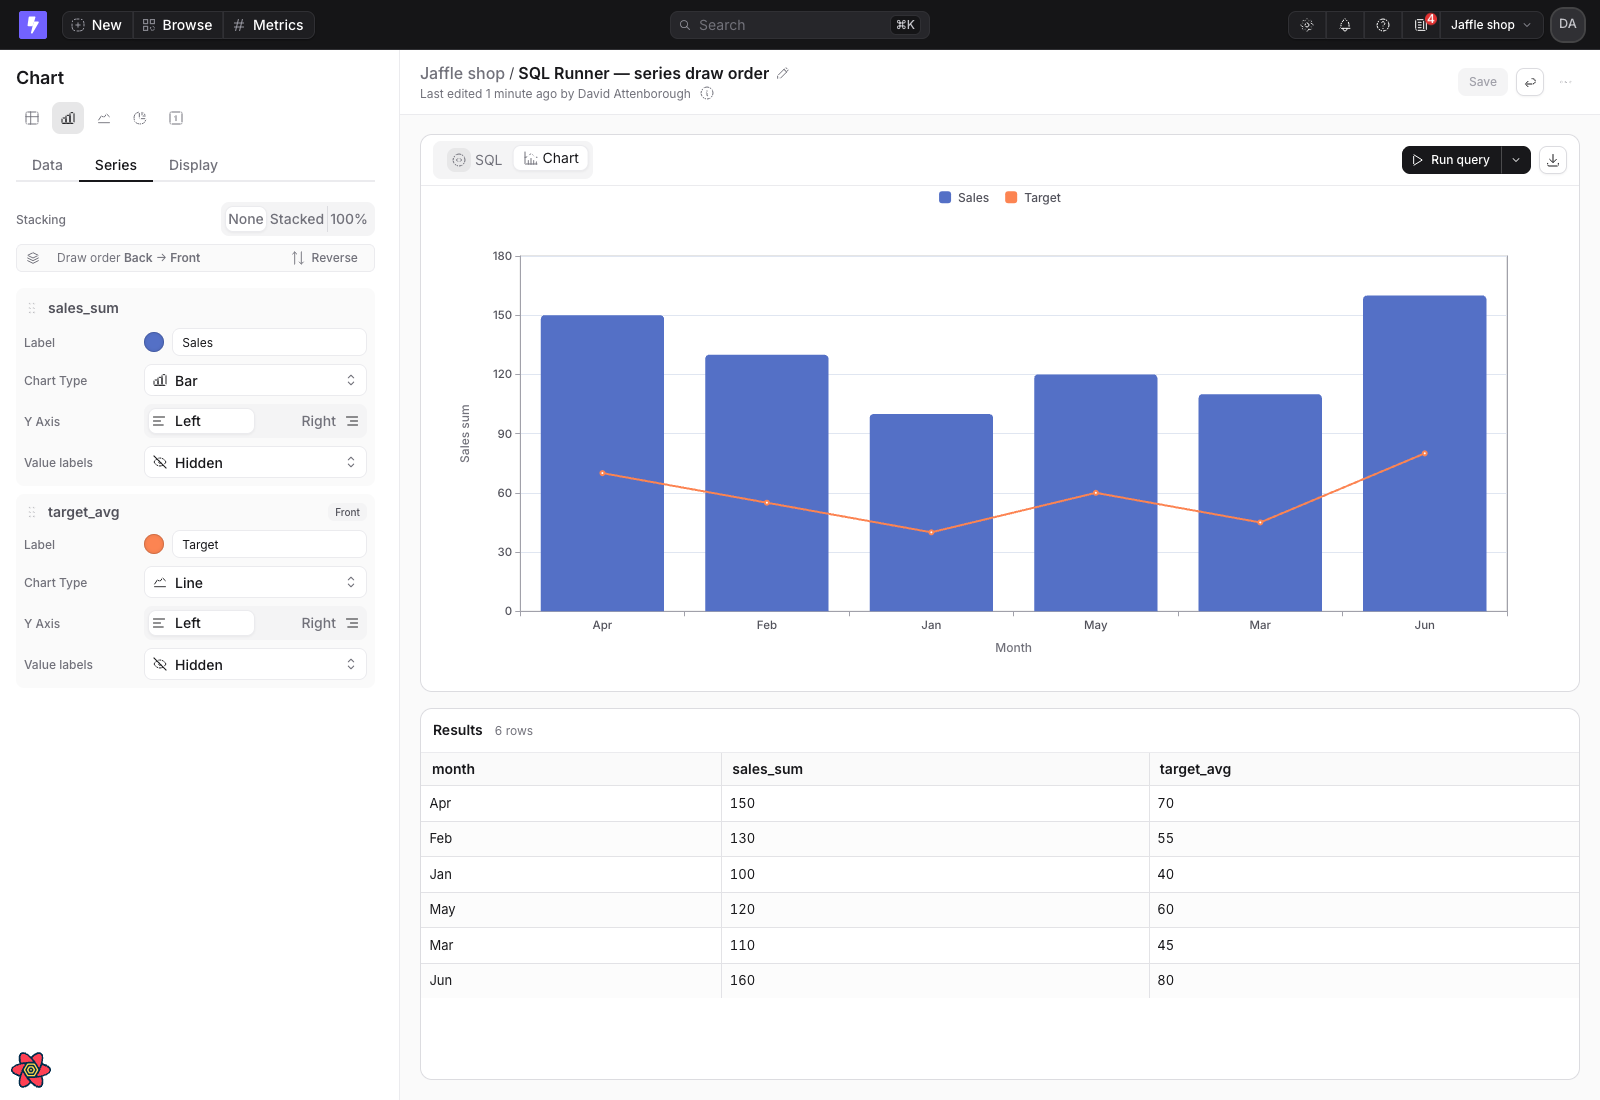
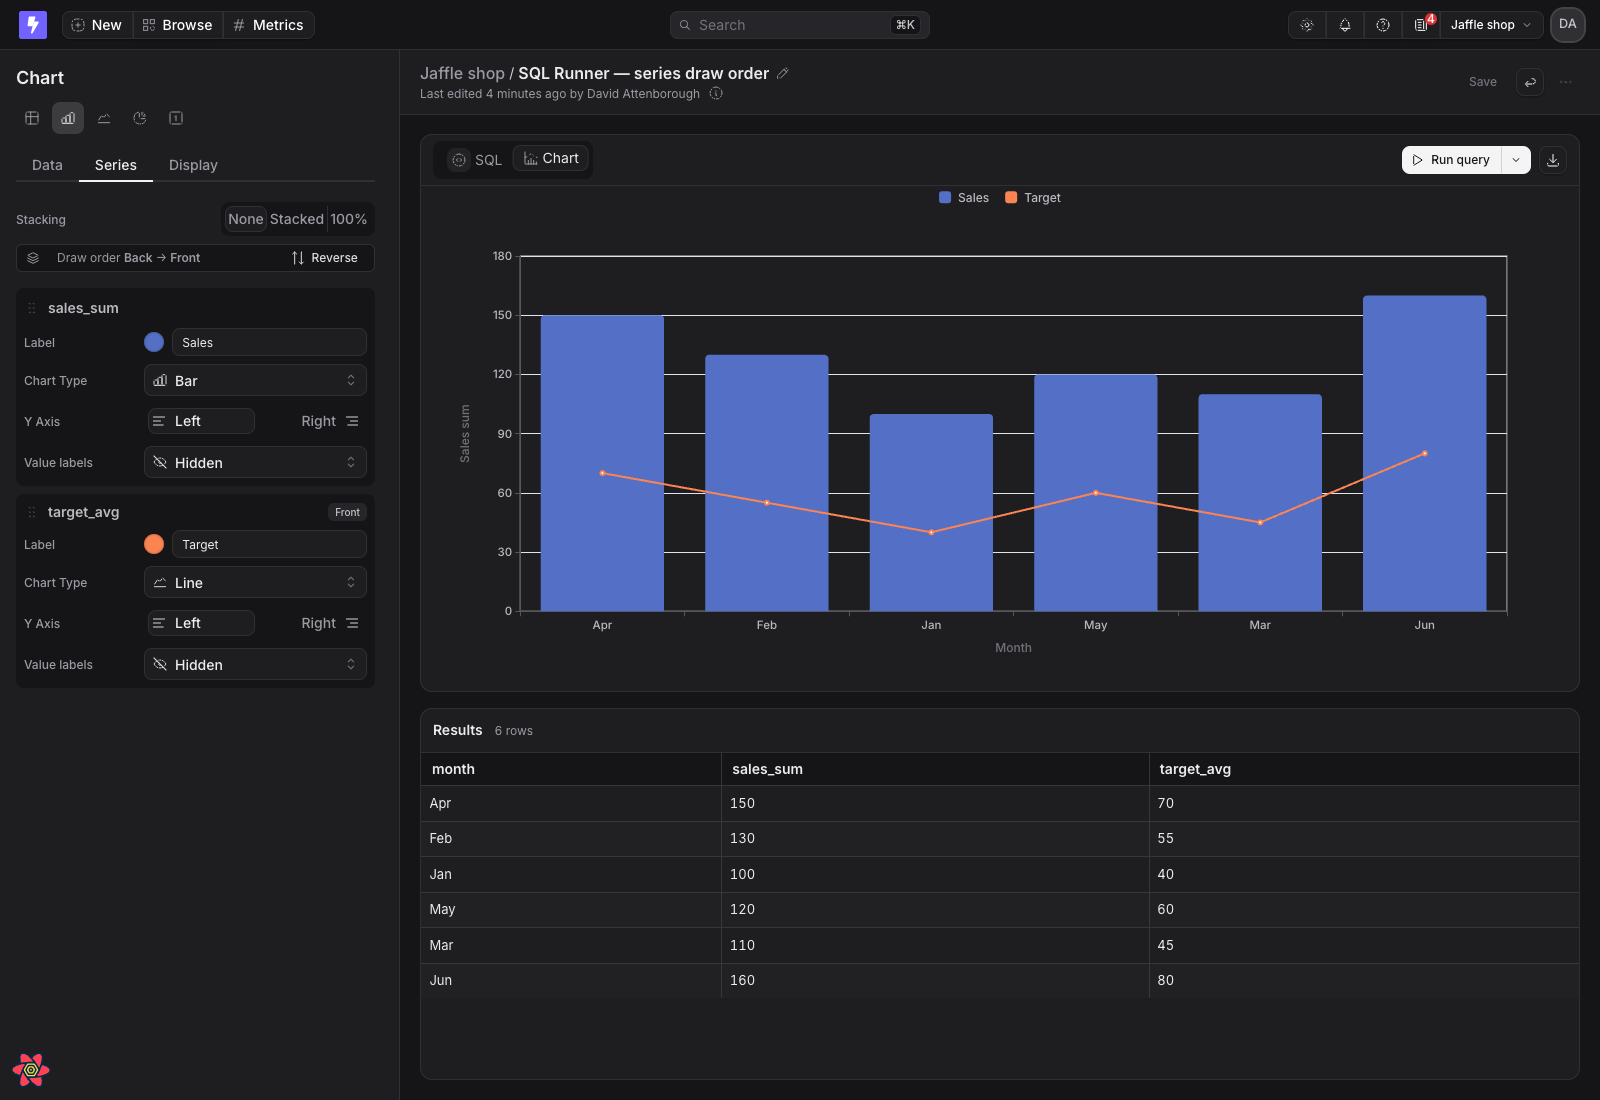
The Target line is at the front of the series list, so it remains visible over the Sales bars.
Limitations
Explore-only chart features
Some chart features work only on charts built in the Explore view. SQL runner table charts don’t support conditional formatting, and SQL runner charts on a dashboard don’t respond to date zoom or offer Drill into. To use them with your SQL, save the query as a virtual view, then build the chart from that virtual view in the Explore view. Create virtual view is only in the save menu of a new, unsaved query. To turn a saved SQL chart into a virtual view, open a new SQL runner query, paste and run the SQL, and save it from there.ORDER BY not guaranteed
Results from the SQL runner are not guaranteed to respect yourORDER BY clause. This is because Lightdash wraps your query in a subquery to support dashboard filtering, and SQL databases don’t preserve ordering from subqueries.
Common symptoms: Results appear in wrong order, sorting doesn’t work, ORDER BY ignored, sort order not preserved.