

Beta Documents are behind the
documents feature flag. On Lightdash Cloud, ask your Lightdash contact to turn it on for your organization. Self-hosted deployments add documents to LIGHTDASH_ENABLE_FEATURE_FLAGS. The editor and layout may still change. What Beta means.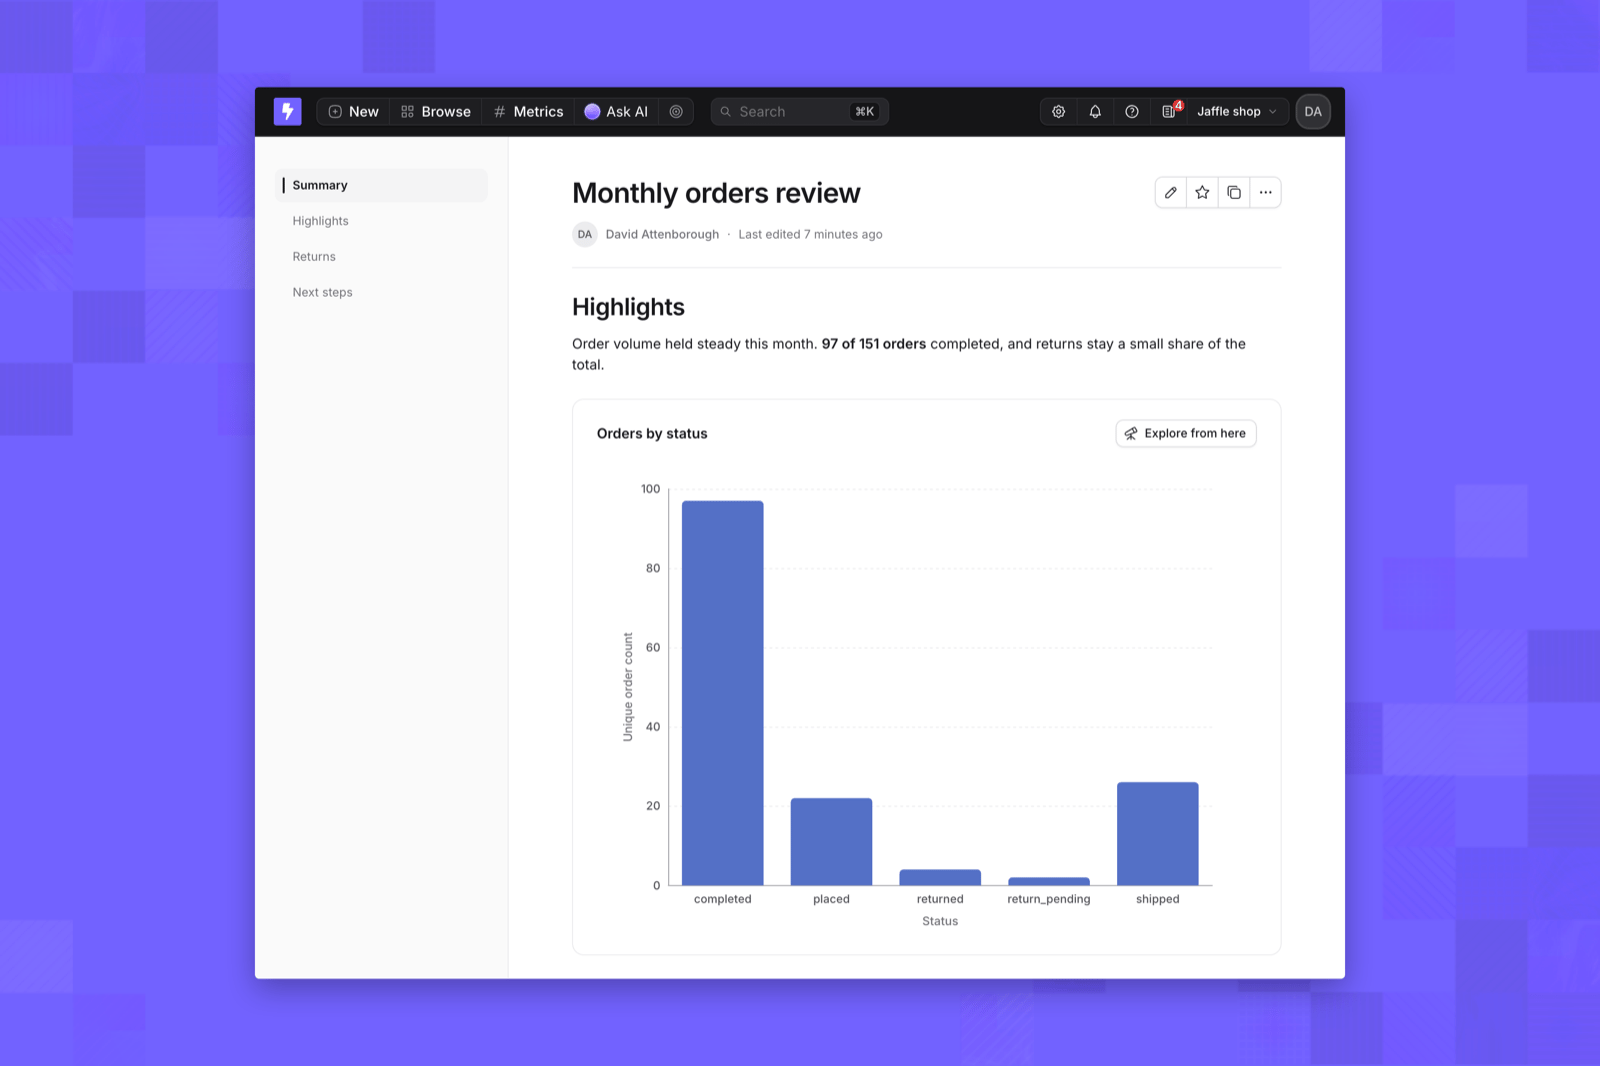
Read a document
A document opens in its reading view. The rail on the left lists the document’s top-level headings; click one to jump to that section. The line under the title shows who created the document and when it was last edited. Each chart shows live results. Click Explore from here on a chart to open its query in the Explore view, where you can change it without affecting the document.Create a document
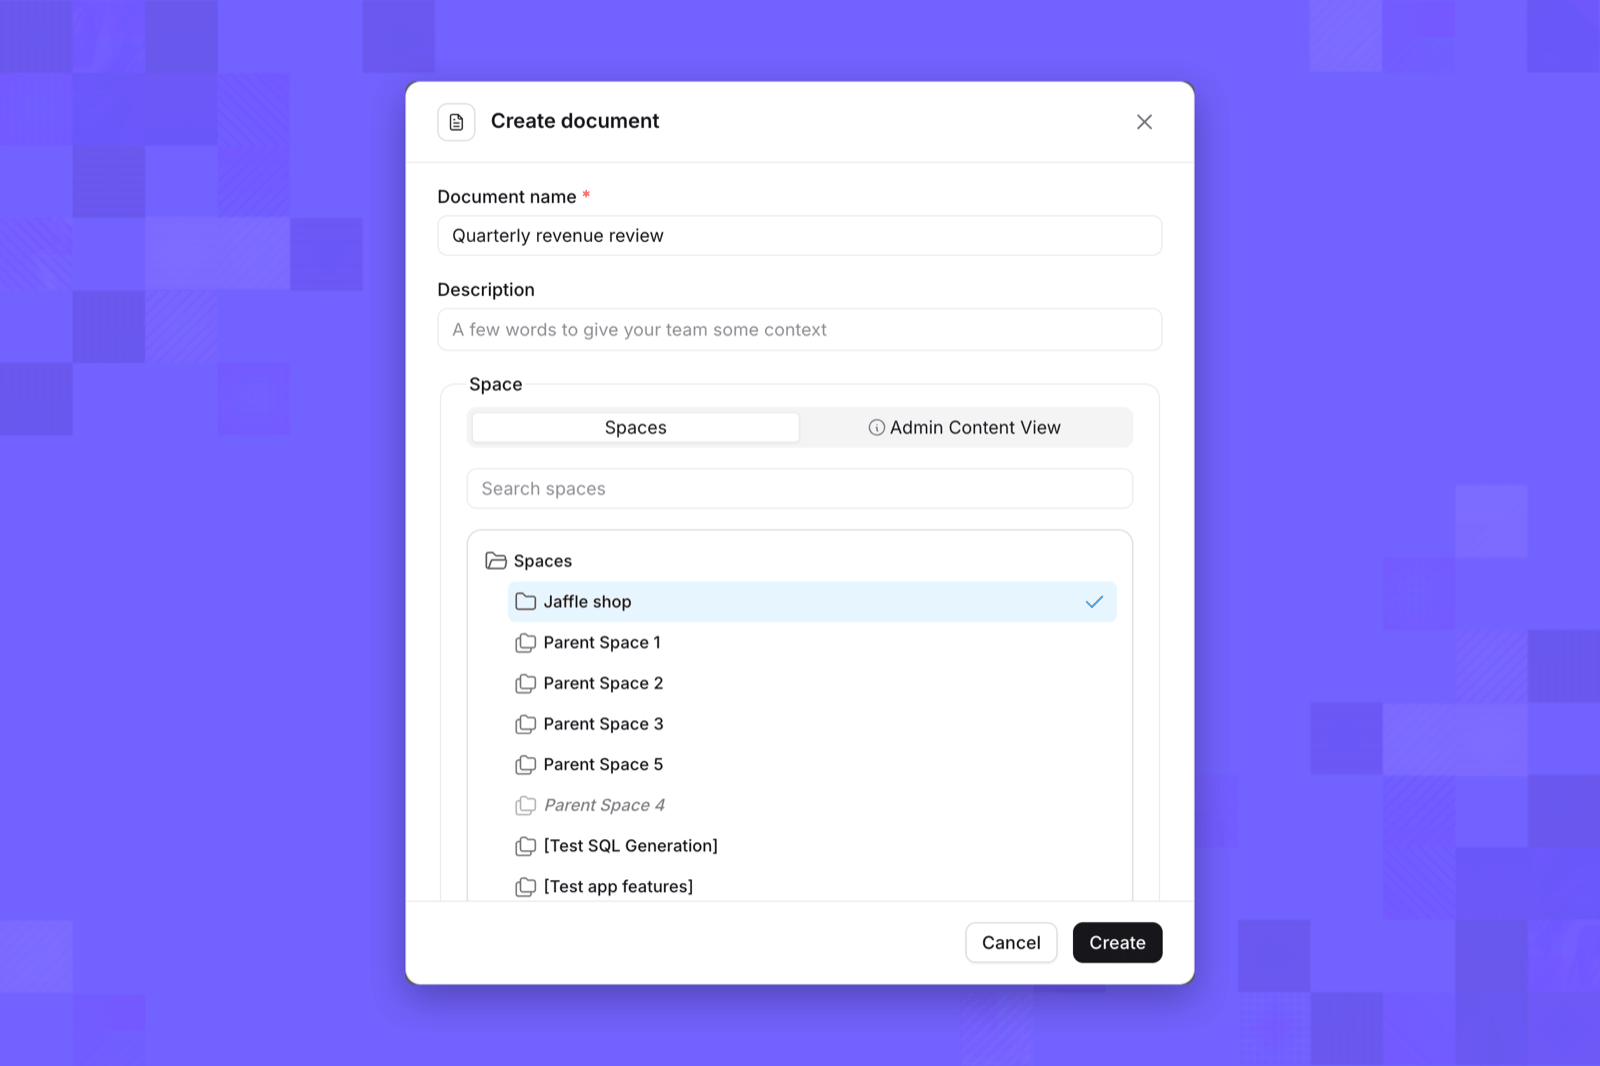
- On the nav bar, click New, then Document. You can also use Add → Create new document in a space, which saves it there, or the All documents page under Browse.
- Enter a name, an optional description, and the space to save it in.
- Click Create. The document opens in edit mode, ready for you to write.
Edit a document
Click the pencil icon next to the title to edit. The document stays in place and an Editing badge appears beside the byline. You edit the text and charts exactly where they appear when reading.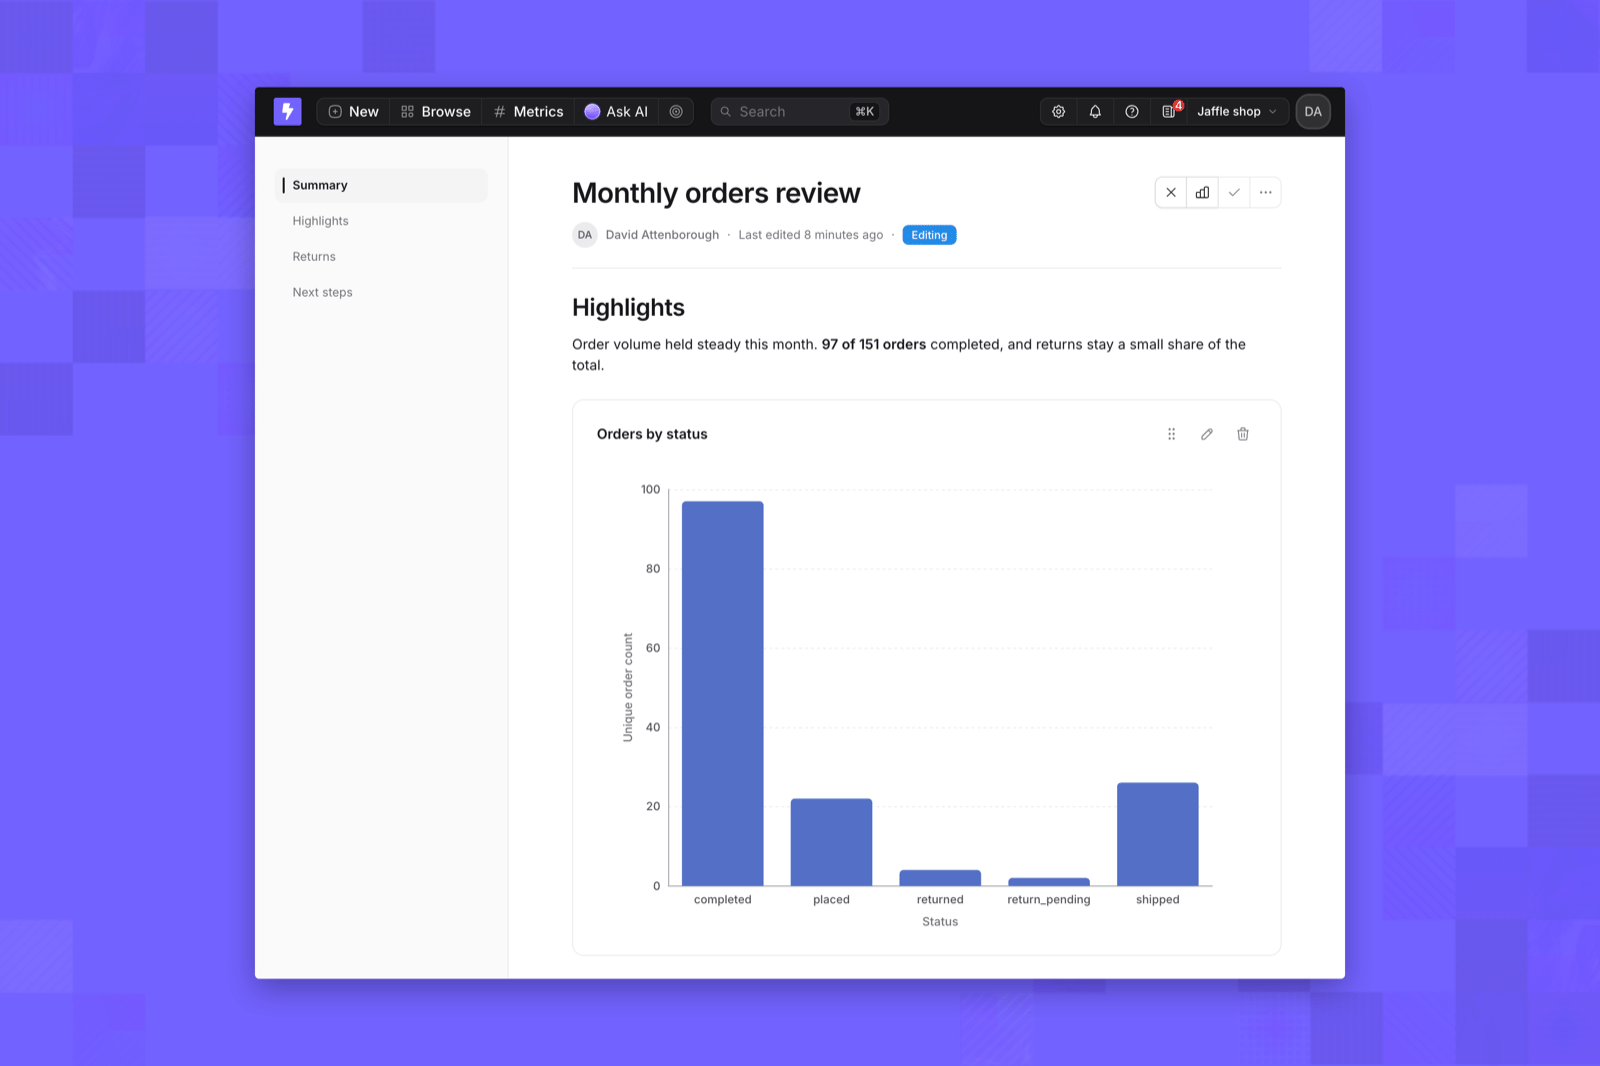
- Rename the document by clicking its title.
- Format text with markdown shortcuts as you type, such as
#for a heading,-for a list, or**for bold. - Insert blocks by typing
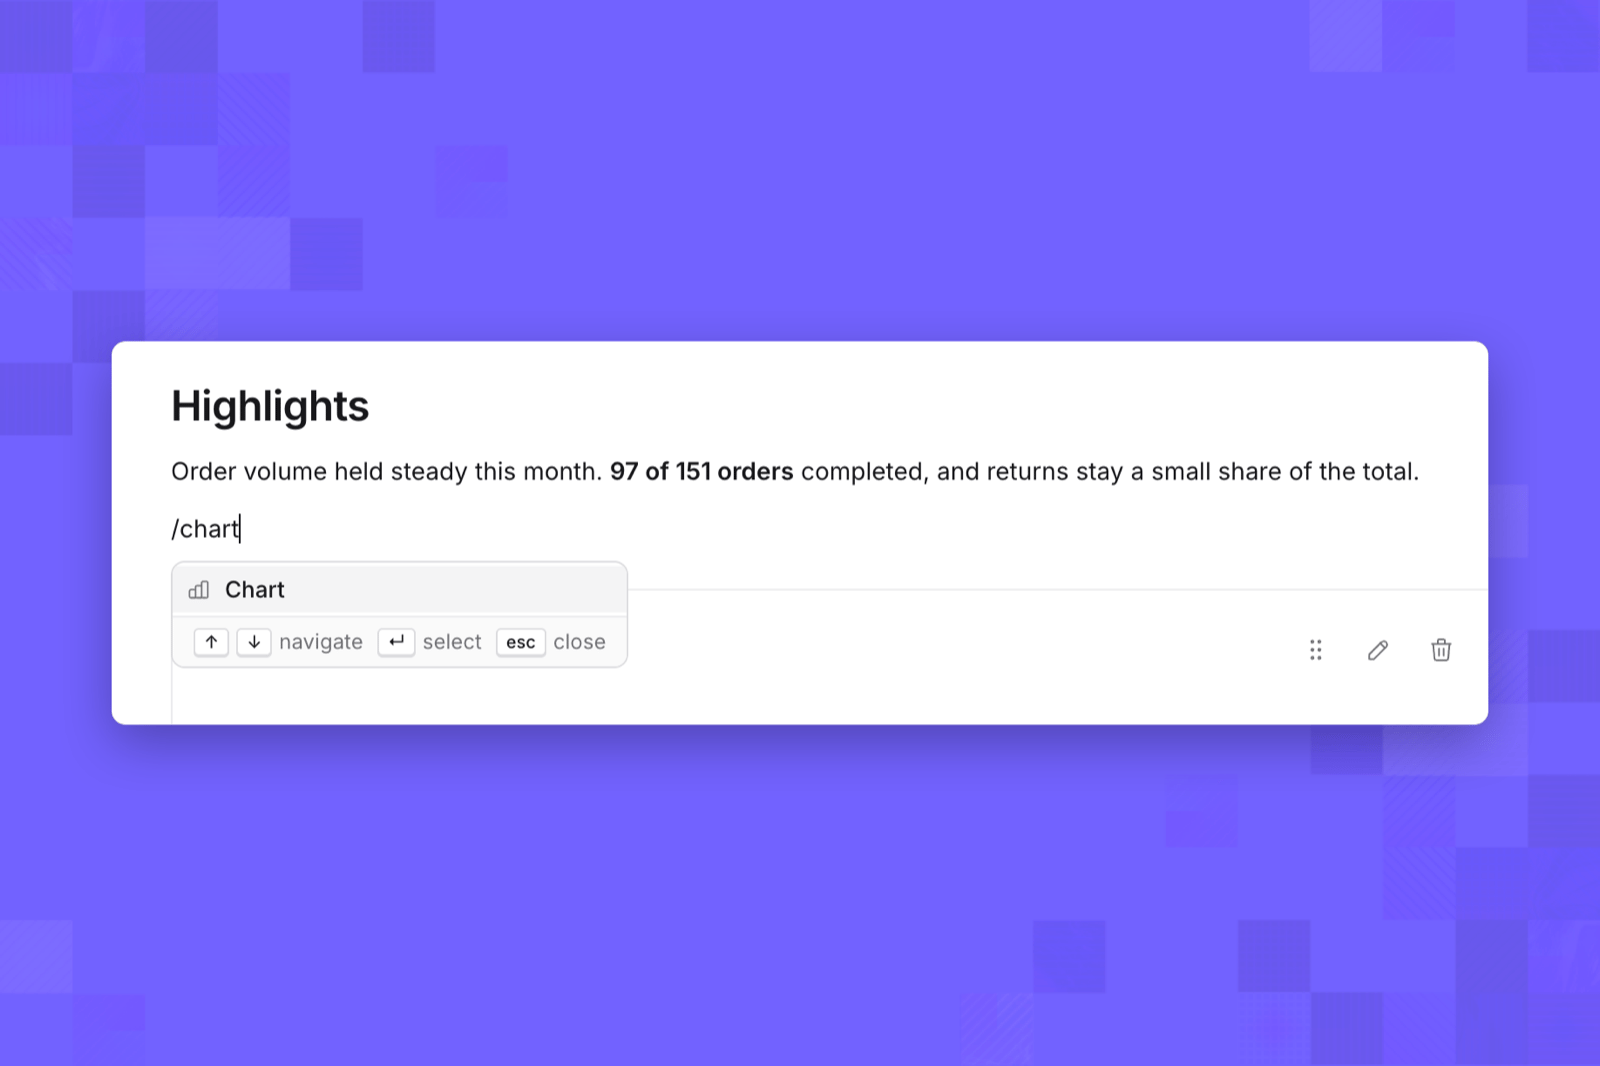
/on an empty line, then choosing text, headings, lists, a quote, a code block, a divider, a table, or a chart. - Write around charts by clicking the space above, between, or below charts. You can also move there with the arrow keys.
A table cell holds a single line. If you press Enter or add a line break inside a cell, the text is saved on one line with a space in between.
Add and arrange charts
Type/chart and press Enter, or click the chart icon next to the title. The Add chart dialog is a full Explore view: pick a table, choose metrics and dimensions, configure the chart, and click Apply to Document. The chart is inserted where your cursor was.
Charts can use custom chart types installed in the project, from the chart library or Chart Studio. A document keeps the chart type version each chart was saved with, so a new version of the chart type doesn’t change the document’s charts.
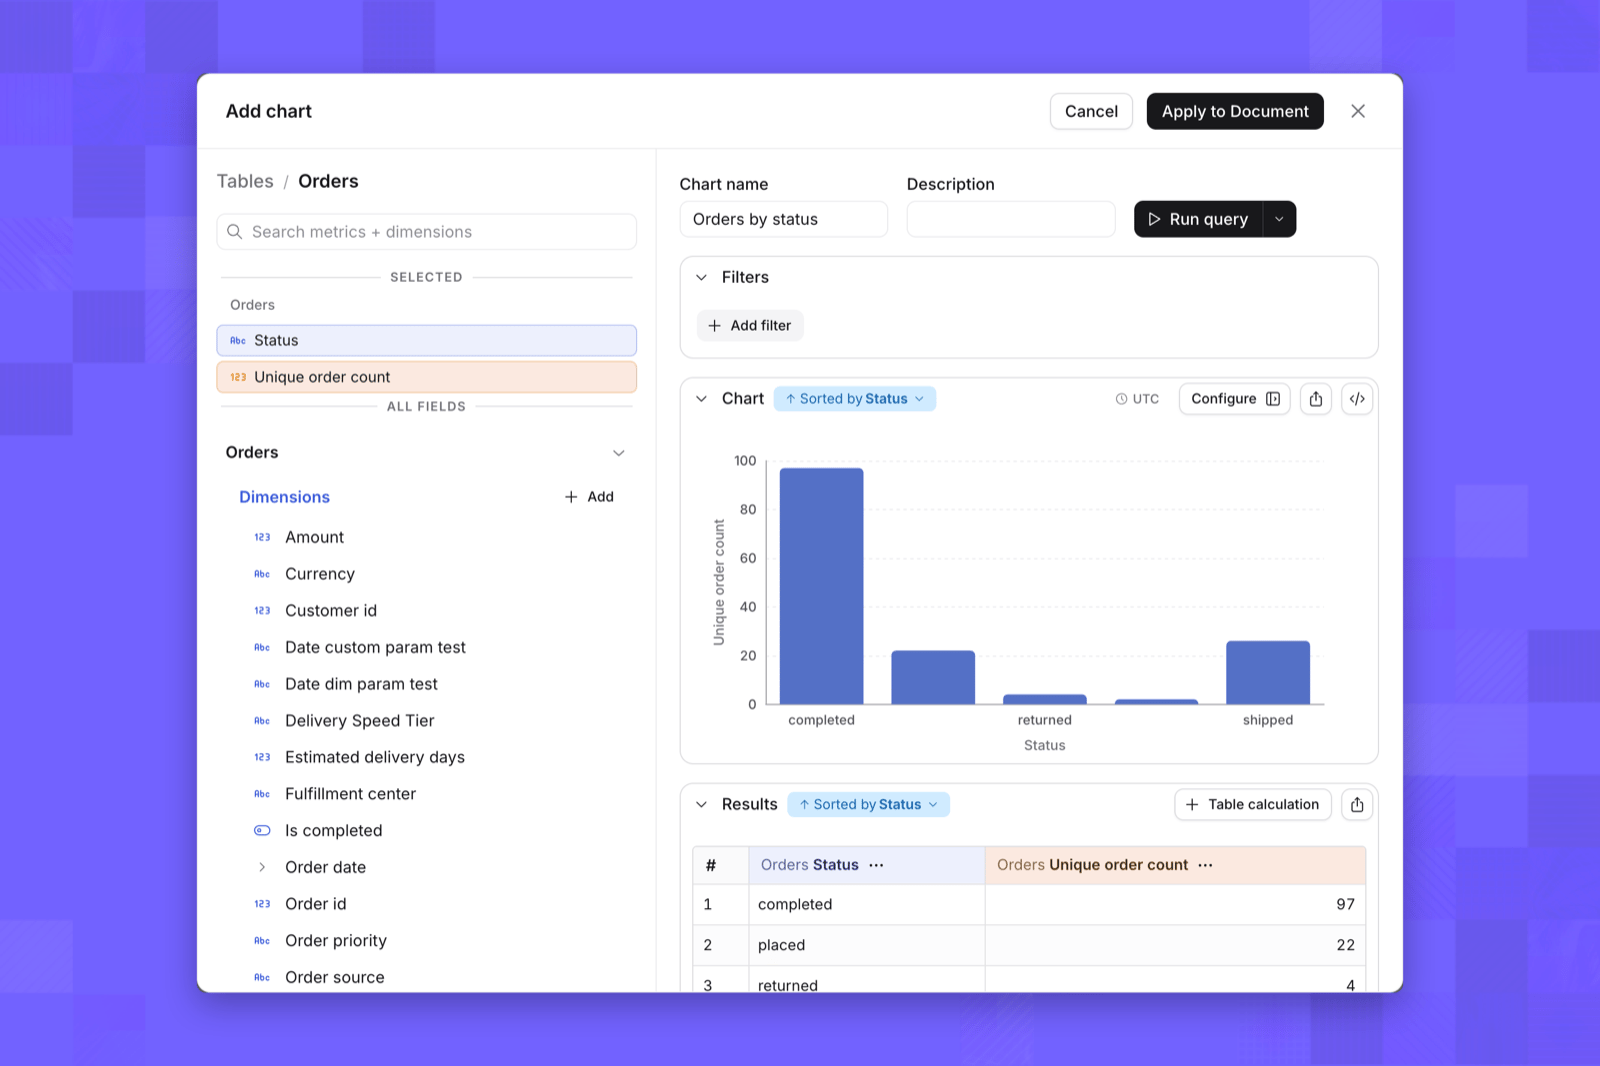
- Move: drag the grip icon to a new position, or focus it and press the up and down arrow keys. With a chart selected, Cmd+Shift+↑ or ↓ (Ctrl on Windows and Linux) also moves it.
- Edit: click the pencil icon, or select the chart and press Enter, to reopen it in the chart editor.
- Remove: click the trash icon, or select the chart and press Backspace.
Create and edit with AI
AI agents with content editing turned on, and Lightdash MCP clients such as Claude or Cursor, can write a new document or rewrite an existing one when you ask them to. Their changes are saved as new versions, like edits made in the editor, and appear in the document’s version history. AI agents can also use the project’s custom chart types in the charts they add.Manage a document
Use the icons next to the title to add the document to your favorites or copy its link. The ⋯ menu holds the rest: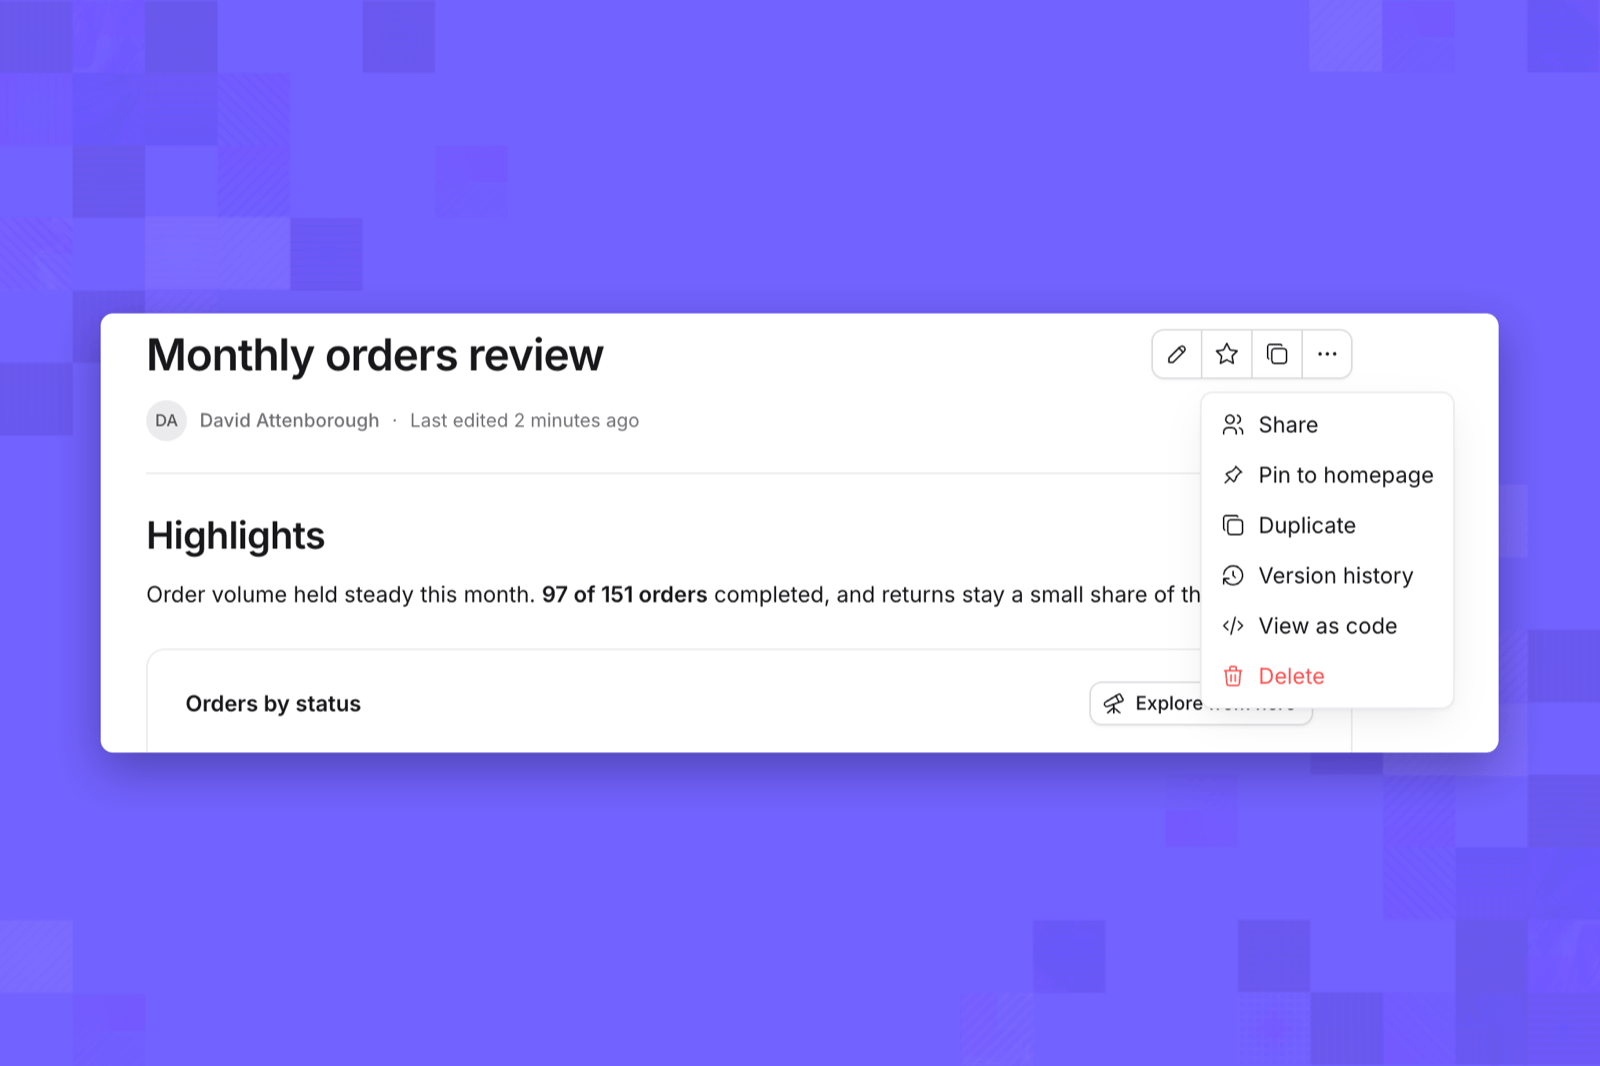
- Share gives specific people or groups access to the document through direct access, where it’s available.
- Pin to homepage adds the document to the project homepage.
- Duplicate saves a copy, with its current content, into a space you choose.
- Version history opens the document’s saved versions.
- View as code shows the document’s content, including every chart’s query and configuration, as JSON.
- Delete removes the document. When soft delete is enabled, it moves to Recently deleted in project settings, where it can be restored.
Version history
Every save creates a new version. Open ⋯ → Version history to see them, newest first, with who saved each one and when. The first entry is the current version.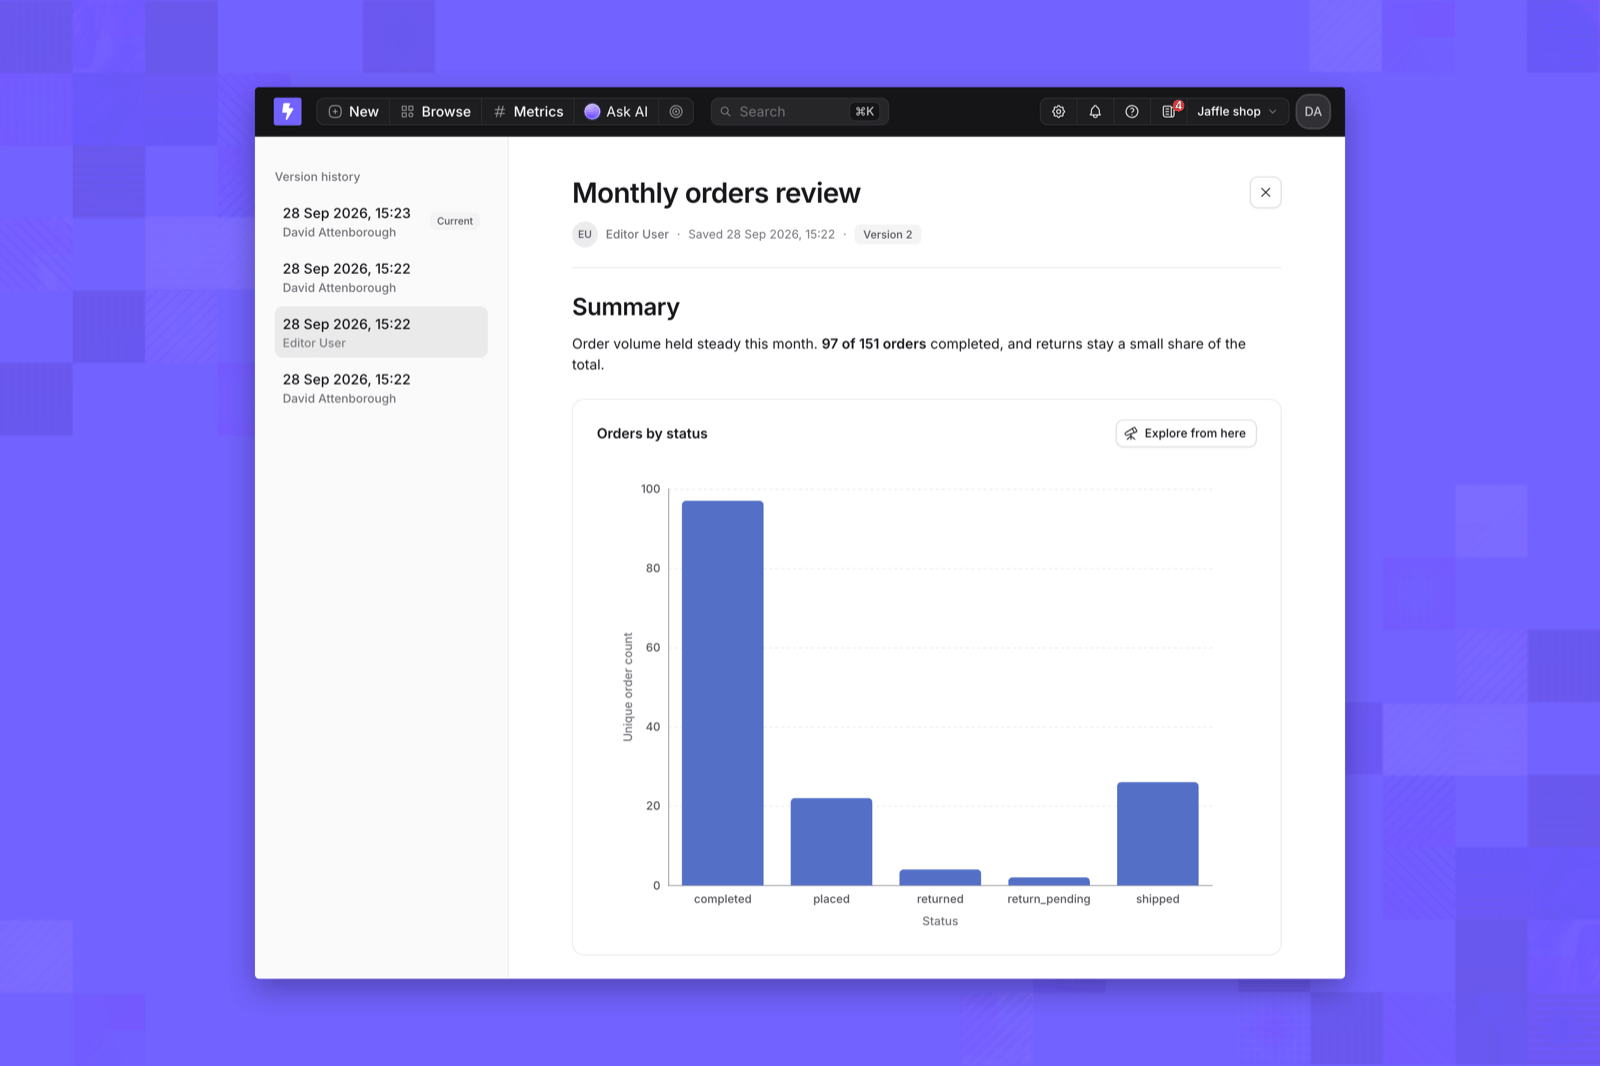
Download and upload with the CLI
The Lightdash CLI downloads and uploads documents as code, alongside your charts and dashboards. Each document is one YAML file named by its slug, in the same format as View as code.lightdash/documents/<slug>.yml:
- A new slug creates a document in the space named by
spaceSlug. The space must already exist — upload it first. - An unchanged file is skipped.
- A changed file saves a new version, so the previous content stays in version history. Changing
spaceSlugmoves the document. - If someone saves the document while the upload runs, the upload fails for that document instead of overwriting their change.