

Beta Linear and Jira export is part of Issues, available on Enterprise and Cloud Pro plans. It needs Review AI agent turns switched on and an organization admin to set it up. What Beta means.
- New findings create an issue automatically. Every new AI-filed finding, and every issue filed by hand on the board, gets a Linear or Jira issue in the background.
- Existing findings can be exported in one click. Open findings that were on the board before you connected are not exported on their own. Use Create issues for existing findings to catch up.
- Each issue links both ways. The Linear or Jira issue carries an Open in Lightdash link back to the finding, and the finding on the board shows the issue identifier (for example
AE-142orDATA-57) as a link to the tracker. - Status is not synced. Closing an issue in Linear or Jira does not change the finding on the board, and resolving a finding does not close the issue. Treat the tracker as the place where work is planned and the board as the place where evidence lives.
What an exported issue contains
Each exported issue uses the finding’s title and a description made of:
The link is also attached to the issue as a Linear link or a Jira web link, so it stays visible when the description is edited.
A finding is exported once per tool. Recurrences of an already-exported finding do not create a new issue; the existing issue keeps its link and the board’s Recurs N× count goes up.
Where the settings live
- Go to Settings → Ask AI → General.
- Make sure Review AI agent turns is on. The export settings only appear while reviews are enabled.
- Scroll to the Linear issues and Jira issues sections, below the Slack notification settings.
Linear
Connect Linear
Lightdash connects to Linear through a private OAuth app that you create in your own Linear workspace. No client secret is needed, and there is nothing to configure on the server.- In the Linear issues section, click Create Linear app. This opens Linear’s new-application page with the app name, callback URL, and grant type already filled in. Save the app in Linear.
- Copy the app’s client ID from Linear.
- Back in Lightdash, paste it into Linear OAuth client ID and click Connect Linear.
- Approve the app in Linear. Lightdash asks for the
readandissues:createscopes only.
If you prefer to create the app by hand, set its callback URL to
https://<your-lightdash-url>/api/v1/linear/oauth/callback and enable the authorization code grant. Public client IDs are fine because the connection uses PKCE.Choose where issues go
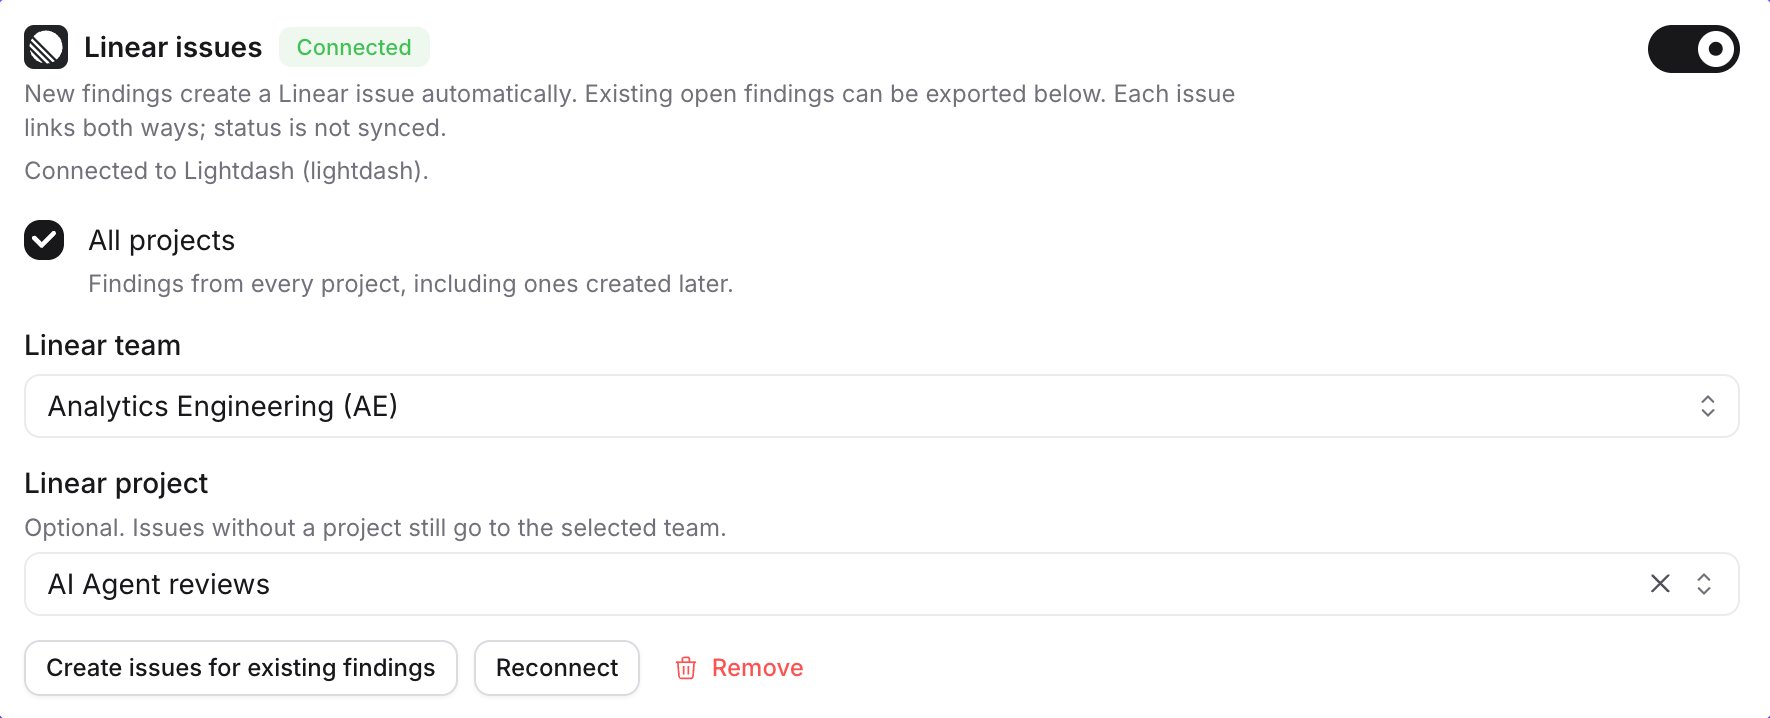
Selections save as you change them. The toggle at the top right switches the export on and off. It can only be turned on once a team is chosen and at least one project is in scope, and it is switched on for you when you pick a team.
Export findings that already exist
Connecting Linear does not export findings that were already on the board. When you are happy with the routing, click Create issues for existing findings. Lightdash queues every open finding in the projects you selected that does not already have a Linear issue, and creates the issues in the background in small batches. Findings in Done and dismissed findings are not exported. The button is safe to click more than once. Findings that already have an issue are skipped, and Lightdash locks each finding while its issue is created so a backfill that overlaps with a review run cannot open duplicates.Reconnect or remove
- Reconnect starts the Linear authorization again with the saved app. Use it after the app is reinstalled or its access is revoked in Linear.
- Remove deletes the connection and its token from Lightdash. Existing Linear issues are left as they are, and the links on the board keep working. Routing is cleared, so reconnecting later starts from a clean setup.
Jira
Connect Jira
Jira Cloud is connected through an Atlassian OAuth 2.0 app that you create in your Atlassian developer console. Both the client ID and the client secret are stored in Lightdash, encrypted, and used only for your organization.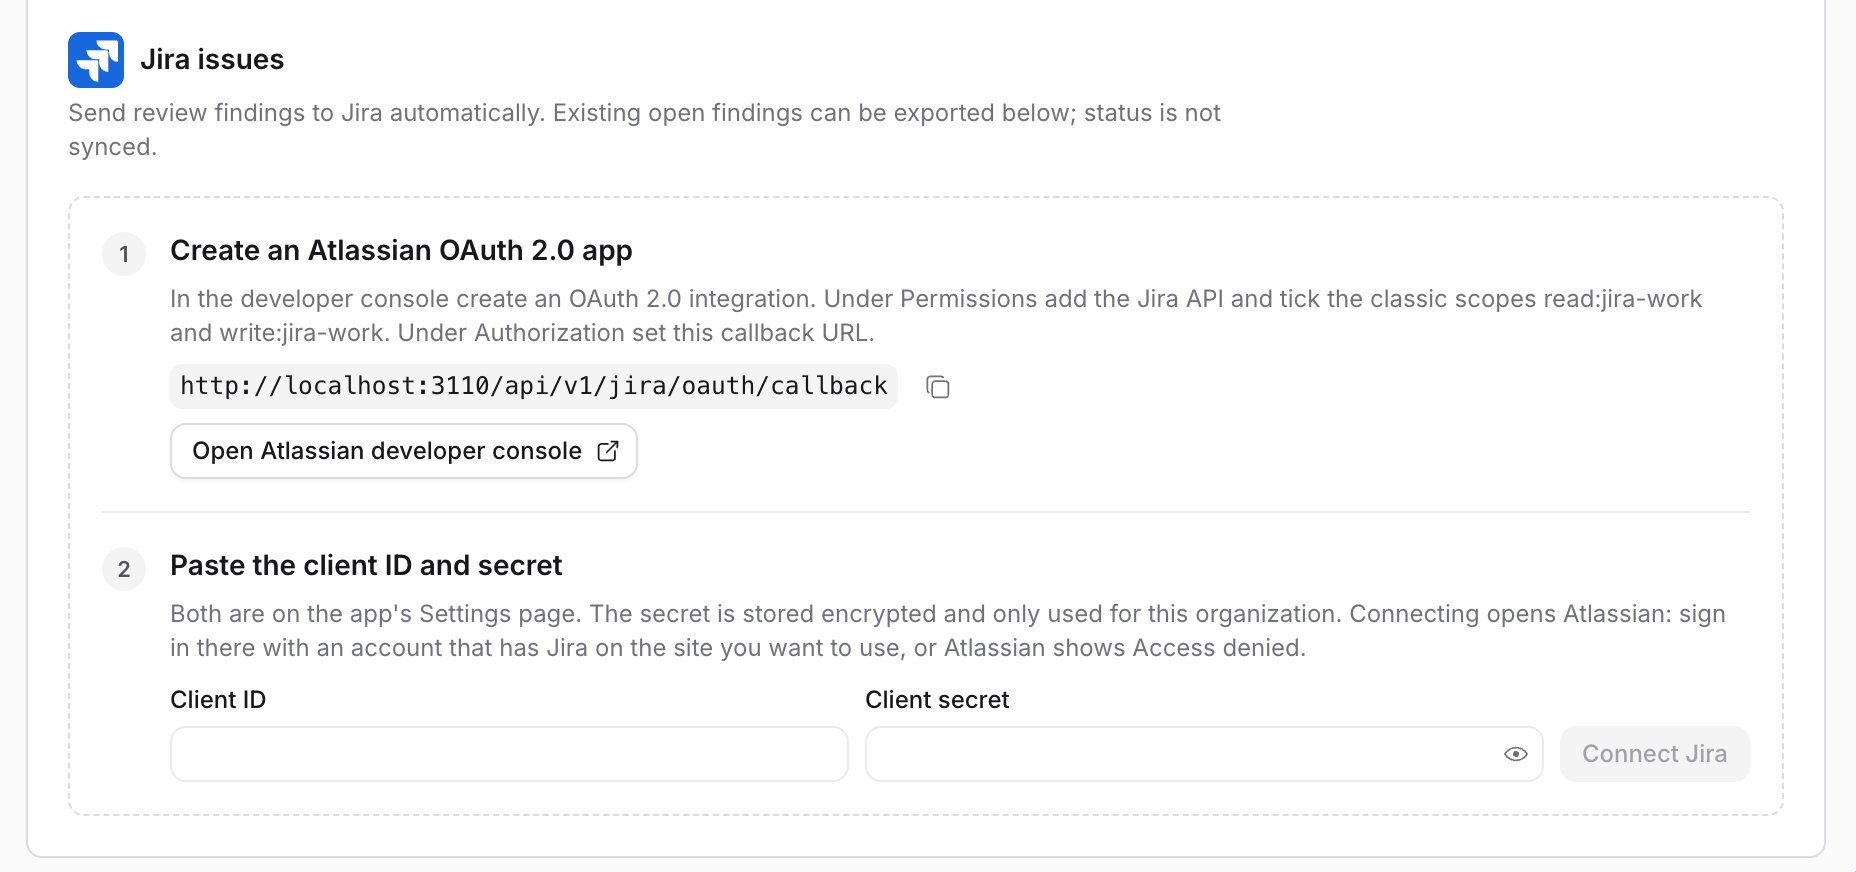
- Click Open Atlassian developer console and create an OAuth 2.0 integration.
- Under Permissions, add the Jira API and tick the classic scopes
read:jira-workandwrite:jira-work. - Under Authorization, set the callback URL to the one shown in Lightdash. It is
https://<your-lightdash-url>/api/v1/jira/oauth/callback, and the copy button next to it puts the exact value on your clipboard. - Open the app’s Settings page in the console and copy the Client ID and Secret.
- Back in Lightdash, paste both and click Connect Jira.
- Atlassian asks you to sign in and approve the app. Sign in with an account that has Jira on the site you want to use. If the account has no Jira access on any site, Atlassian shows Access denied and the connection is not saved.
Lightdash also asks Atlassian for the
offline_access scope so it can refresh the token in the background. You do not need to add it in the console; it is granted automatically alongside the classic scopes.Choose where issues go
Selections save as you change them. The toggle at the top right switches the export on and off, and can only be turned on once a Jira project and issue type are chosen and at least one Lightdash project is in scope.
Export findings that already exist
The Jira section has the same Create issues for existing findings button as Linear. It queues every open finding in scope that does not already have a Jira issue and creates them in the background, skipping findings that are already linked.Reconnect or remove
- Reconnect restarts the Atlassian authorization with the saved client ID and secret. Use it if the token was revoked, or to switch the connecting account.
- Remove deletes the connection, its token, and the stored client secret from Lightdash. Existing Jira issues and the links on the board are left as they are. Routing is cleared.
Which findings are exported
Issue creation runs on the scheduler. If Linear or Jira is unavailable, the job fails and is retried; findings whose issue was already created are not created twice.
Troubleshooting
- The Linear or Jira sections are missing. They only render while Review AI agent turns is on. Reviews are also paused while your organization has any bring-your-own AI provider key set, which hides the sections too.
- The export toggle is greyed out. Linear needs a team, Jira needs a project and an issue type, and both need at least one Lightdash project in scope. Pick those first.
- No issues appear for new findings. Check the toggle is on, that the finding’s project is in the selected projects, and that the finding is new rather than a recurrence. Findings that recur attach to the existing card and do not open another issue.
- Atlassian shows Access denied. The account you signed in with has no Jira product on any site. Sign in with an account that uses Jira on the site you want, then click Reconnect.
- Jira shows Select site. The connecting account can see several Jira sites. Pick one in the Jira site dropdown; issues are not created until a site is chosen.
- Linear shows Reconnect required. The connection predates app-based setup. Create a private app with Create Linear app and connect with its client ID.
- I changed the team or project and old issues did not move. Routing only applies to issues created after the change. Existing issues stay where they were created.
Related
- Issues: the board these exports are created from, and how findings are filed.
- Agent visibility: where Issues fits into admin visibility overall.
- Set up agents: enabling reviews and the rest of the Ask AI settings.