

Before you begin
- An organization admin must enable AI features.
- You need a Developer or Admin role, or a custom role with
manage:AiAgent, to create and manage agents. See Agent permissions. - Choose the agent’s audience, job, and data scope. Effective analytics with agents explains how to define a useful scope.
Create an agent
- Open Ask AI in the project where the agent will work.
- Open the agent dropdown and select Create new agent.
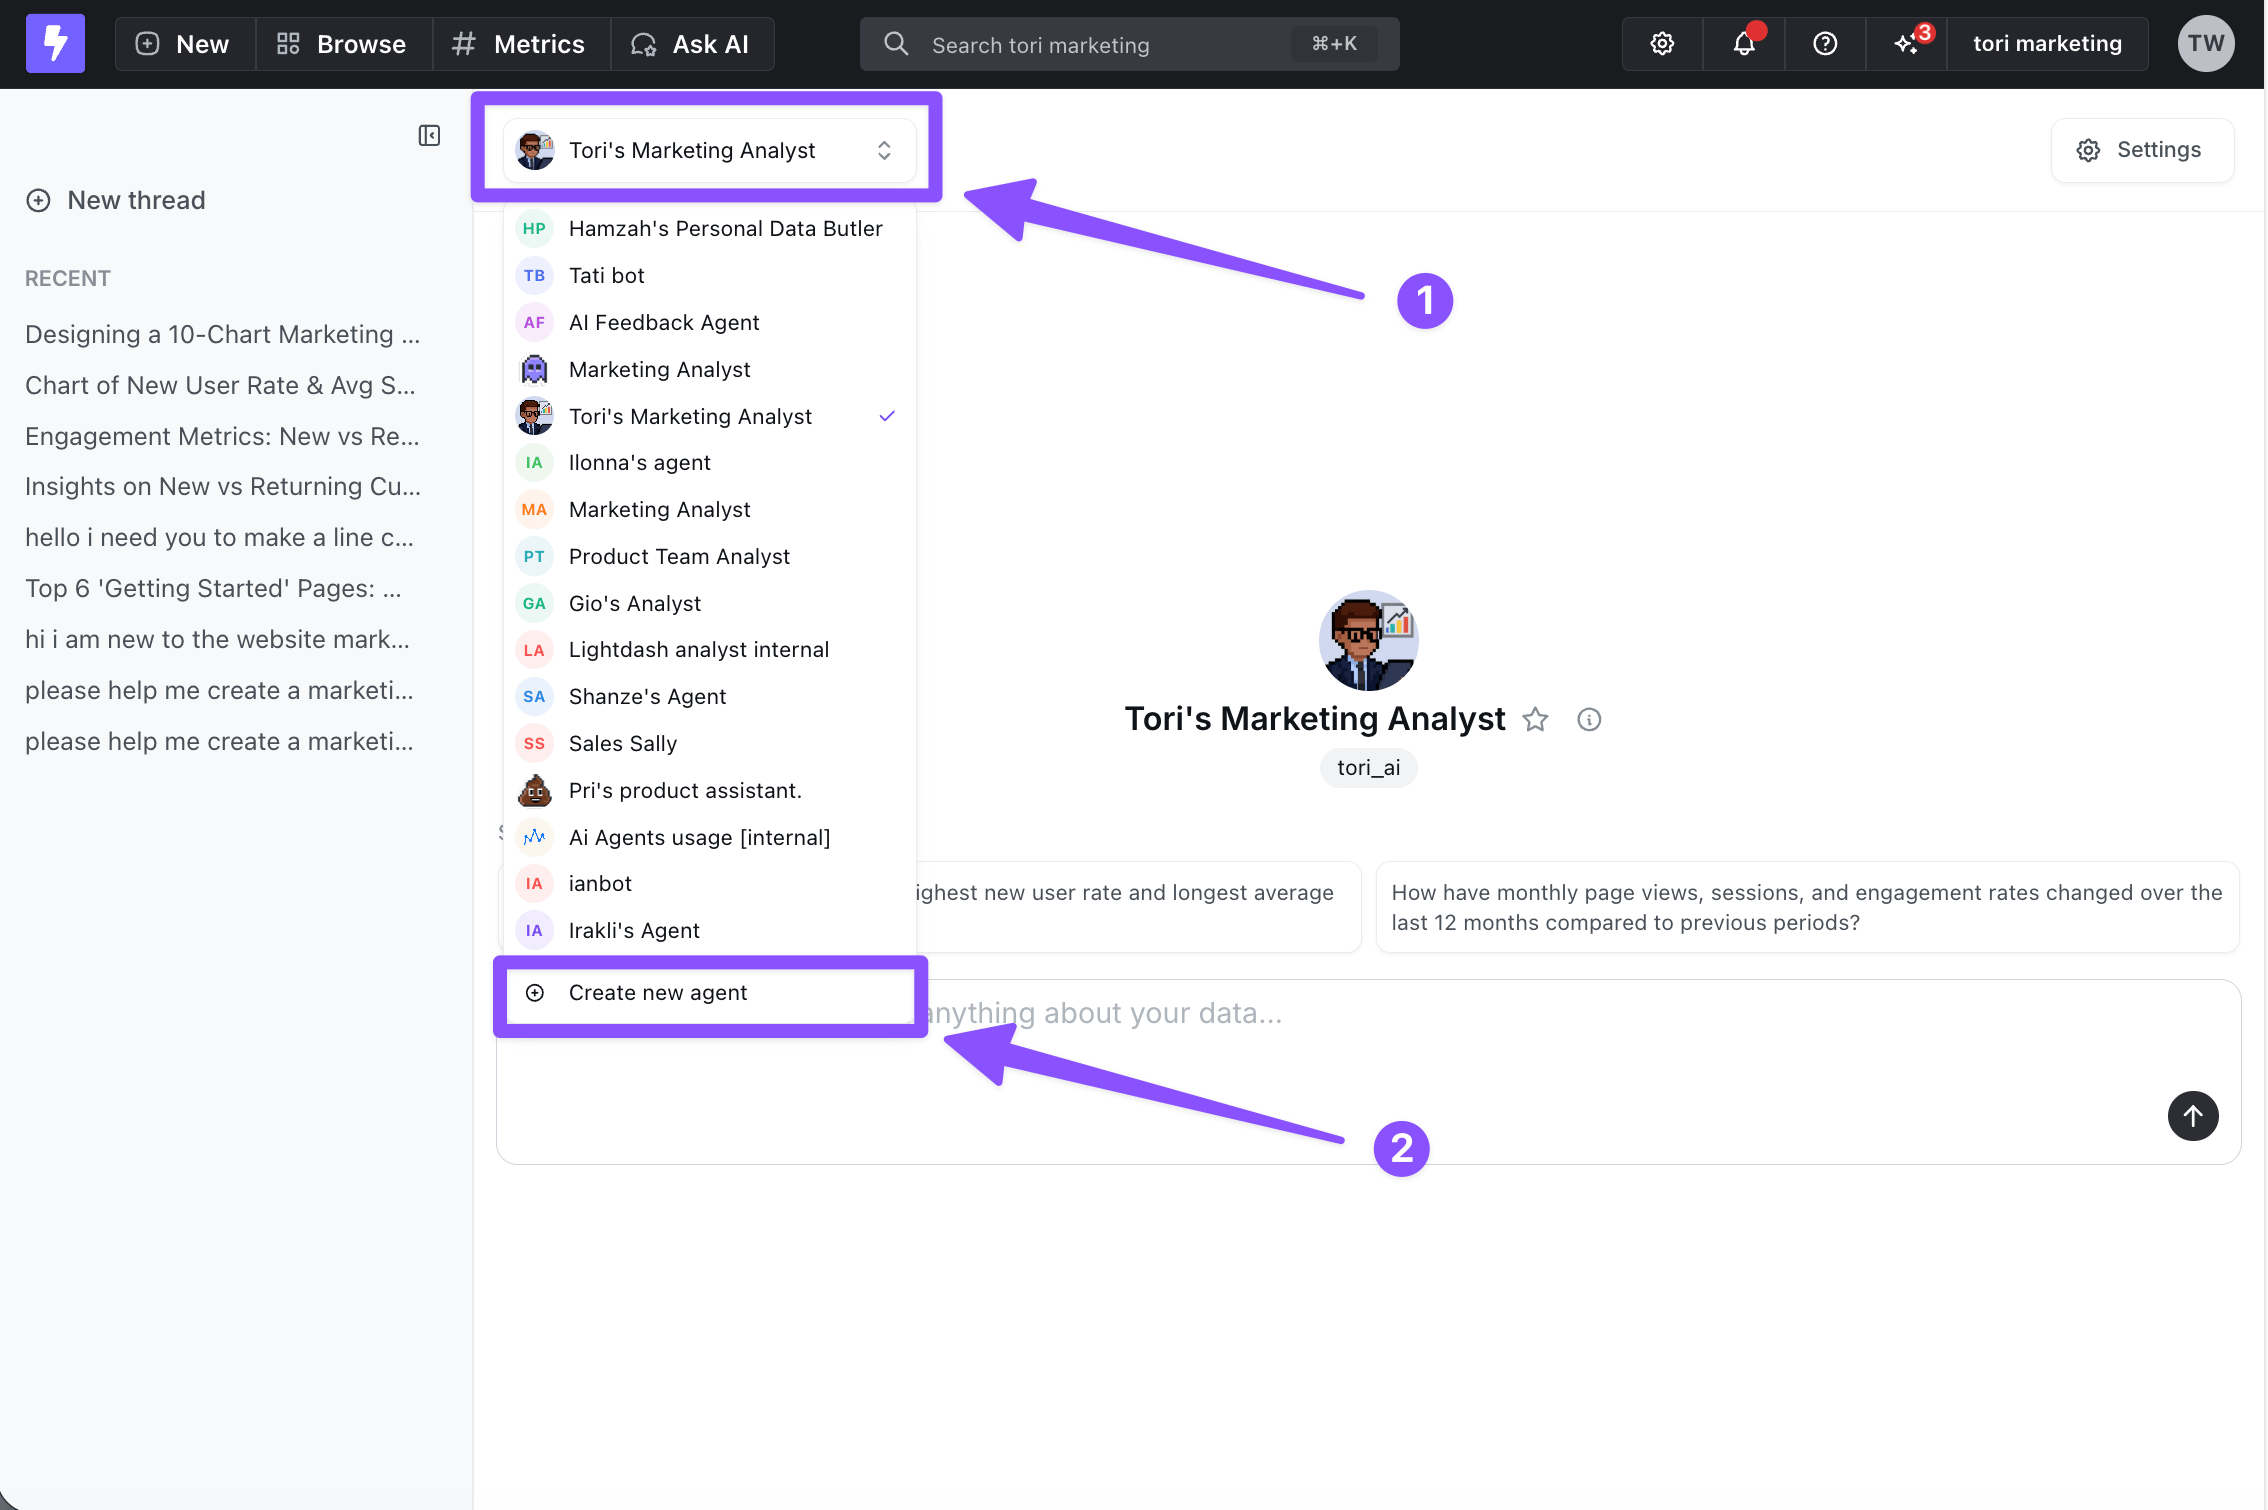
- Set the name, description, instructions, and access using the configuration options below. To keep the agent private while testing, choose Admins & developers only under Access & privacy → Who can use the agent.
- Click Create agent. You can then add reference documents and return to the settings to refine the configuration.
Configure your agent
Name and image
Set Name and an avatar so your team can recognize the agent. Add a Description too. It shows above the message input every time someone opens a new thread, before they type anything, so use it for a short welcome or a list of the topics the agent covers. Instructions can’t do this reliably: the model reads them as guidance and decides for itself whether to open with a greeting.Instructions
Add the role, priorities, analysis defaults, constraints, and communication style that should apply to every conversation with this agent. Keep stable model and field definitions in the semantic layer, and use knowledge documents for longer reference material. See Writing effective instructions for examples and authoring guidance. Instructions belong to one agent, and there’s no organization-wide instructions field. Use them to define names the agent could misread, for example “Acme Planner is our app. A question about Acme Planner is about the product, not a person.” To give every agent in a project the same terminology, use agent context instead. Instructions don’t widen the agent’s access. Configure data access and agent permissions separately.Default model (optional)
Choose the default model and reasoning setting used for new chats with this agent. Leave the model empty to inherit the organization default. Lightdash resolves the model for a new chat in this order:- The user’s per-chat selection
- The agent’s default model
- The organization default model
- The system default
Knowledge documents (optional)
After creating the agent, upload longer reference material under Knowledge & data → Reference documents. See Knowledge documents for upload, retrieval, and editing behavior.Skills (optional)
Attach a reusable workflow from your organization’s skill library, or create one in the agent’s Skills section. See Custom agent skills for authoring and invocation.Data access
Choose whether the agent can read query results or work with metadata only. See data access modes for the defaults and behavior. Use Pass user information to tailor answers to who is asking. If the agent can use SQL mode, limit which schemas it can read with Agent data scope.Composer queries (optional)
The Composer queries switch controls whether the agent can post-process results with DuckDB and Python. It appears once that feature is turned on for your organization and is on by default. It needs data access that lets the agent read rows. Turn it off to keep an agent on the standard query tools.User and group access (optional)
By default, your agent is available to everyone in the project. To change that, open the agent’s settings and go to Access & privacy → Who can use the agent:- Everyone in the project — every project member can see and use the agent. This is the default.
- Admins & developers only — hidden from everyone else, which is useful while you set up or test the agent.
- Specific users & groups — only the users and groups you pick.
manage:AiAgent scope can always use every agent in the project, whatever you choose here. Someone who can’t use any agent in a project doesn’t see Ask AI in that project, so set this on each agent in the project.
This controls who can use the agent, which is separate from data access control (what data the agent can query).
Narrowing this list also changes which agent other people land on: someone who can use only one agent in the project opens it directly. See Set your default agent.
Tags (optional)
Add Tags to limit the agent to part of your semantic layer. Configure matching tags on your models and fields first; see limiting access to specific explores and fields for the YAML and filtering rules.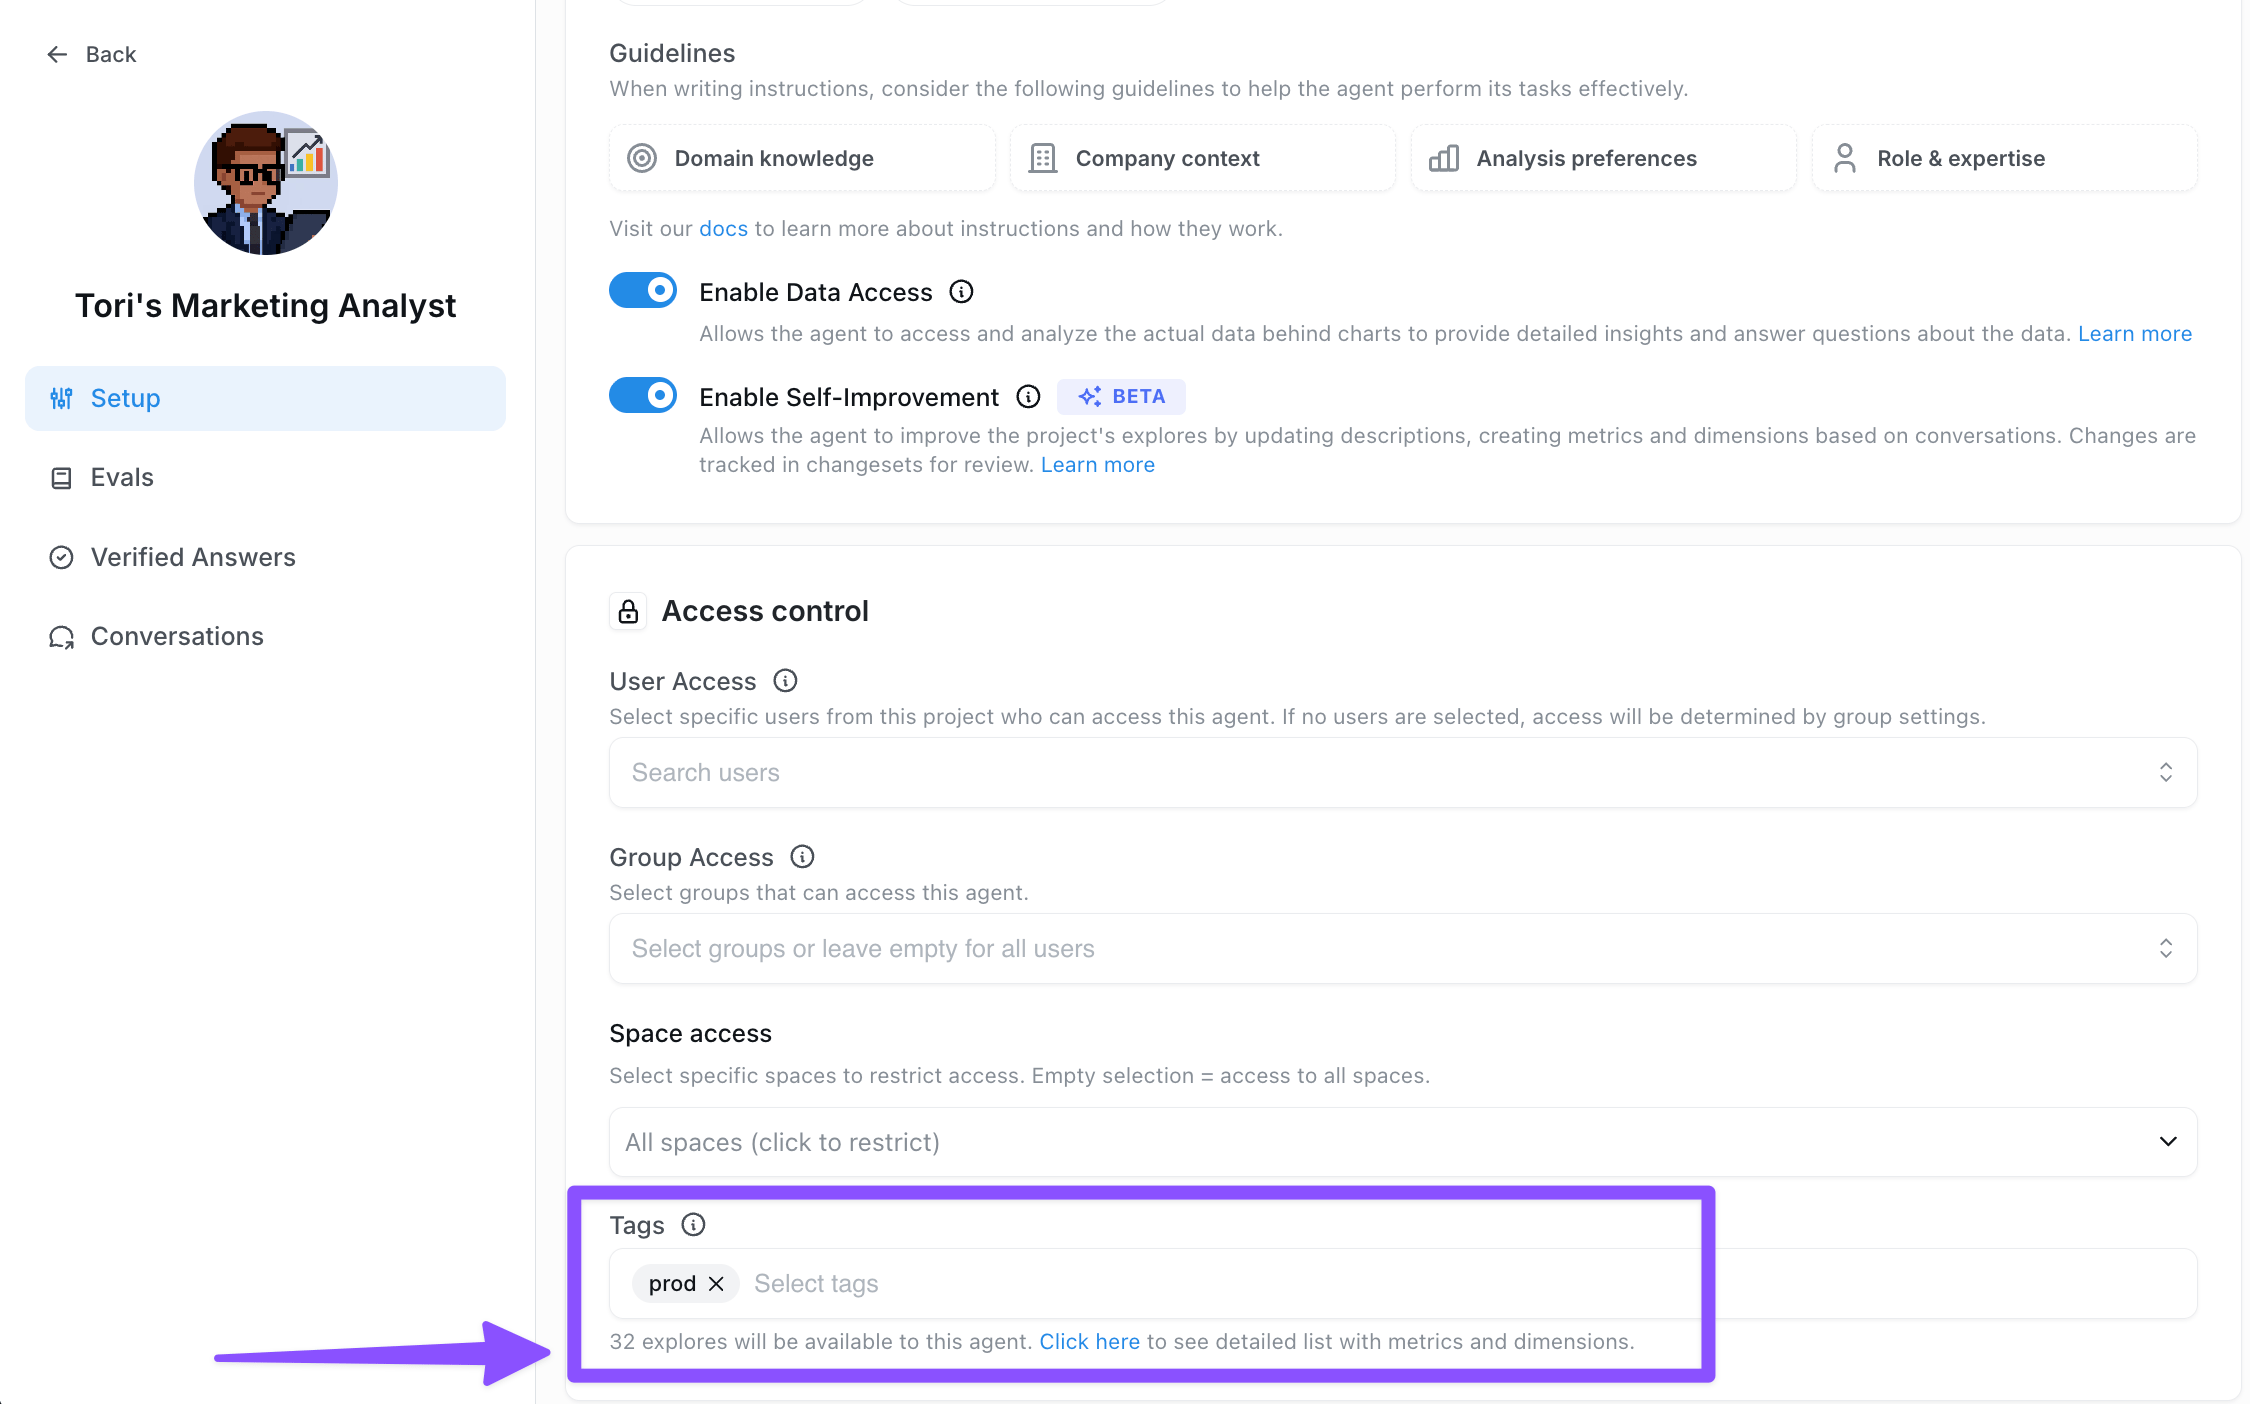
Enable AI writeback (optional)
Allow your agent to edit dbt or native Lightdash YAML models from chat — renaming metrics, adding dimensions, or updating descriptions — and open a pull request for review. See AI writeback for supported connections and setup.Test and share the agent
- Start a conversation with the agent and ask a question your team regularly needs to answer.
- Inspect the query, chart, and explanation. Check that the agent uses the intended metrics, filters, and comparison period.
- Adjust its configuration and click Save changes. Start a fresh conversation to test the same question without the earlier conversation’s context.
- Set who can use the agent when it is ready for your team.