> ## Documentation Index
> Fetch the complete documentation index at: https://docs.lightdash.com/llms.txt
> Use this file to discover all available pages before exploring further.
# Lightdash Desktop
> Ask questions and build data apps on Lightdash Cloud with your own Claude or ChatGPT subscription.
Experimental Available for Lightdash Cloud customers. [Contact us](/support) if you'd like to try it. [Learn about feature maturity levels](/support/feature-maturity-levels).
Lightdash Desktop connects your own AI subscription to your team's Lightdash Cloud data. Ask questions, inspect results, and build interactive apps to share with your team.
**Bring your subscription. Lightdash supplies the data and metric definitions.** Claude Code or OpenAI Codex runs on your computer using your Claude or ChatGPT account and its usage limits. Your Lightdash login determines which projects, content, and data you can access.
[**Download Lightdash Desktop →**](https://github.com/lightdash/lightdash-desktop-releases/releases/latest)
 ## What you can do
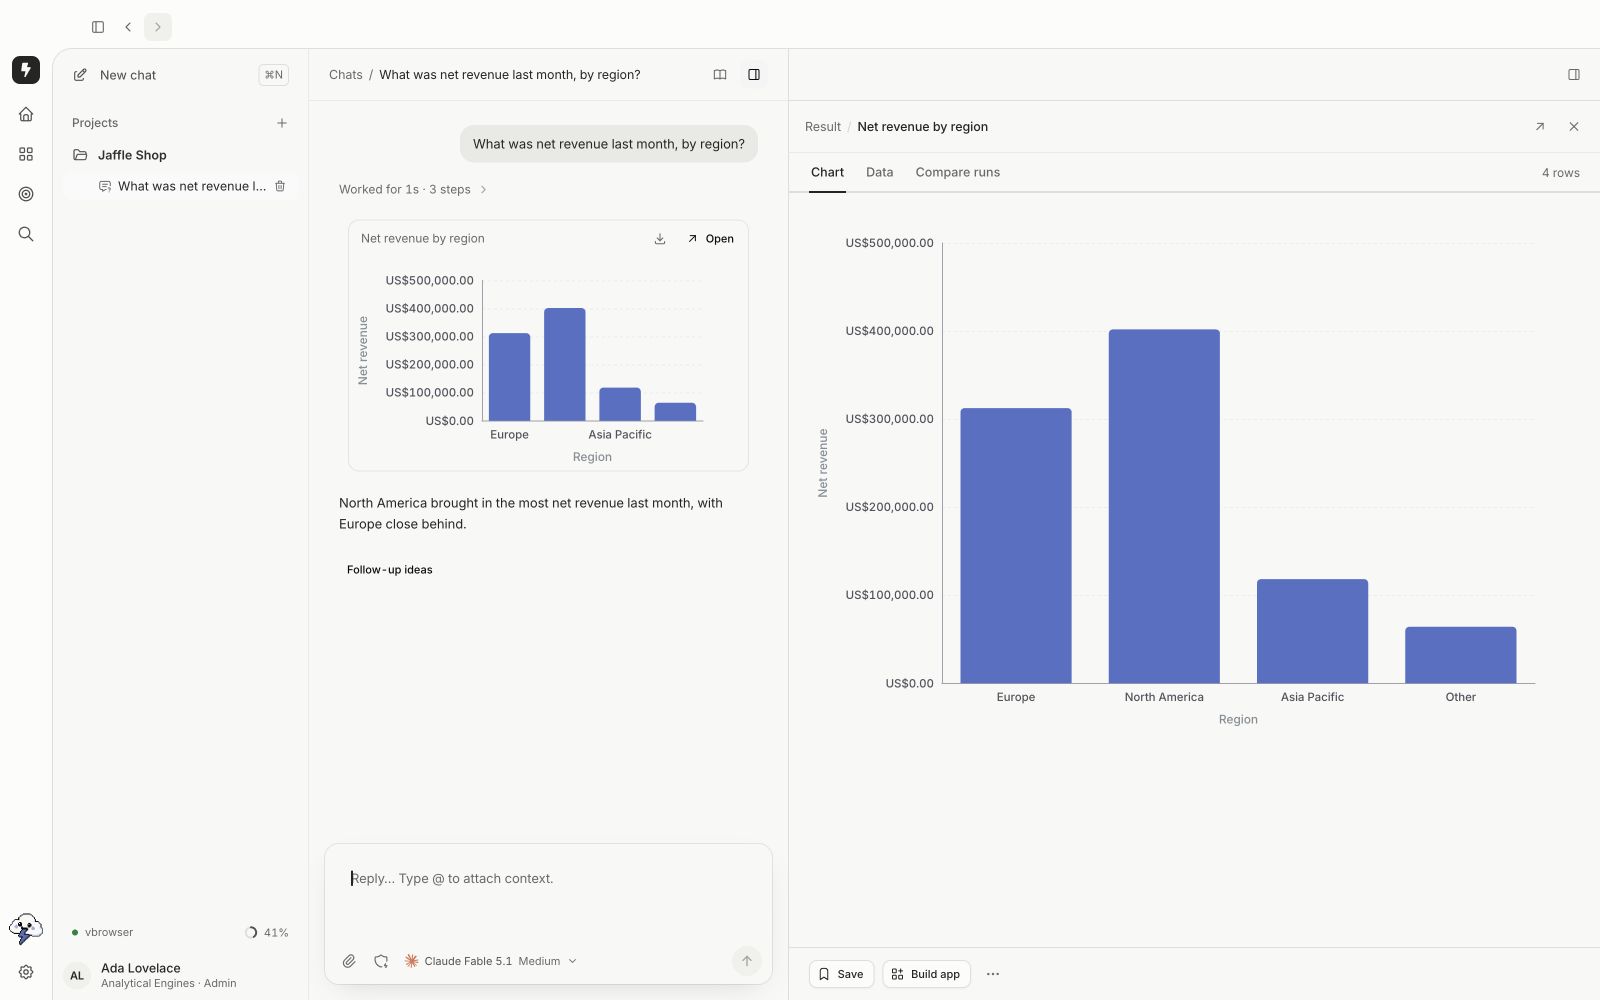
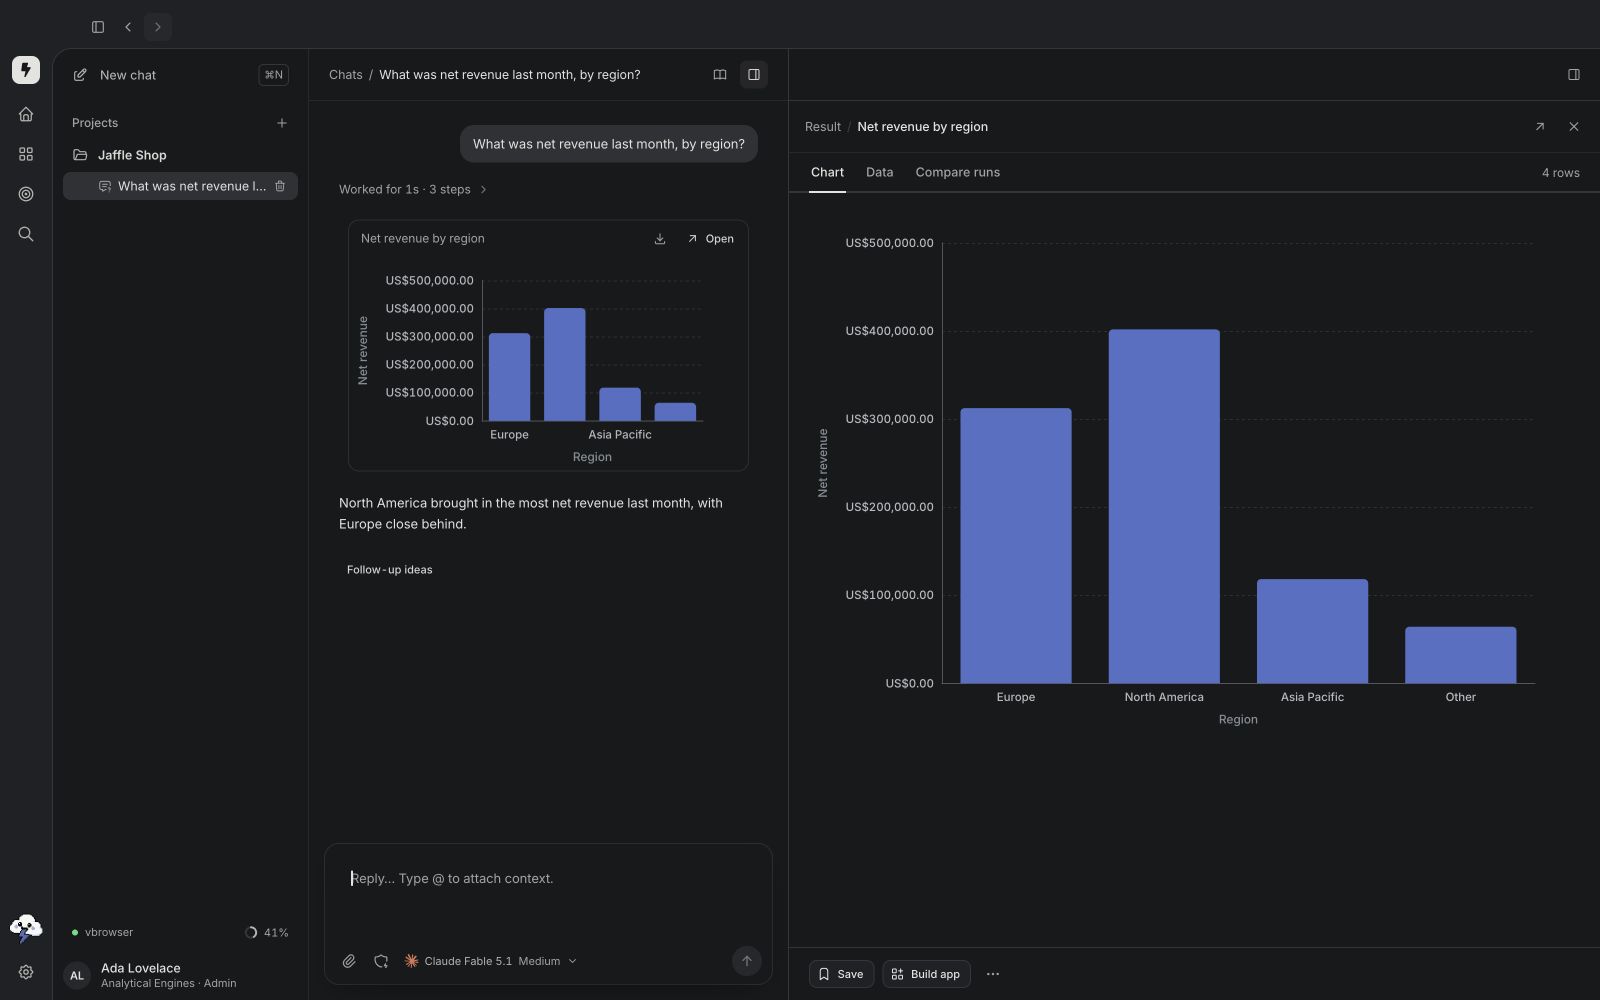
* **Ask questions about your data.** Follow up in the same chat, inspect charts and result rows, and open results in Lightdash.
* **Keep useful answers.** Use **Save** to keep an answer for yourself, or **More → Save as chart in Lightdash** to save a chart in your project.
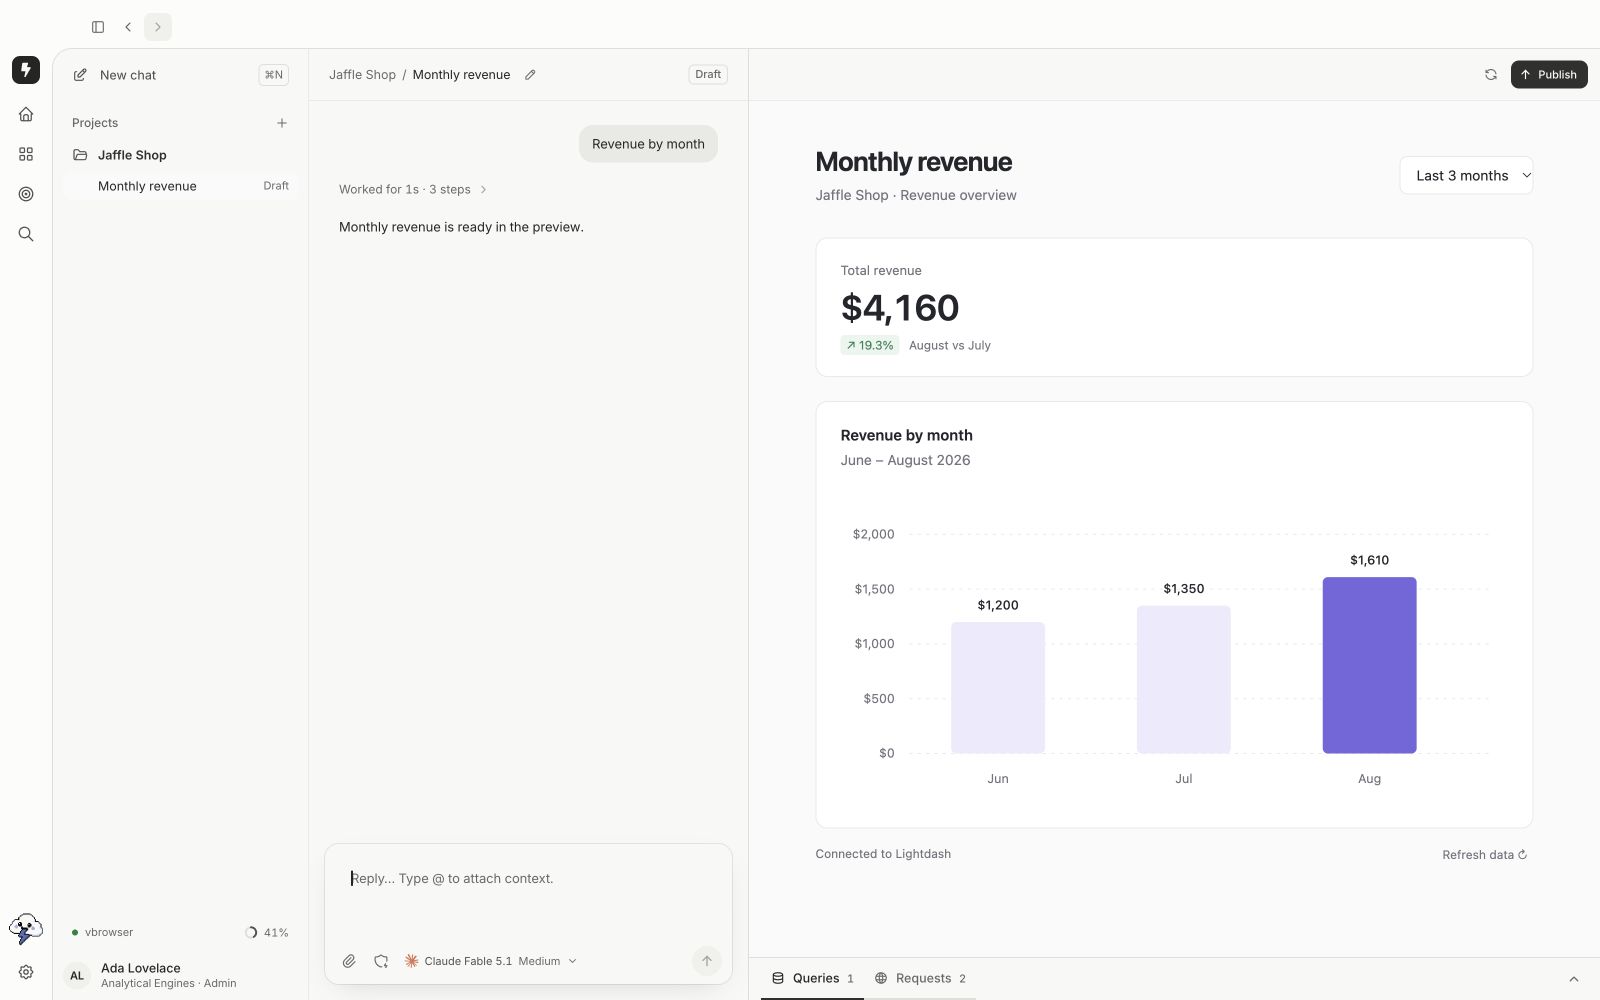
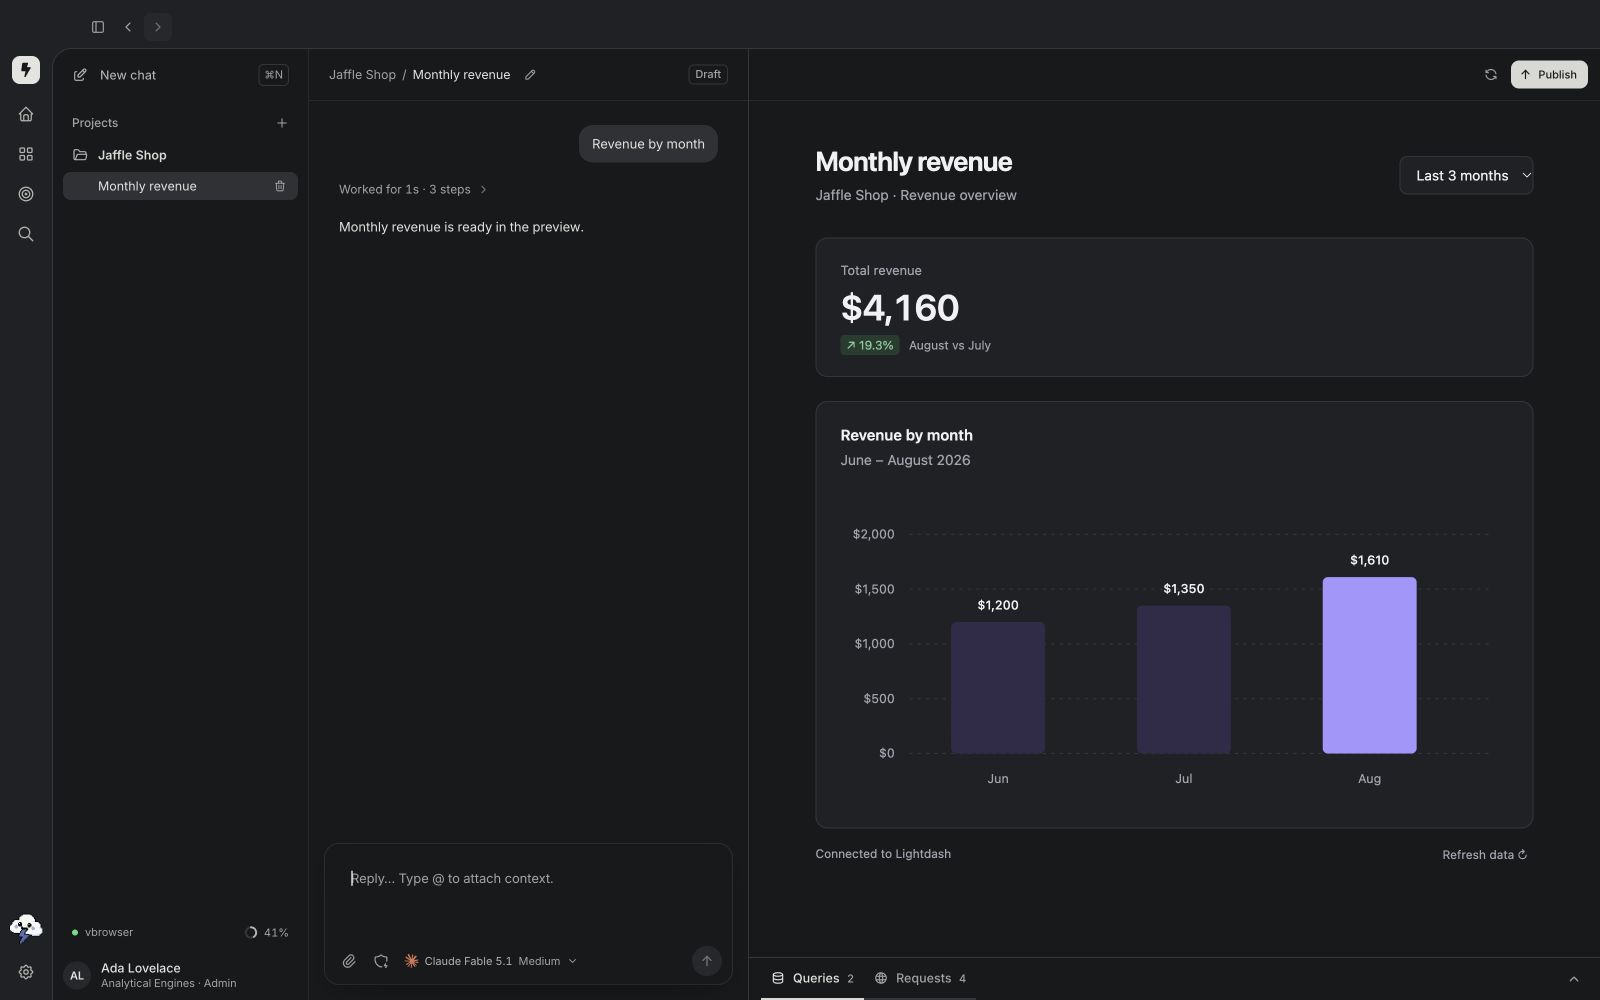
* **Build interactive data apps.** Describe a dashboard, report, or custom tool. Refine it through chat, inspect its preview, and publish it to Lightdash when you're happy with it.
* **Turn an answer into an app.** Choose **Build app** from a result to start with the query you've already explored.
* **Reuse your work.** Open existing data apps, edit them, or remix one into an independent draft.
* **Save repeatable workflows as Playbooks.** Reuse an investigation or app-building prompt, with variables for things like a date range or region. Playbooks can be exported and imported.
For example, start with “What was net revenue last month, by region?”, then ask “Which region changed most compared with the previous month?” Once you have an answer worth revisiting, build a revenue review app with a region filter and a monthly trend.
## What you can do
* **Ask questions about your data.** Follow up in the same chat, inspect charts and result rows, and open results in Lightdash.
* **Keep useful answers.** Use **Save** to keep an answer for yourself, or **More → Save as chart in Lightdash** to save a chart in your project.
* **Build interactive data apps.** Describe a dashboard, report, or custom tool. Refine it through chat, inspect its preview, and publish it to Lightdash when you're happy with it.
* **Turn an answer into an app.** Choose **Build app** from a result to start with the query you've already explored.
* **Reuse your work.** Open existing data apps, edit them, or remix one into an independent draft.
* **Save repeatable workflows as Playbooks.** Reuse an investigation or app-building prompt, with variables for things like a date range or region. Playbooks can be exported and imported.
For example, start with “What was net revenue last month, by region?”, then ask “Which region changed most compared with the previous month?” Once you have an answer worth revisiting, build a revenue review app with a region filter and a monthly trend.
 ## How Desktop fits with Lightdash
The [AI agents in Lightdash and Slack](/agents/use-ai-agents) run within Lightdash's hosted agent experience. Desktop gives you a local workspace where you choose your connected subscription and model, keep conversations and app drafts on your computer, and preview apps alongside the chat.
Published [data apps](/data-apps) live in Lightdash. Teammates open them in their browser with their own Lightdash access; they don't need Desktop or your AI subscription to view them. Saving a personal answer or keeping a local draft doesn't publish it to your team.
## Download and connect
### 1. Install the app
Open the [latest release](https://github.com/lightdash/lightdash-desktop-releases/releases/latest) and expand **Assets**. Choose the installer for your computer:
| Computer | Installer |
| - | - |
| Mac with Apple silicon | `arm64.dmg` |
| Mac with an Intel processor | `x64.dmg` |
| Windows on Intel or AMD | `x64.exe` |
| Windows on ARM | `arm64.exe` |
| Linux on Intel or AMD | `x86_64.AppImage` or `amd64.deb` |
| Linux on ARM | `arm64.AppImage` or `arm64.deb` |
The filenames include the release version. On a Mac, open the DMG and drag Lightdash Desktop into Applications. On Windows, run the installer. On Linux, install the `.deb` package or make the AppImage executable and launch it.
You'll need access to a Lightdash Cloud project and an account that can use Claude Code or Codex. Install [Node.js with npm](https://nodejs.org/en/download) to build data apps; Desktop also uses npm to install Codex.
### 2. Connect Lightdash
Open Desktop and enter your Lightdash Cloud instance URL, such as `https://your-team.lightdash.cloud`. Choose your team's sign-in method and complete sign-in in your browser. Return to Desktop to continue.
If you need the token-based option, create a [personal access token](/personal-settings/create-personal-tokens) in Lightdash and use the app's personal access token sign-in.
### 3. Connect your AI subscription
Choose **Claude** or **ChatGPT**. You only need one:
* **Claude:** install Claude Code from the setup screen if needed, then choose **Sign in with Claude**. Having the Claude desktop app alone doesn't connect the Claude Code CLI that Lightdash Desktop uses.
* **ChatGPT:** install the Codex CLI from the setup screen if needed, then choose **Sign in with ChatGPT**.
Complete the provider's browser sign-in, return to Desktop, and wait for **Connected**. Check your account's current access and usage limits with [Claude](https://code.claude.com/docs/en/overview) or [Codex](https://developers.openai.com/codex/pricing/).
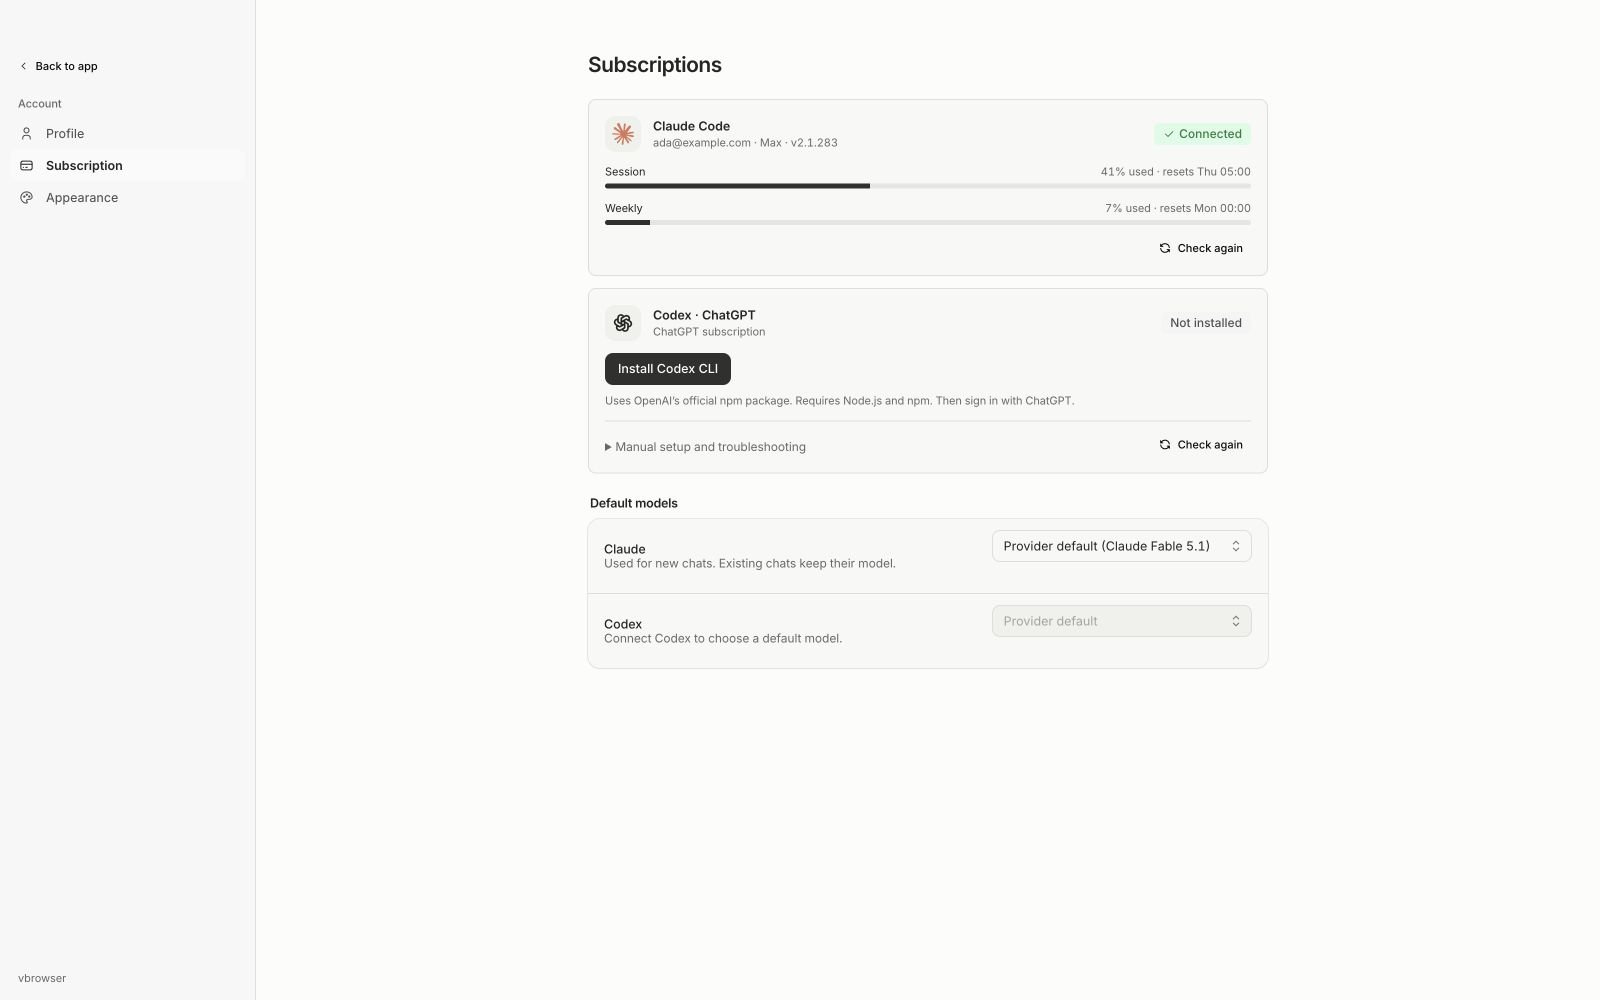
You can manage connections and default models in **Settings → Subscription**. The model picker in a chat lets you choose from your connected providers.
## How Desktop fits with Lightdash
The [AI agents in Lightdash and Slack](/agents/use-ai-agents) run within Lightdash's hosted agent experience. Desktop gives you a local workspace where you choose your connected subscription and model, keep conversations and app drafts on your computer, and preview apps alongside the chat.
Published [data apps](/data-apps) live in Lightdash. Teammates open them in their browser with their own Lightdash access; they don't need Desktop or your AI subscription to view them. Saving a personal answer or keeping a local draft doesn't publish it to your team.
## Download and connect
### 1. Install the app
Open the [latest release](https://github.com/lightdash/lightdash-desktop-releases/releases/latest) and expand **Assets**. Choose the installer for your computer:
| Computer | Installer |
| - | - |
| Mac with Apple silicon | `arm64.dmg` |
| Mac with an Intel processor | `x64.dmg` |
| Windows on Intel or AMD | `x64.exe` |
| Windows on ARM | `arm64.exe` |
| Linux on Intel or AMD | `x86_64.AppImage` or `amd64.deb` |
| Linux on ARM | `arm64.AppImage` or `arm64.deb` |
The filenames include the release version. On a Mac, open the DMG and drag Lightdash Desktop into Applications. On Windows, run the installer. On Linux, install the `.deb` package or make the AppImage executable and launch it.
You'll need access to a Lightdash Cloud project and an account that can use Claude Code or Codex. Install [Node.js with npm](https://nodejs.org/en/download) to build data apps; Desktop also uses npm to install Codex.
### 2. Connect Lightdash
Open Desktop and enter your Lightdash Cloud instance URL, such as `https://your-team.lightdash.cloud`. Choose your team's sign-in method and complete sign-in in your browser. Return to Desktop to continue.
If you need the token-based option, create a [personal access token](/personal-settings/create-personal-tokens) in Lightdash and use the app's personal access token sign-in.
### 3. Connect your AI subscription
Choose **Claude** or **ChatGPT**. You only need one:
* **Claude:** install Claude Code from the setup screen if needed, then choose **Sign in with Claude**. Having the Claude desktop app alone doesn't connect the Claude Code CLI that Lightdash Desktop uses.
* **ChatGPT:** install the Codex CLI from the setup screen if needed, then choose **Sign in with ChatGPT**.
Complete the provider's browser sign-in, return to Desktop, and wait for **Connected**. Check your account's current access and usage limits with [Claude](https://code.claude.com/docs/en/overview) or [Codex](https://developers.openai.com/codex/pricing/).
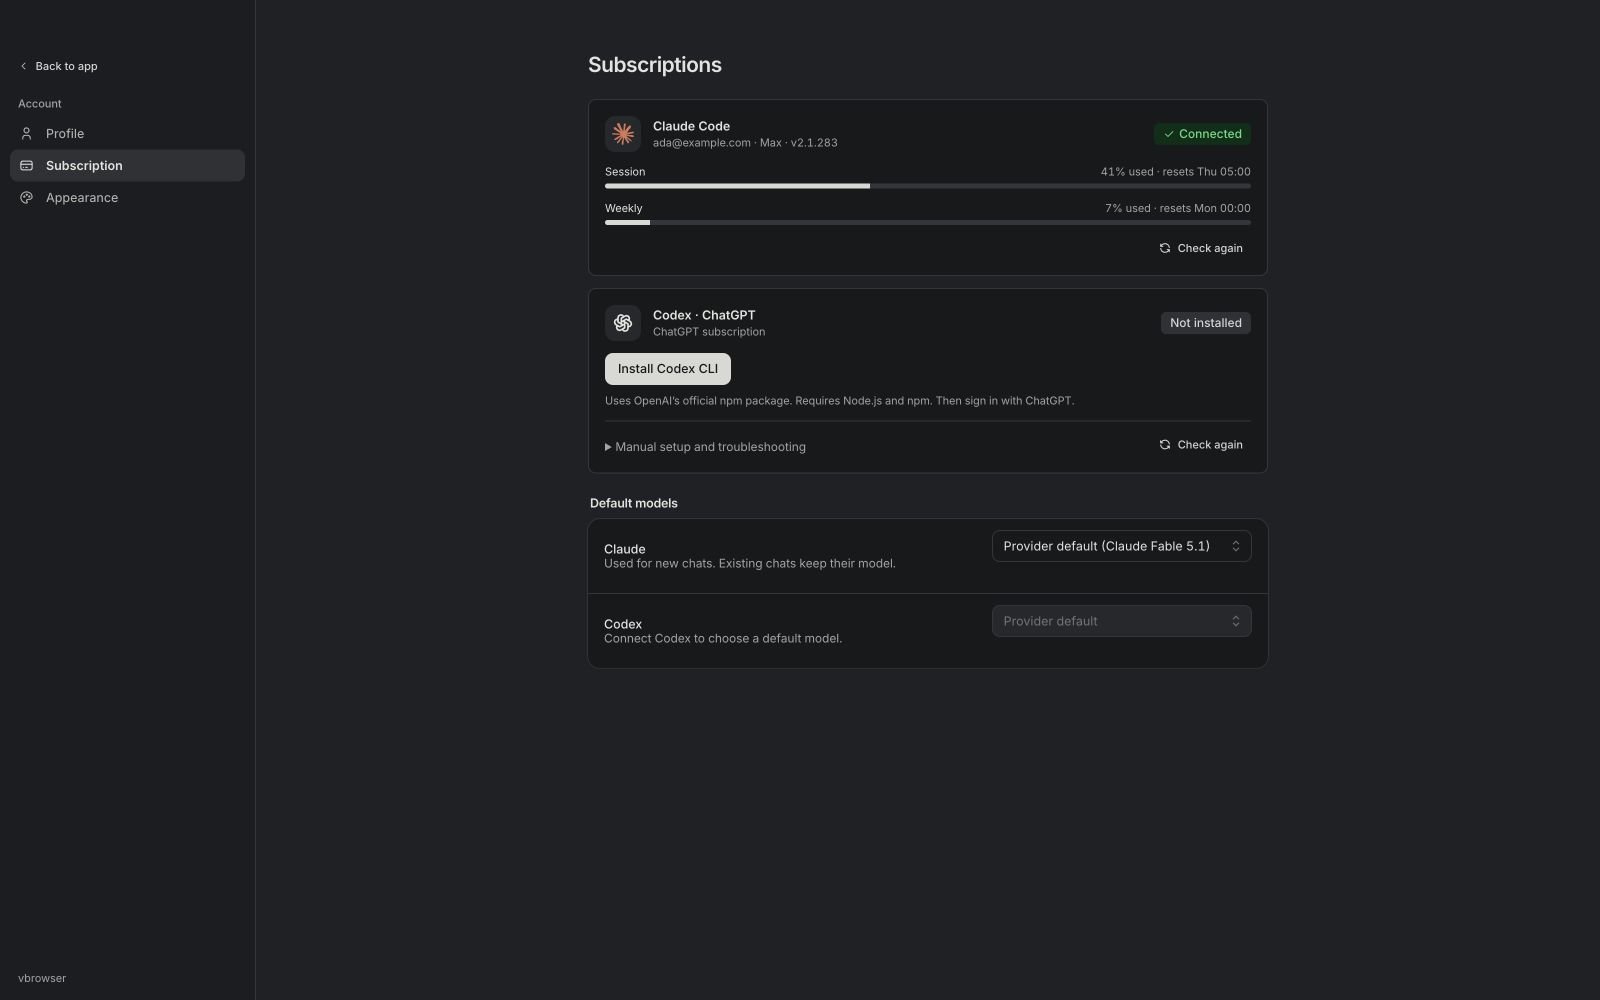
You can manage connections and default models in **Settings → Subscription**. The model picker in a chat lets you choose from your connected providers.
 ### 4. Open a project and try it
Choose your project. Use **Ask** for a data question or **Build** for a data app; **Shift+Tab** switches modes before you send. Type **@** or use the attachment control to add relevant project context, such as charts, dashboards, or a design reference.
For your first app, try: “Build a simple monthly revenue app with total revenue, a bar chart, and a period filter.” Review the preview, ask for refinements, then choose **Publish** to make the app available in Lightdash. Creating and publishing content requires the appropriate [project permissions](/workspace-admin/roles).
## Data and sharing
Queries go through Lightdash and respect your access. Publishing an app doesn't grant its viewers access to data they couldn't otherwise query.
The connected AI provider can receive your prompts, attached context, and results returned by tools. Running the agent on your computer doesn't mean model inference happens offline. Use a provider account approved by your organization, and share only context you're allowed to send to it.
Chat history, Playbooks, and unpublished app work stay on this device. Publish an app to share it through Lightdash; export a Playbook to pass its workflow to another Desktop user.
## If something gets stuck
* **Provider isn't connected:** open **Settings → Subscription**, complete any installation or sign-in steps, then choose **Check again**. Expand **Manual setup and troubleshooting** for provider-specific help.
* **Your subscription reaches its limit:** check the provider's reset time, or choose another connected provider for a new chat.
* **An app won't build:** check that Node.js and npm are installed, and share the error with the agent so it can help fix the app.
* **A project or Publish is unavailable:** check your Lightdash account and project permissions with your admin.
For app feedback, contact the Lightdash teammate who invited you to try Desktop. Include your operating system, app version, what you tried, and a screenshot or error message. Check **Settings → Updates** for app updates, and **Settings → Appearance** for light, dark, or system mode.
This documentation is built and hosted on [Mintlify](https://mintlify.com), a developer documentation platform.
### 4. Open a project and try it
Choose your project. Use **Ask** for a data question or **Build** for a data app; **Shift+Tab** switches modes before you send. Type **@** or use the attachment control to add relevant project context, such as charts, dashboards, or a design reference.
For your first app, try: “Build a simple monthly revenue app with total revenue, a bar chart, and a period filter.” Review the preview, ask for refinements, then choose **Publish** to make the app available in Lightdash. Creating and publishing content requires the appropriate [project permissions](/workspace-admin/roles).
## Data and sharing
Queries go through Lightdash and respect your access. Publishing an app doesn't grant its viewers access to data they couldn't otherwise query.
The connected AI provider can receive your prompts, attached context, and results returned by tools. Running the agent on your computer doesn't mean model inference happens offline. Use a provider account approved by your organization, and share only context you're allowed to send to it.
Chat history, Playbooks, and unpublished app work stay on this device. Publish an app to share it through Lightdash; export a Playbook to pass its workflow to another Desktop user.
## If something gets stuck
* **Provider isn't connected:** open **Settings → Subscription**, complete any installation or sign-in steps, then choose **Check again**. Expand **Manual setup and troubleshooting** for provider-specific help.
* **Your subscription reaches its limit:** check the provider's reset time, or choose another connected provider for a new chat.
* **An app won't build:** check that Node.js and npm are installed, and share the error with the agent so it can help fix the app.
* **A project or Publish is unavailable:** check your Lightdash account and project permissions with your admin.
For app feedback, contact the Lightdash teammate who invited you to try Desktop. Include your operating system, app version, what you tried, and a screenshot or error message. Check **Settings → Updates** for app updates, and **Settings → Appearance** for light, dark, or system mode.
This documentation is built and hosted on [Mintlify](https://mintlify.com), a developer documentation platform.